Project-12: Deploying a Highly Resilient Web Architecture on AWS
In this blog, I’ll walk you through how I deployed a highly resilient web architecture using AWS services. The goal was to ensure high availability, security, and scalability by using an Auto Scaling group, an Application Load Balancer (ALB), and private subnets. I also configured a NAT Gateway for internet access, a Bastion Host for secure SSH access, and SSL termination for secure traffic.
Architecture Overview
High Availability: The servers are deployed in two Availability Zones (AZs) for better resiliency.
Scalability: Auto Scaling ensures the system can handle traffic spikes.
Security: Instances are in private subnets and receive traffic only through the Application Load Balancer.
Internet Access: A NAT Gateway allows outbound internet connectivity for updates.
Bastion Host: Used to securely connect and install Nginx on private instances.
Custom Domain & SSL: A custom domain from Name.com is integrated with AWS, and SSL termination is handled via AWS Certificate Manager (ACM).
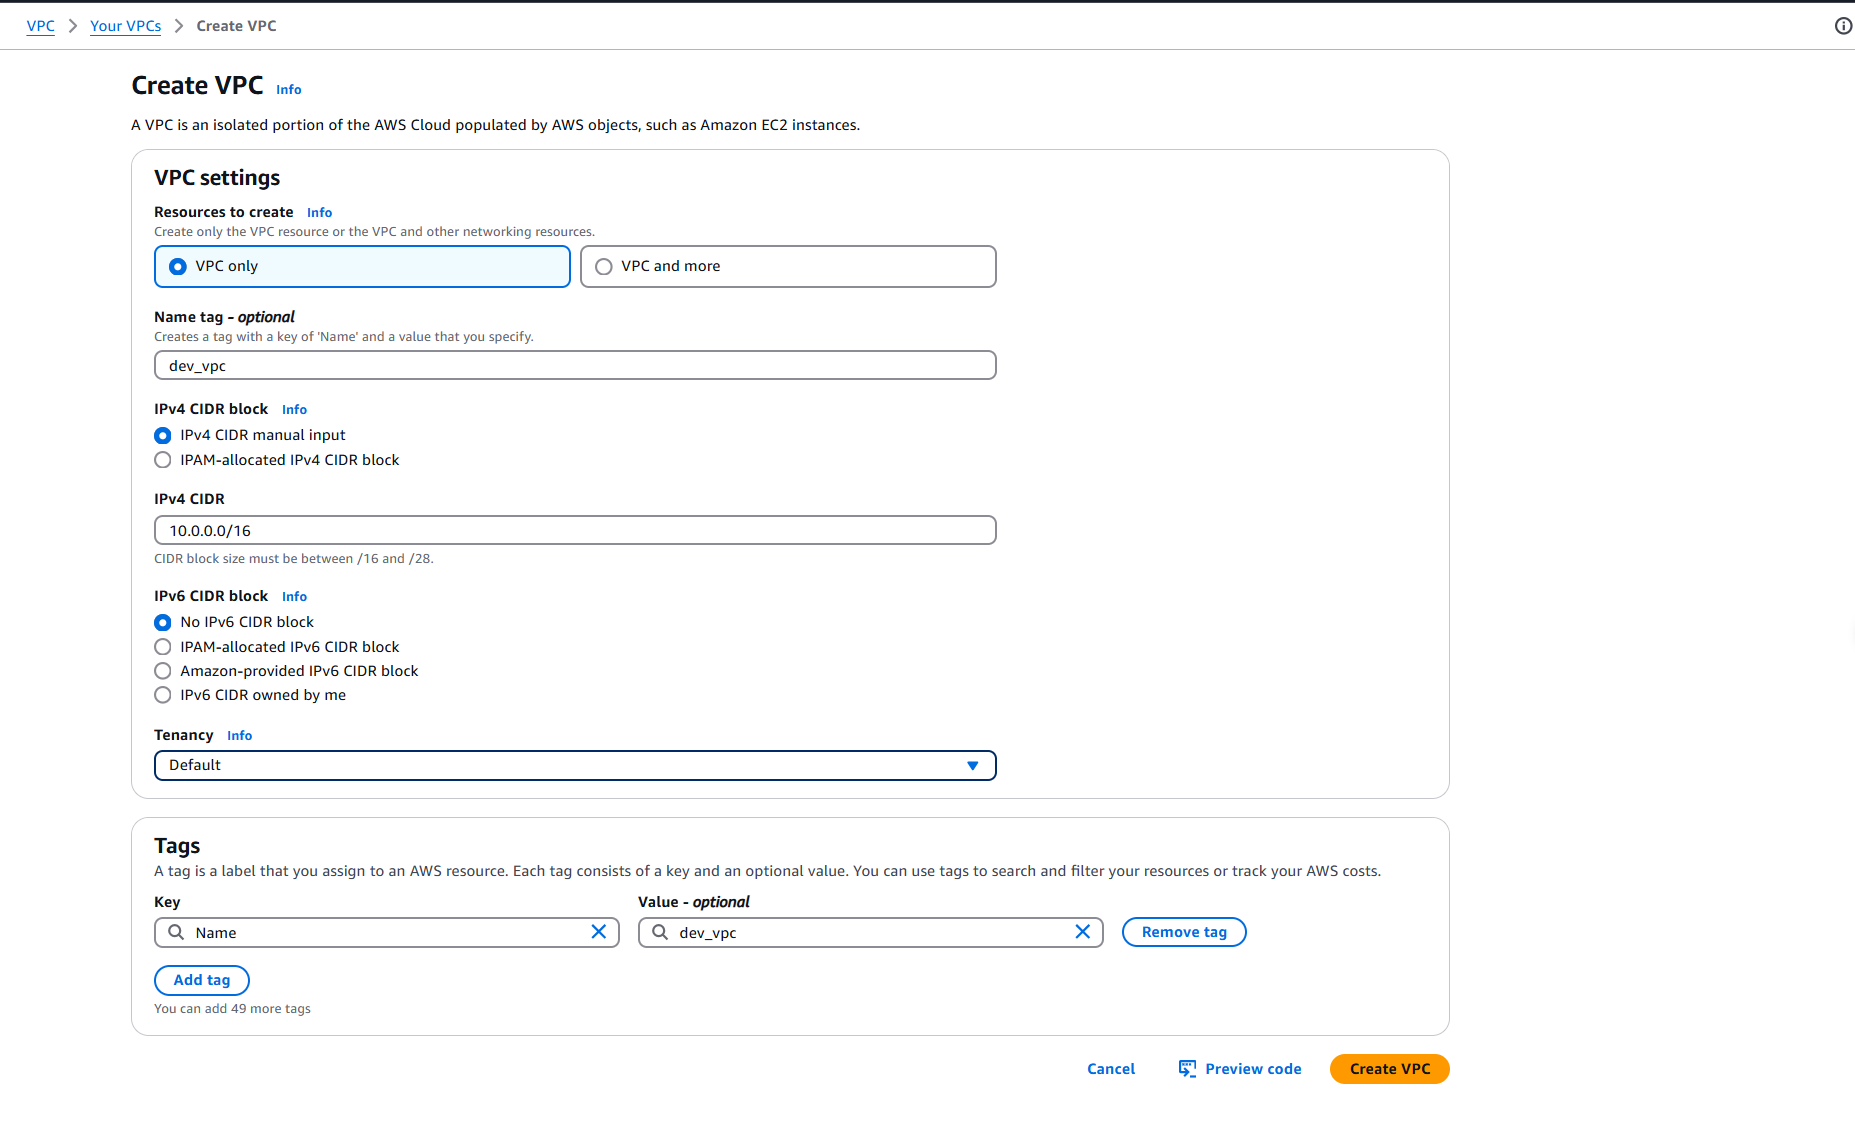
Step 1: Setting Up VPC and Subnets
- Created a VPC <dev_vpc> with a CIDR block (e.g.,
10.0.0.0/16).
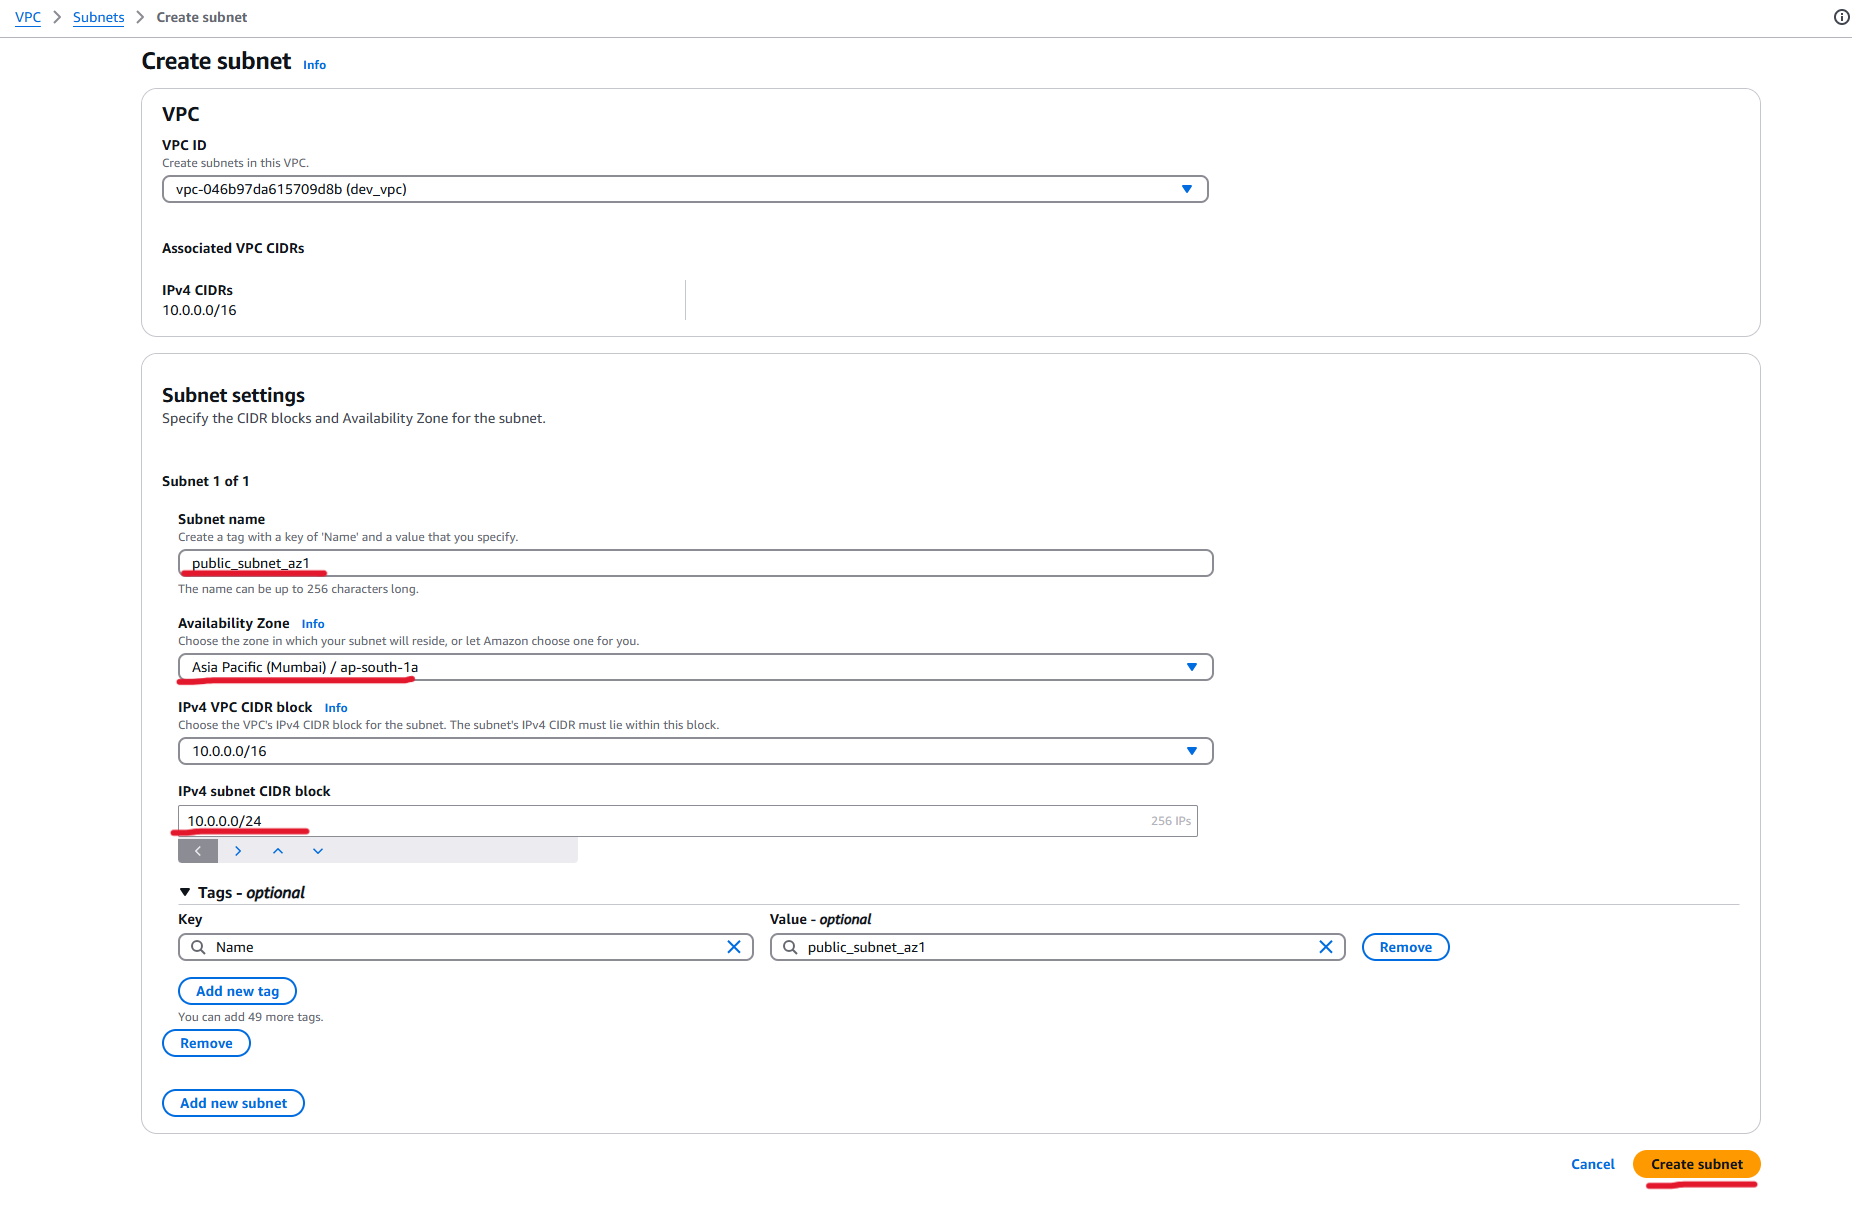
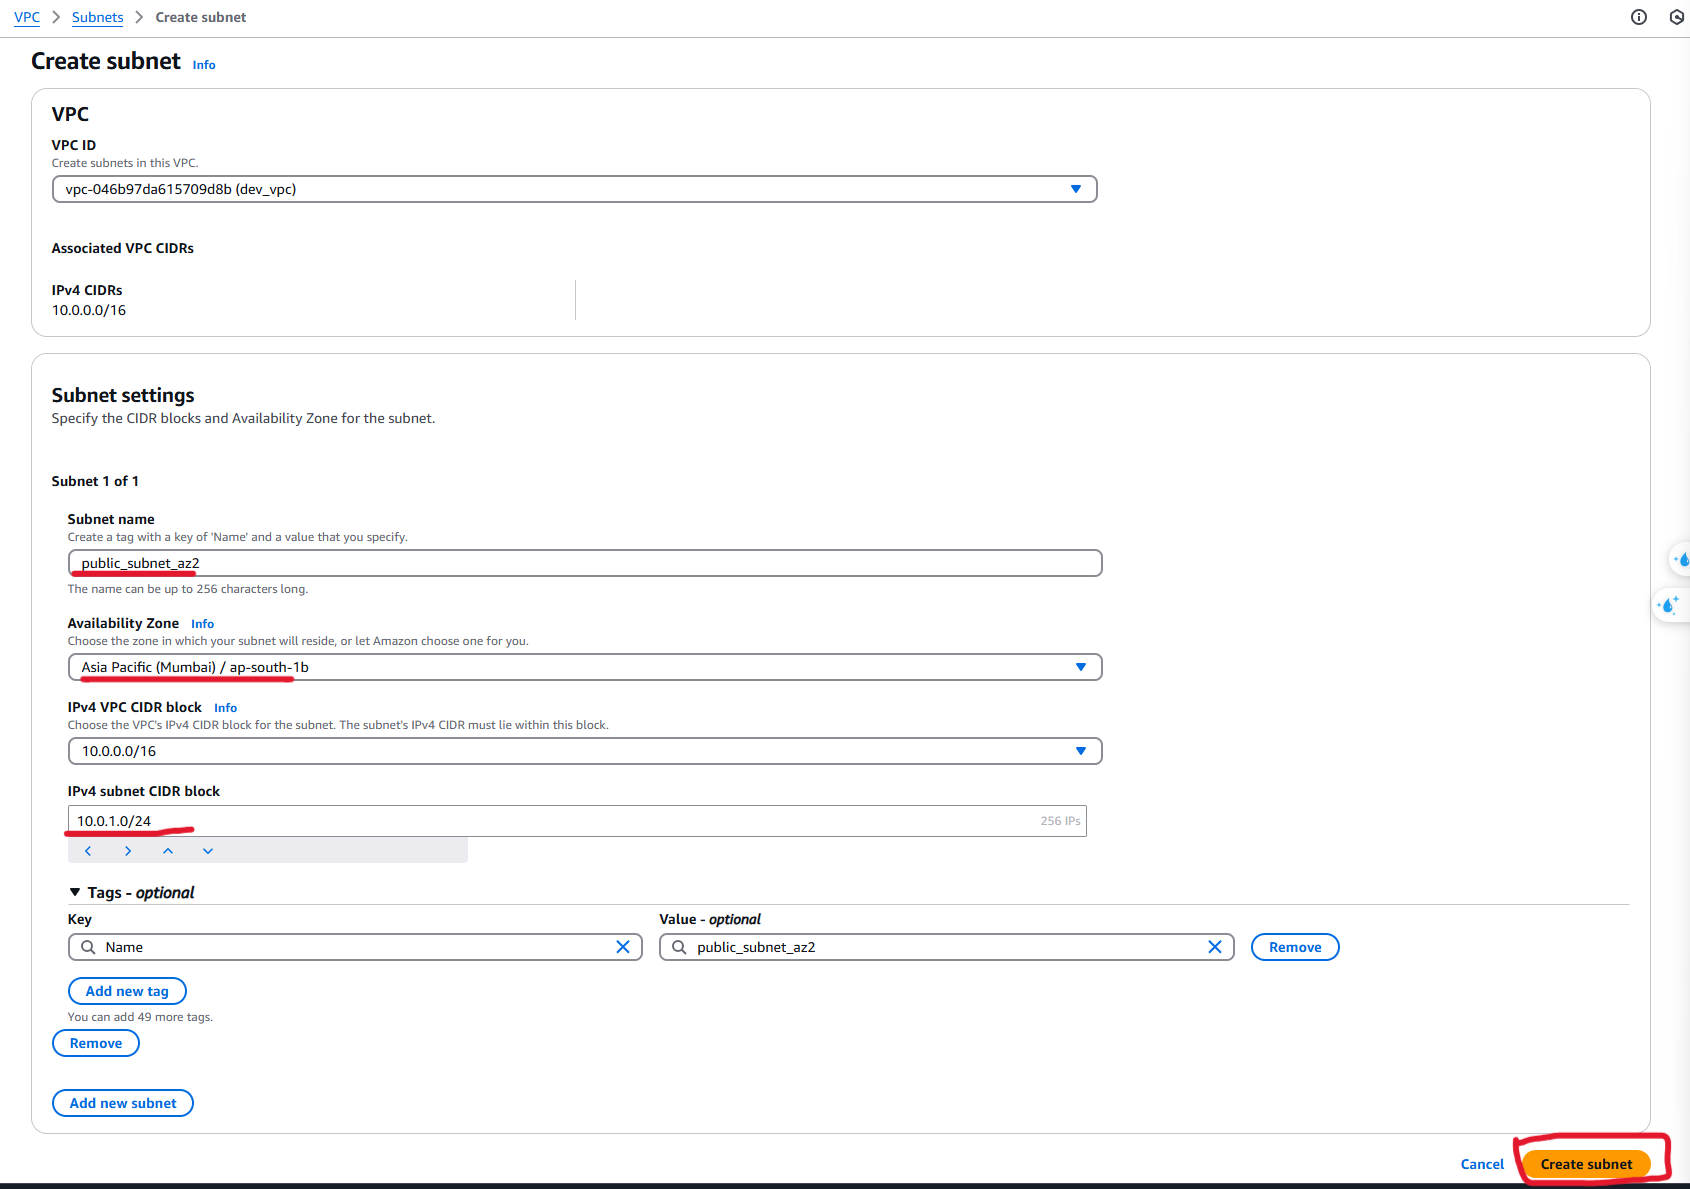
- Created two public subnets (one in each AZ) for the Load Balancer and NAT Gateway.
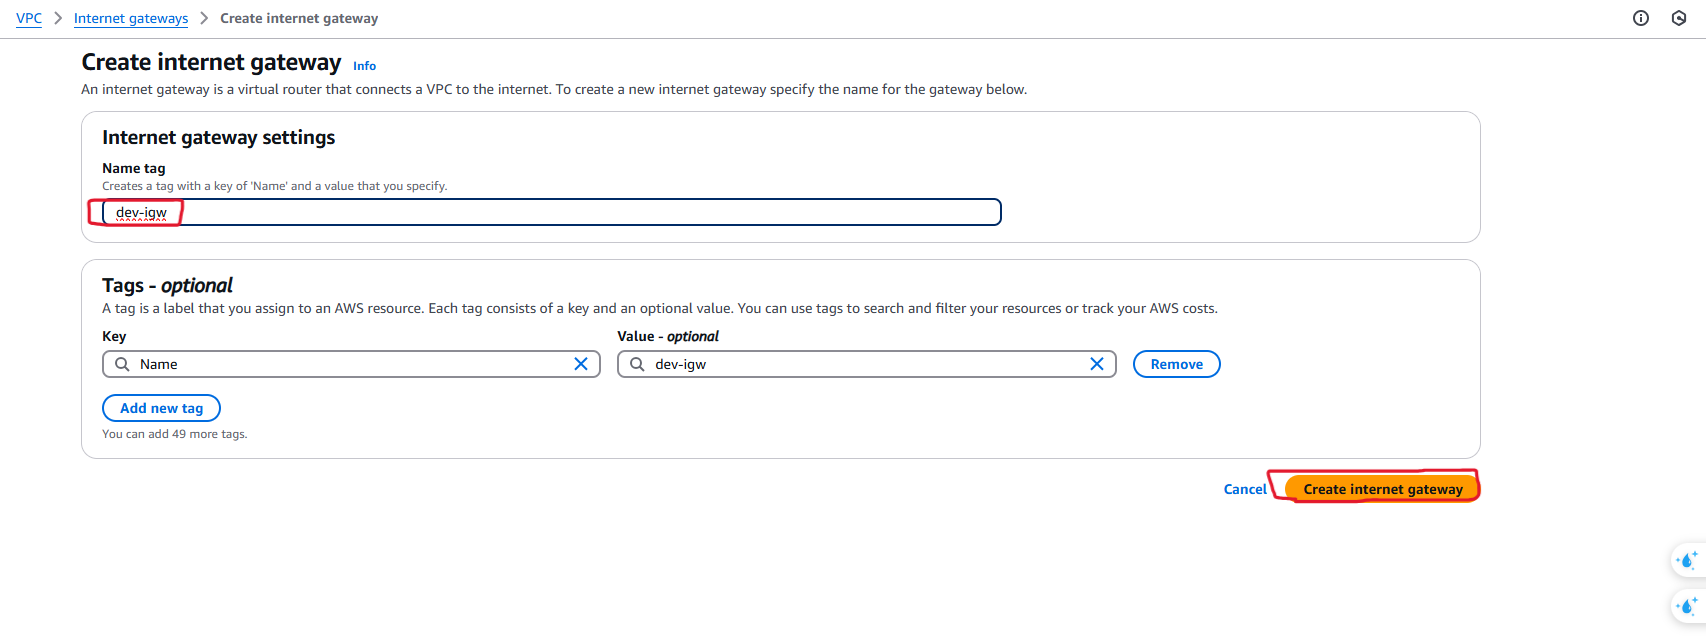
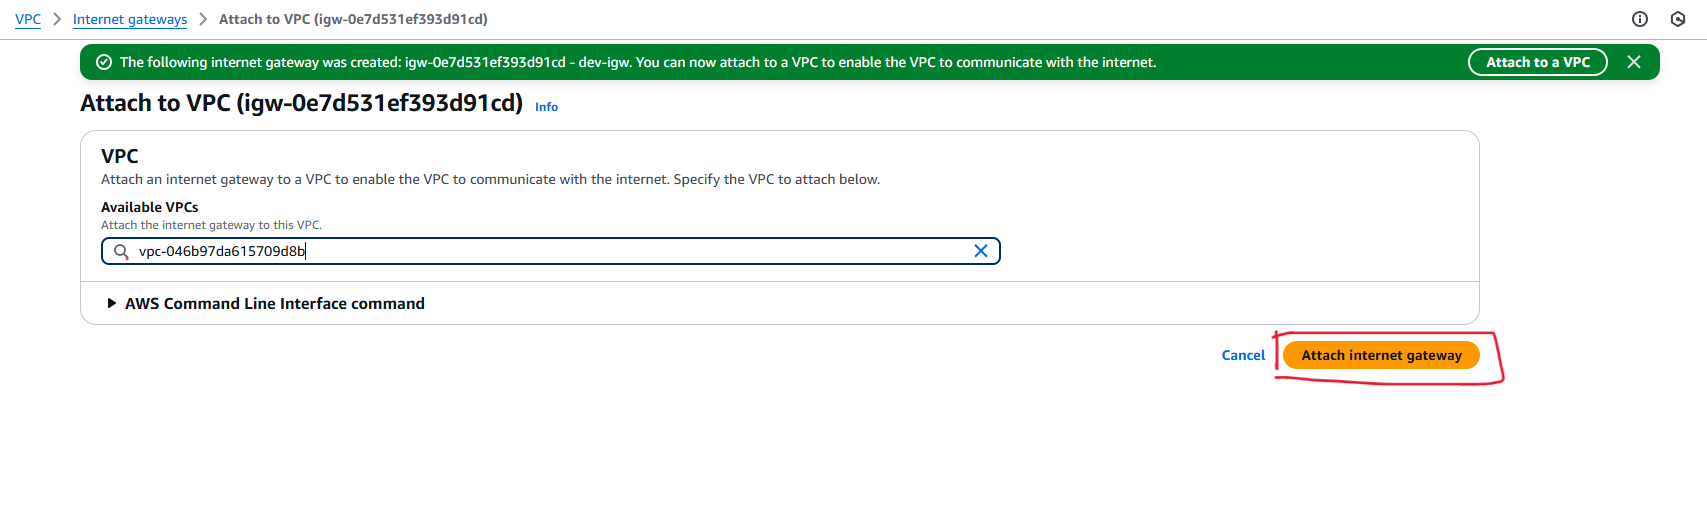
Configured Internet Gateway and attached it to the VPC.
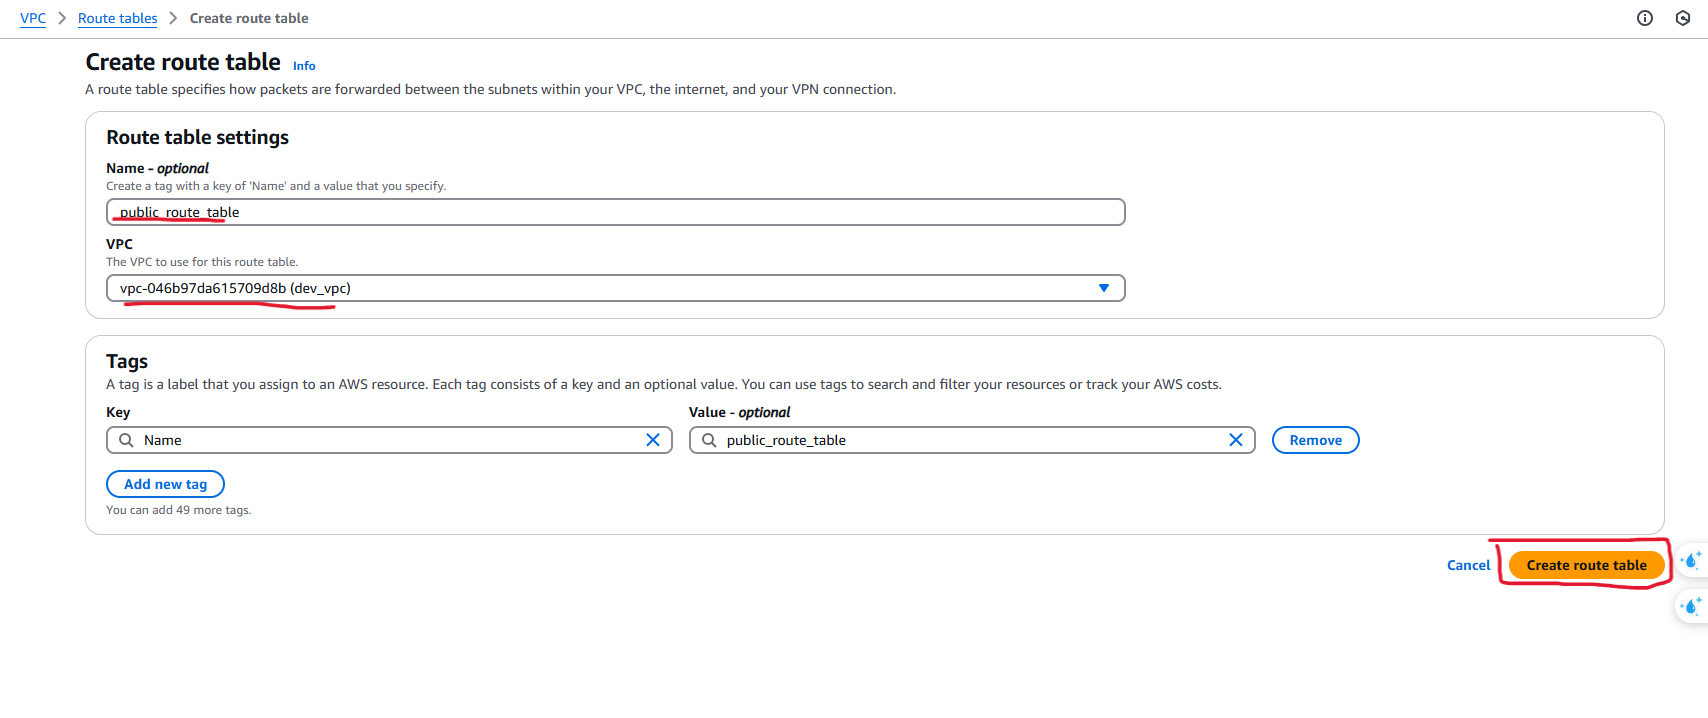
Created public route table in AZ 1a:
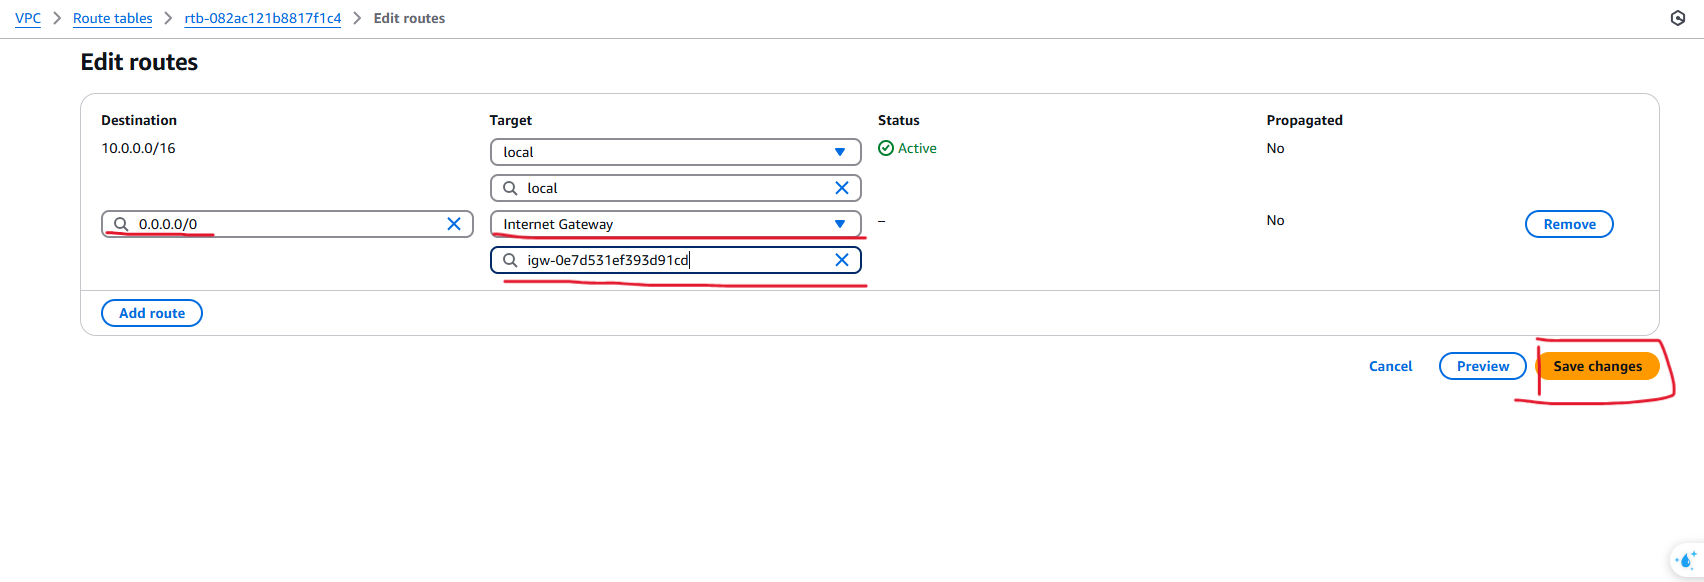
Edited the routes of above public route table and send the traffic to IGW :
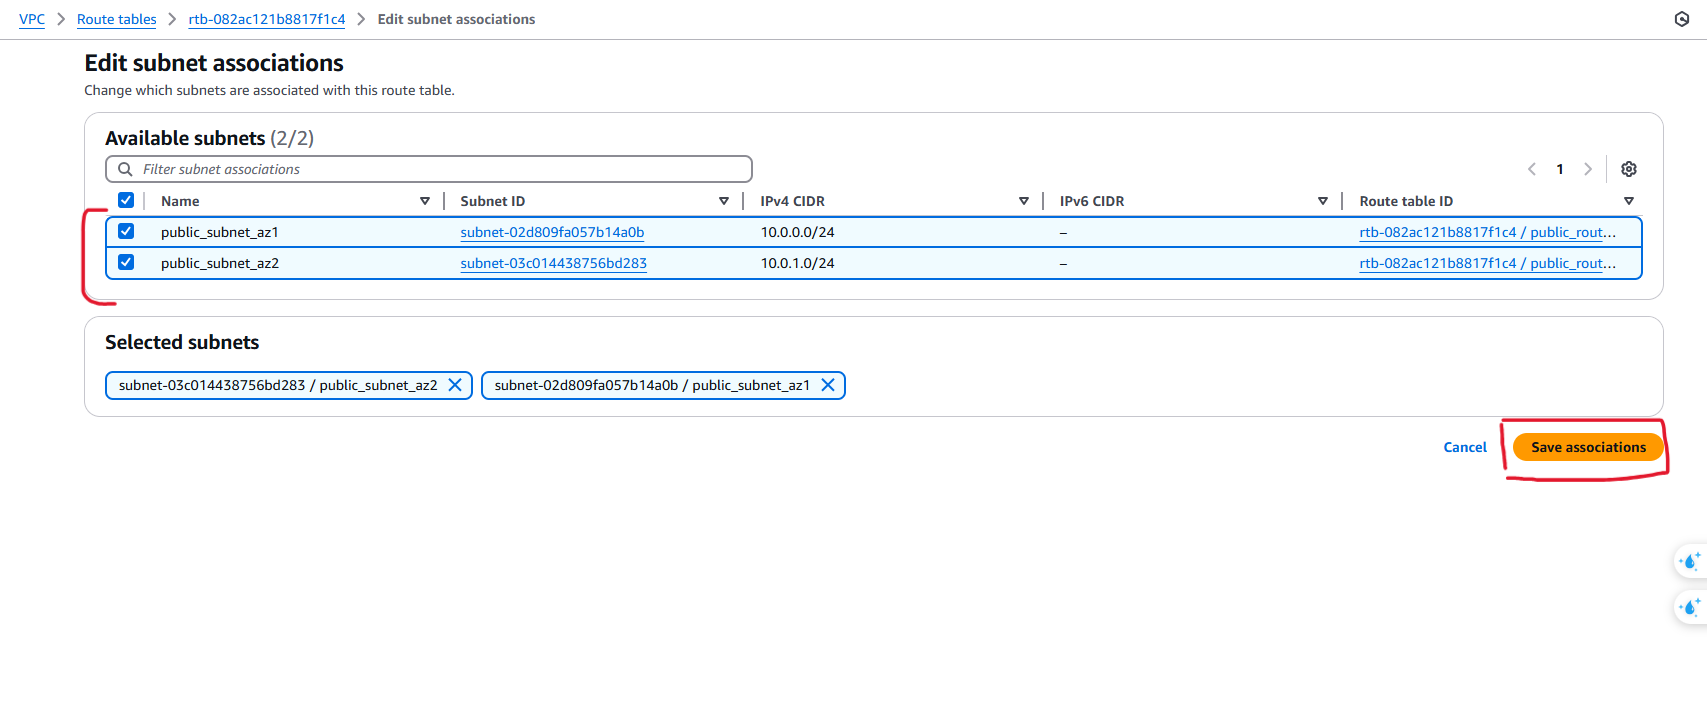
Attached subnet association(public subnet in both AZ) in public route table:
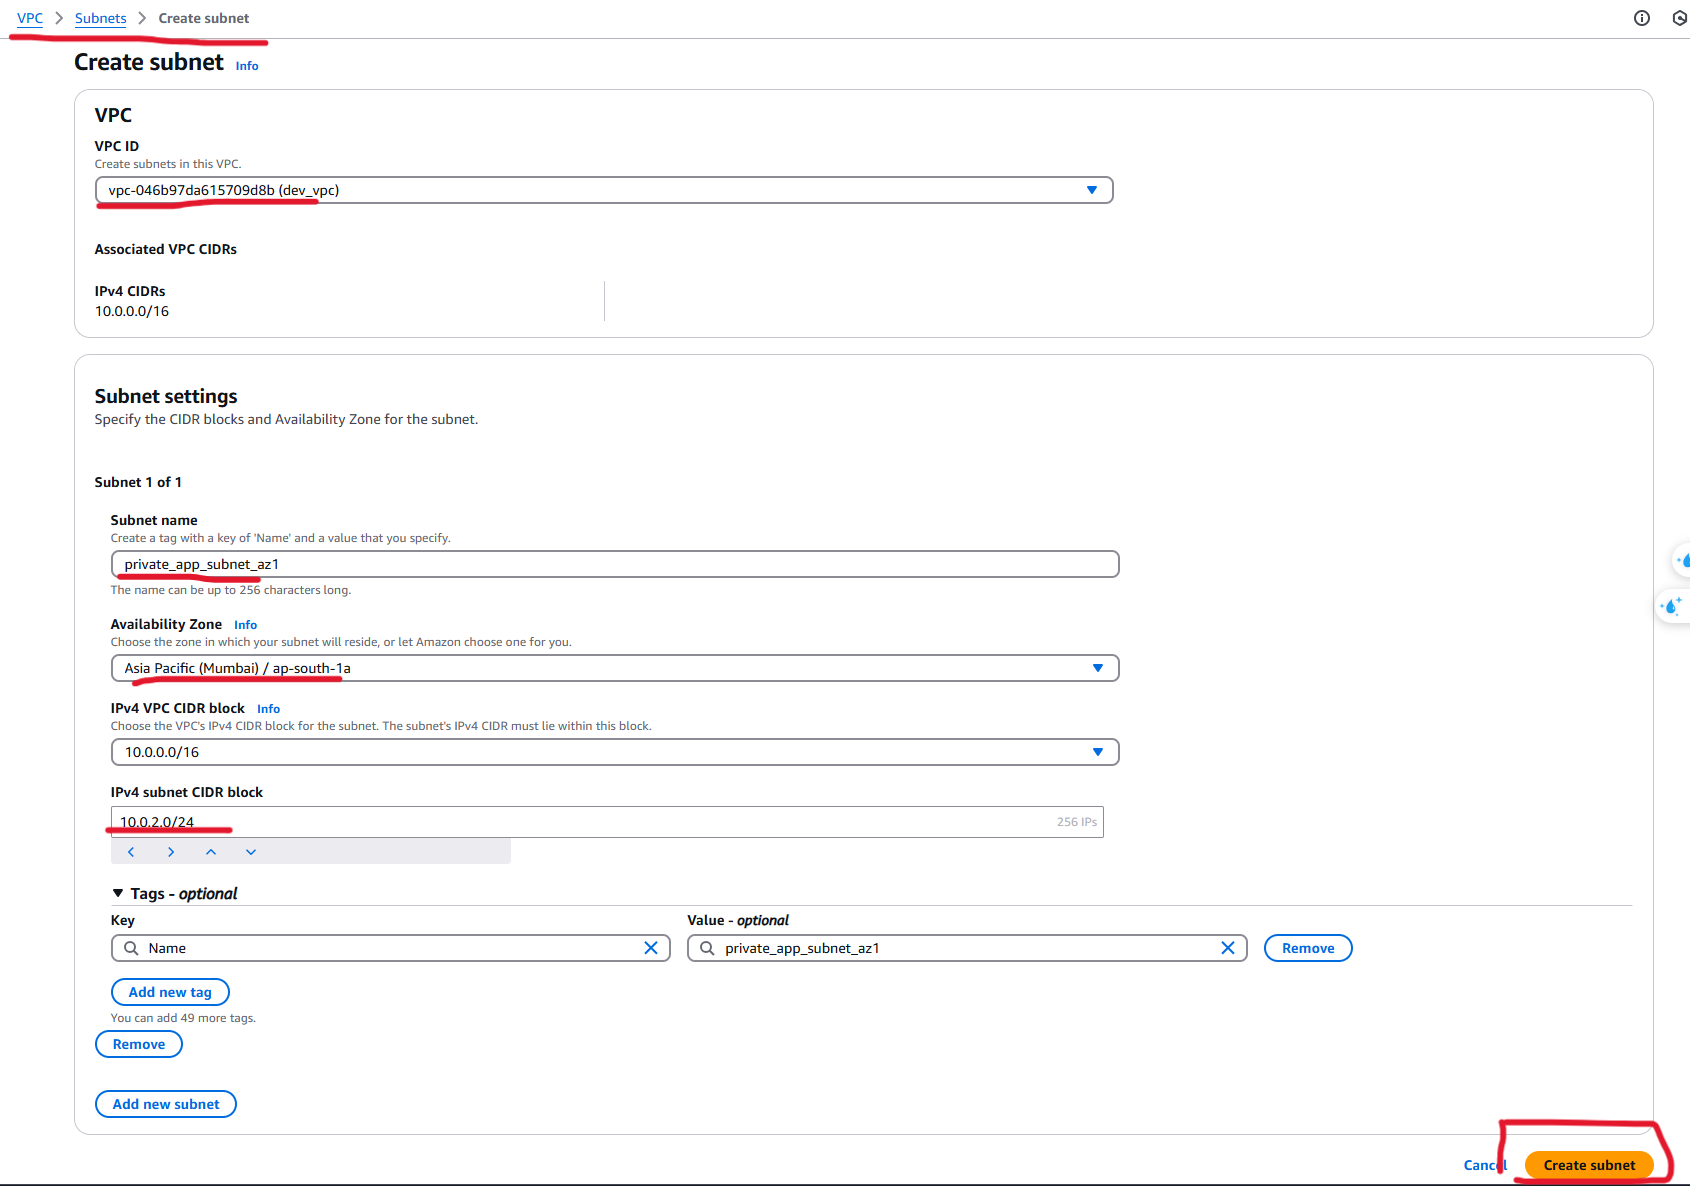
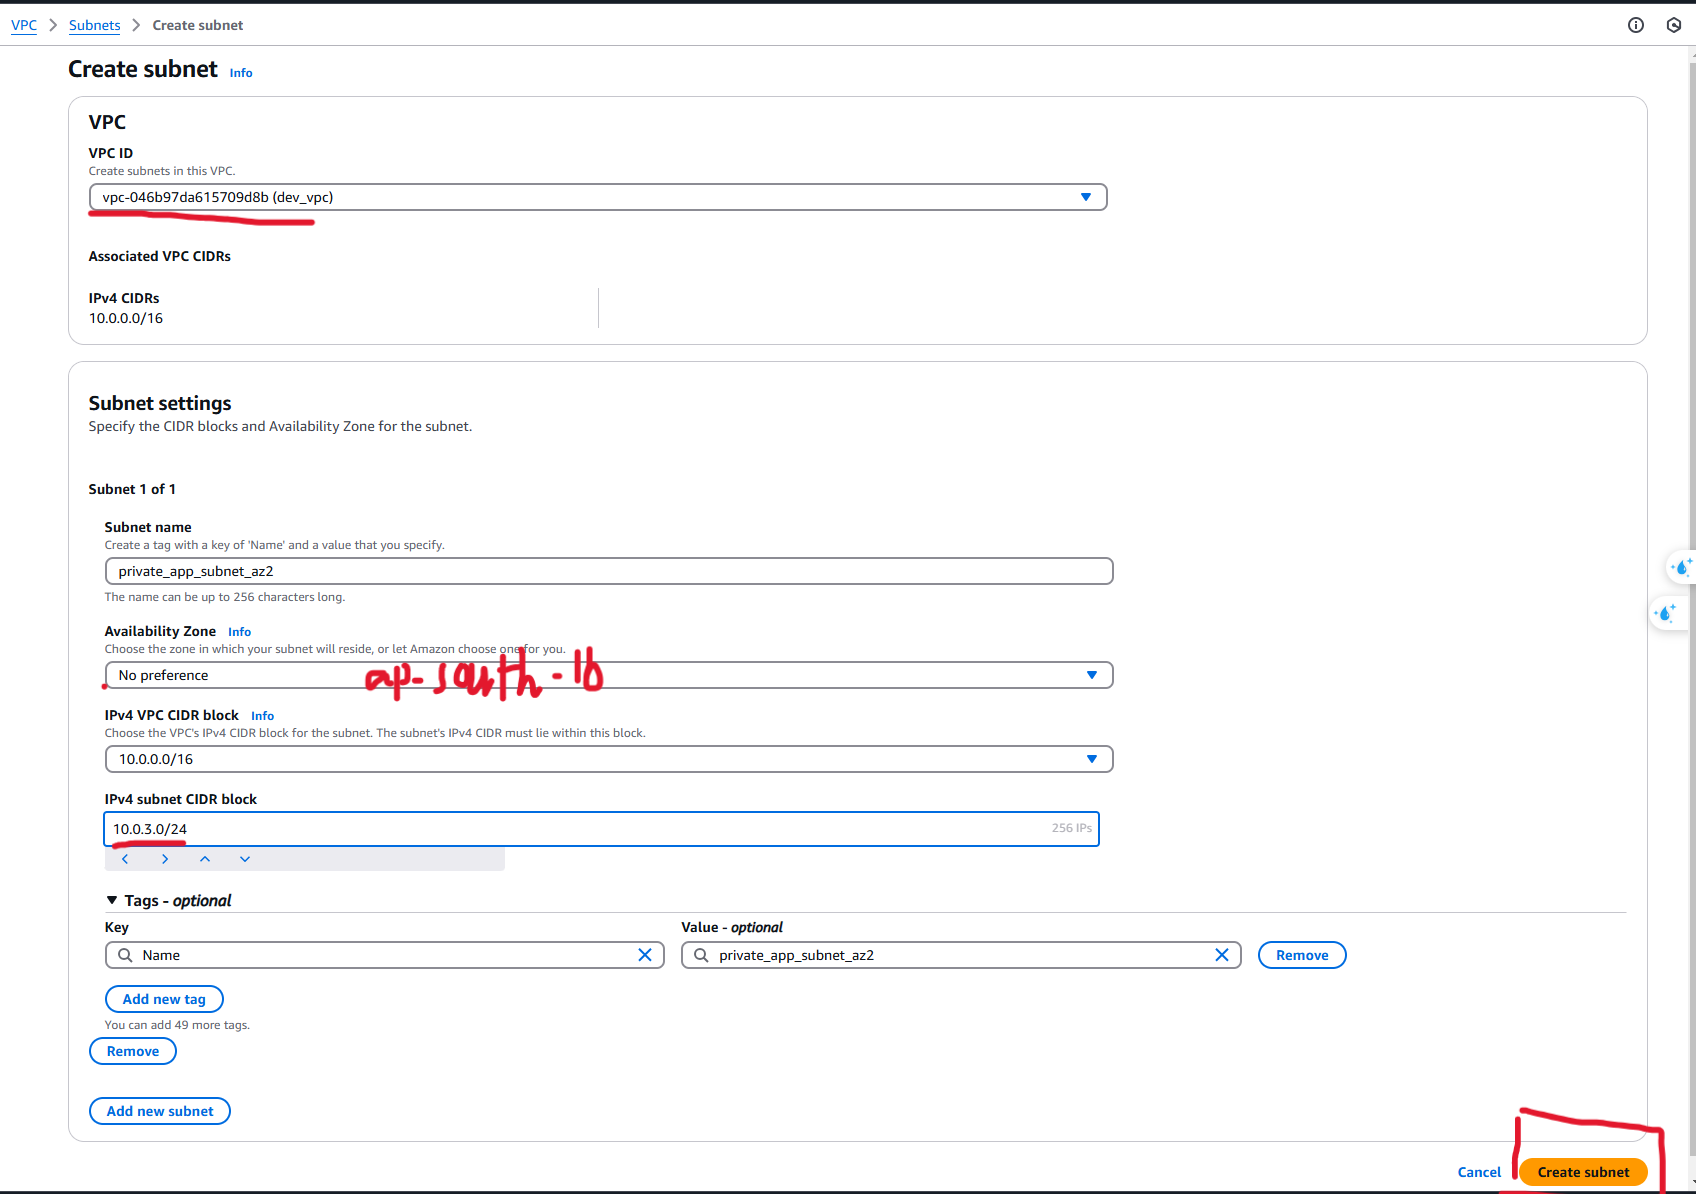
Created two private subnets (one in each AZ) for application servers:
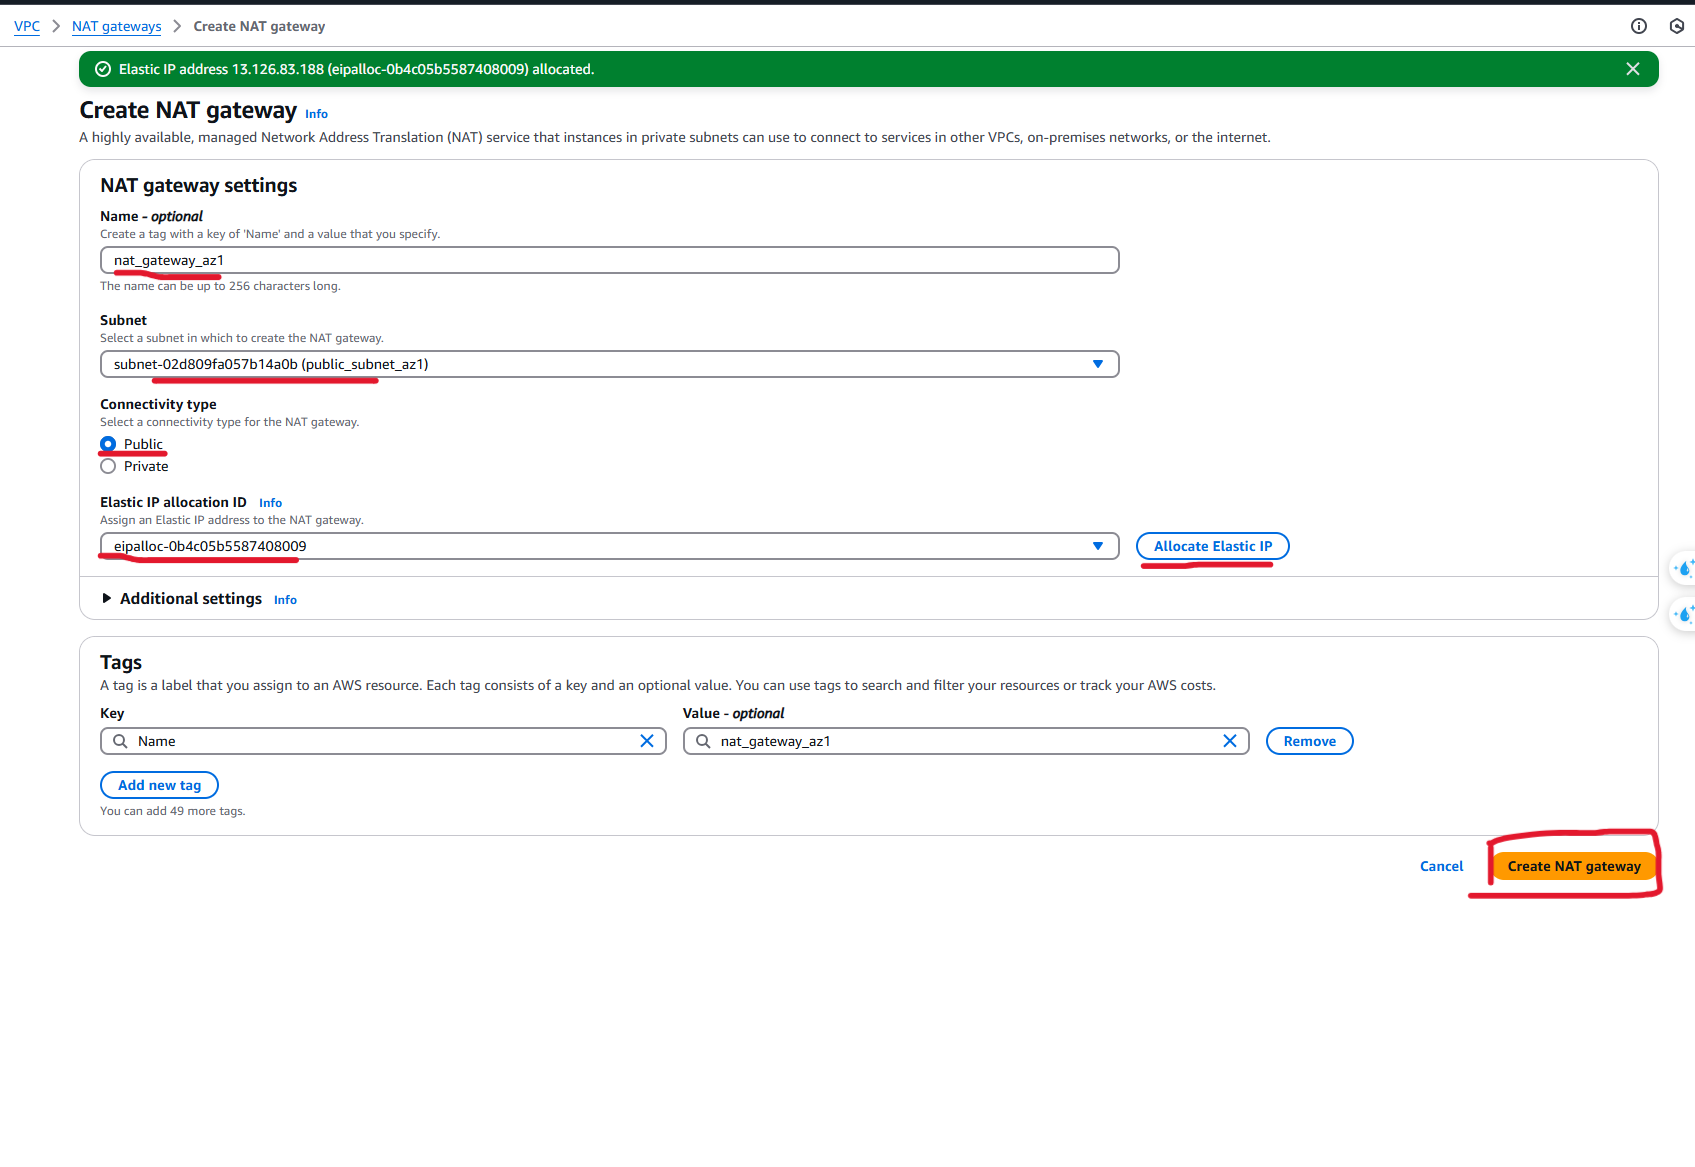
Set up a NAT Gateway + elastic IP in each AZ to allow private instances to access the internet. NOTE !! NAT Gateway is created in public subnet

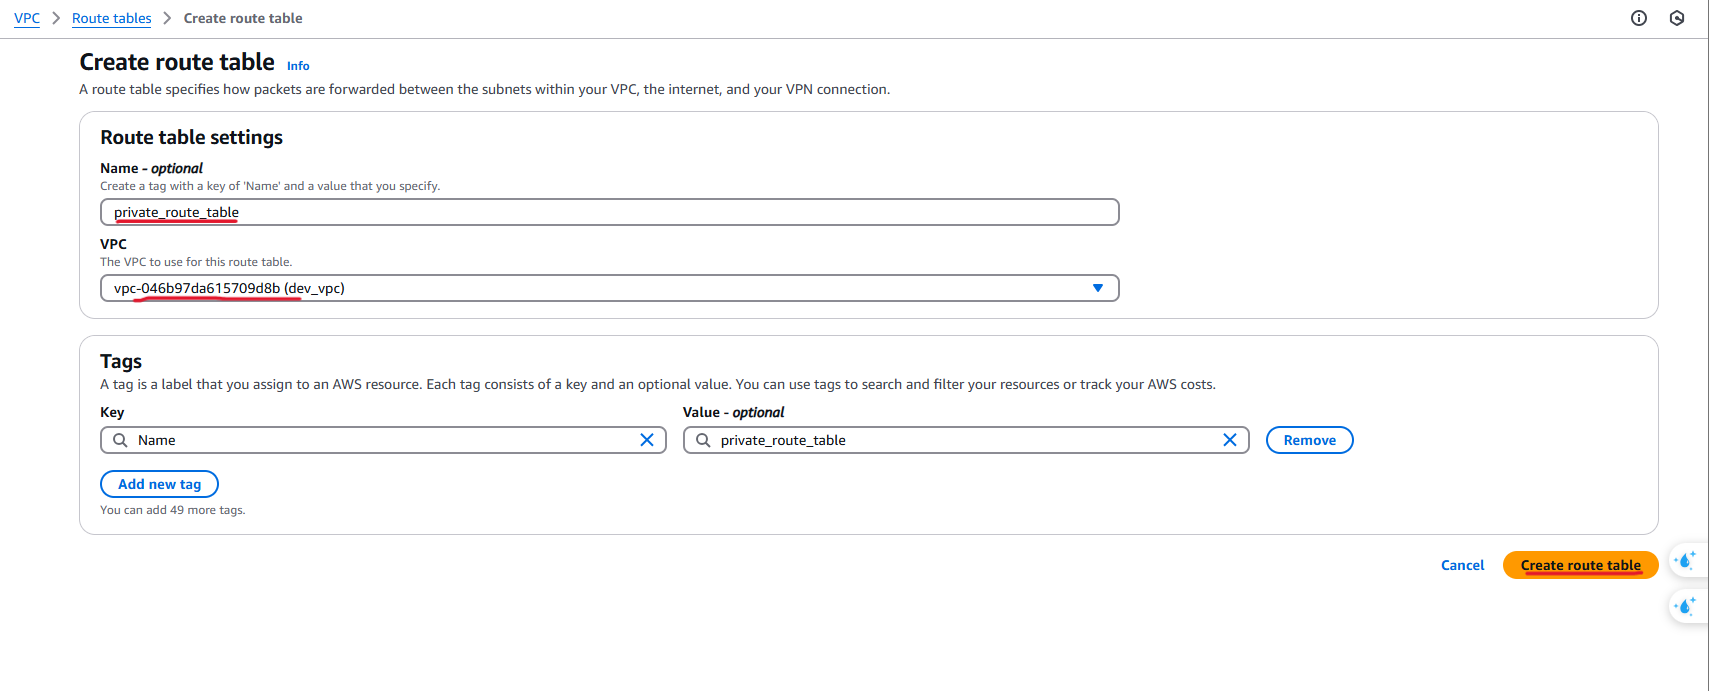
Created a Private route table in AZ-1a
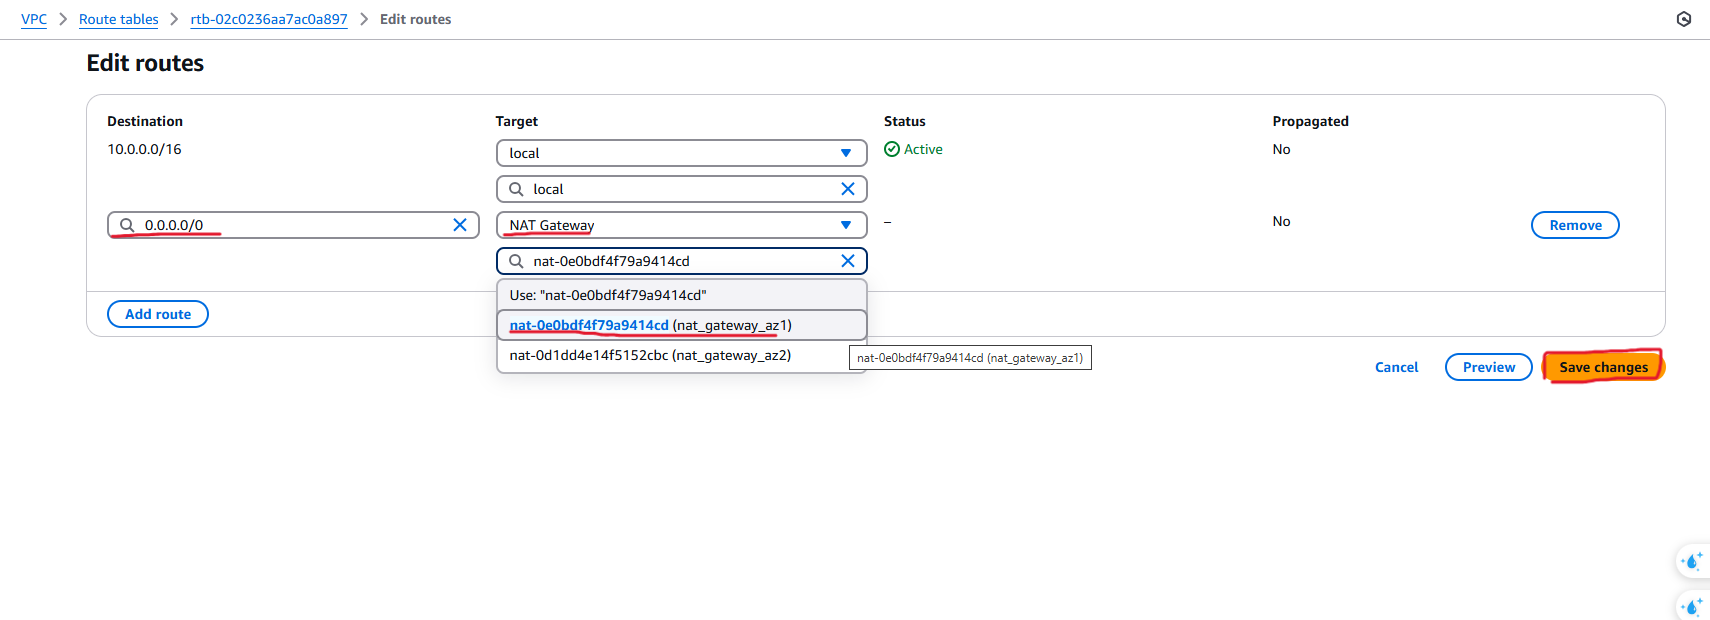
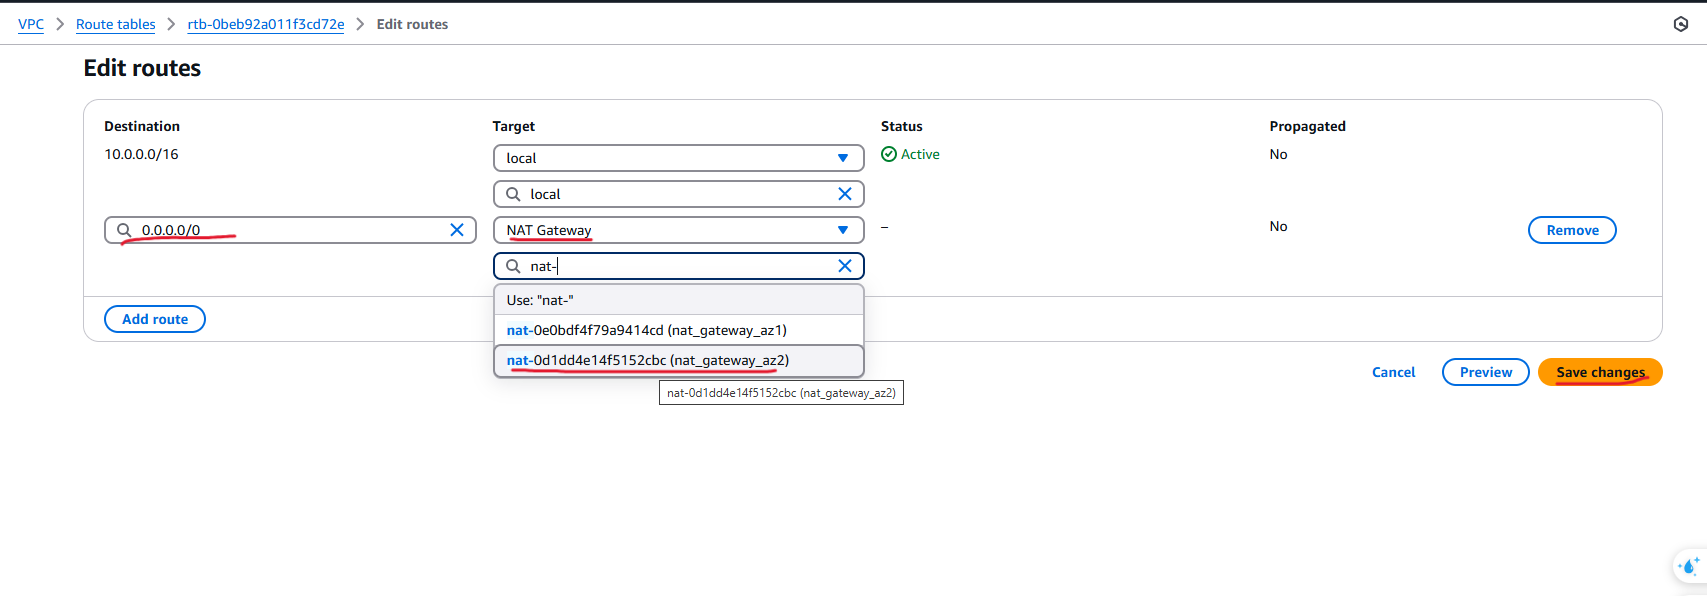
Edited routes in above private route table and selected the NAT gateway of AZ-1a as a target
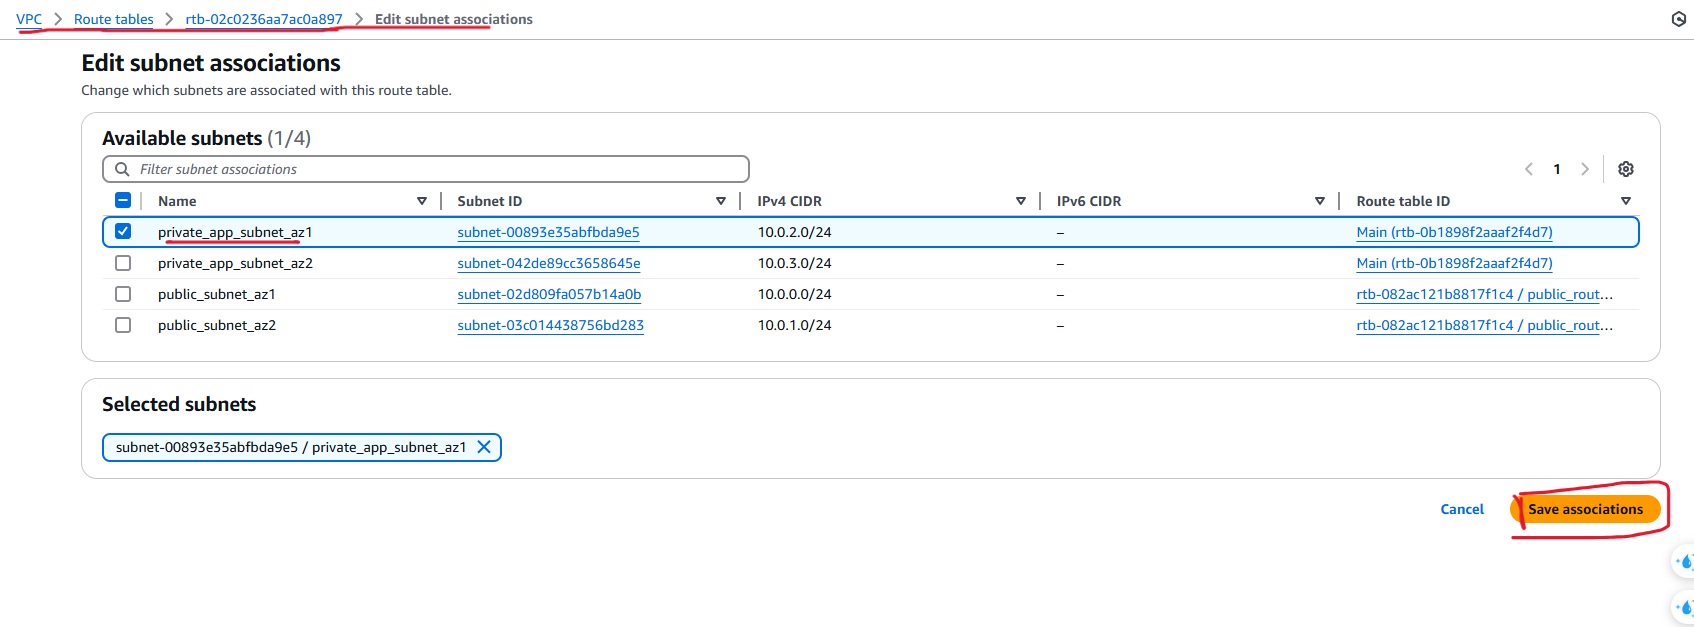
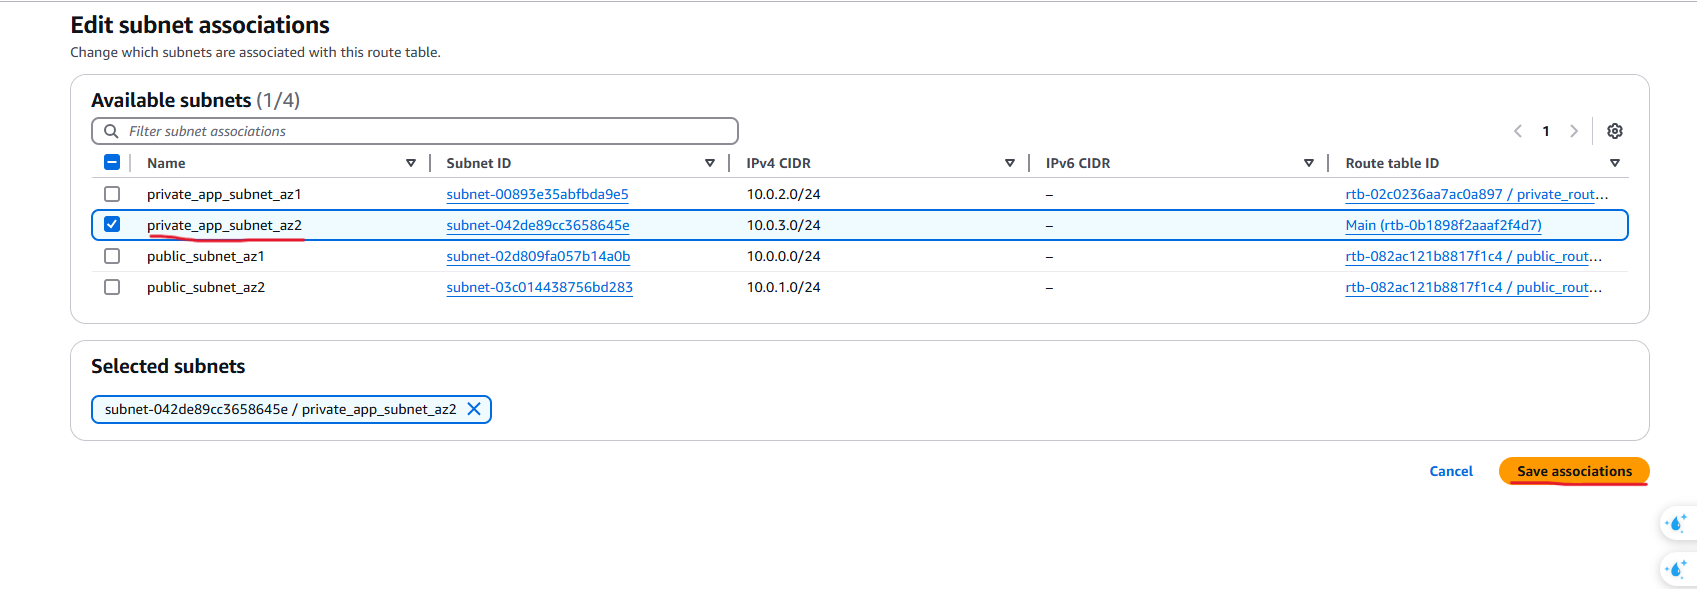
- Associated private subnet in AZ-1a in private route table:
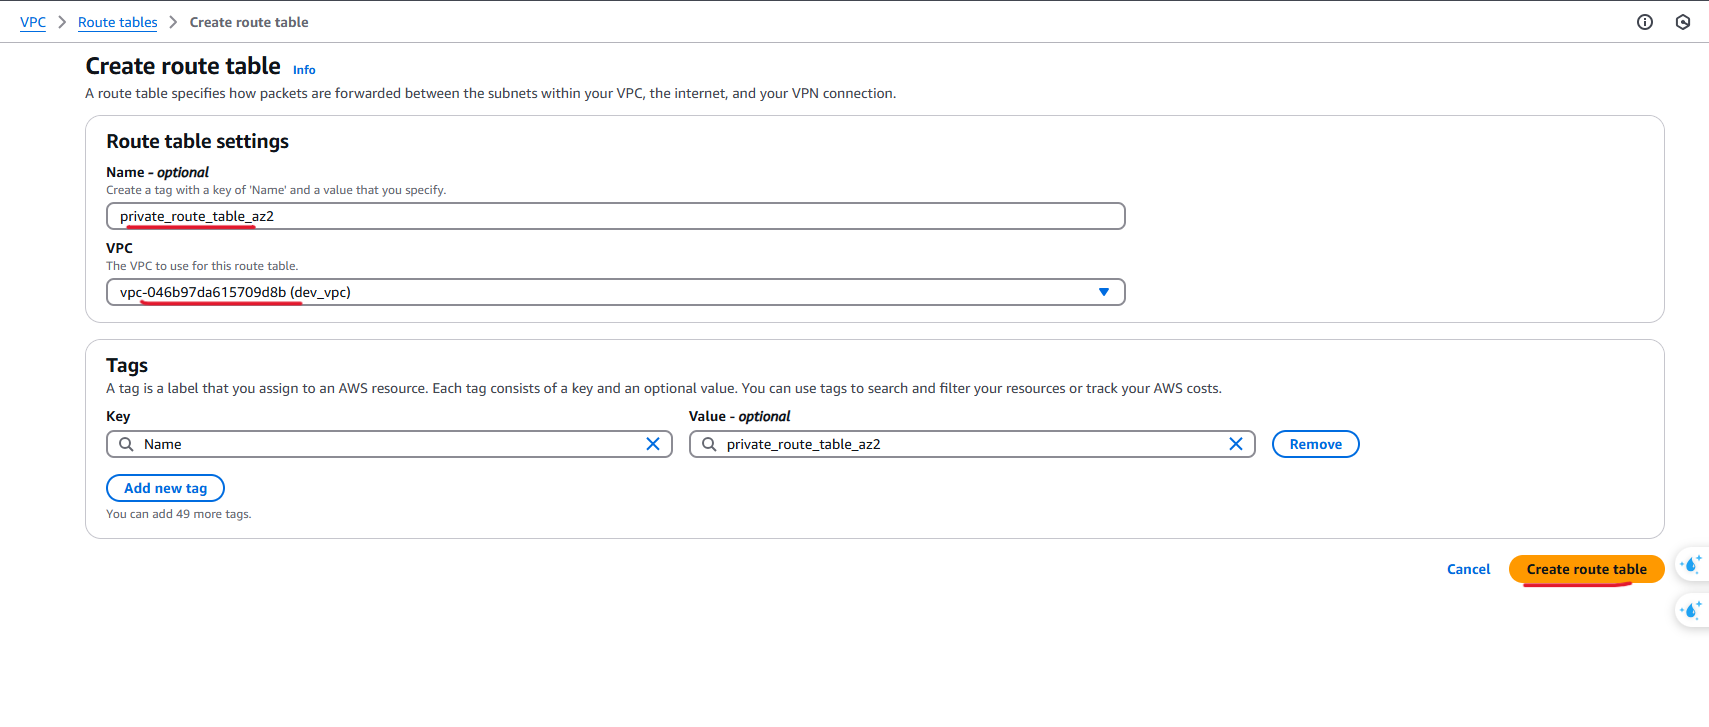
- Created private route table in AZ-1b:
- Edited route in above private route table and selected the NAT gateway of AZ-1b as a target
Associated private subnet in AZ-1b in an above private route table:
Step 2: Configuring Security Groups
ALB Security Group: Allowed HTTP (80) and HTTPS (443) from anywhere.
Bastion Host Security Group: Allowed SSH (22) only from my IP.
Application Servers Security Group: Allowed traffic only from the ALB and SSH only from the Bastion Host.
Step 3: Launching a Bastion Host
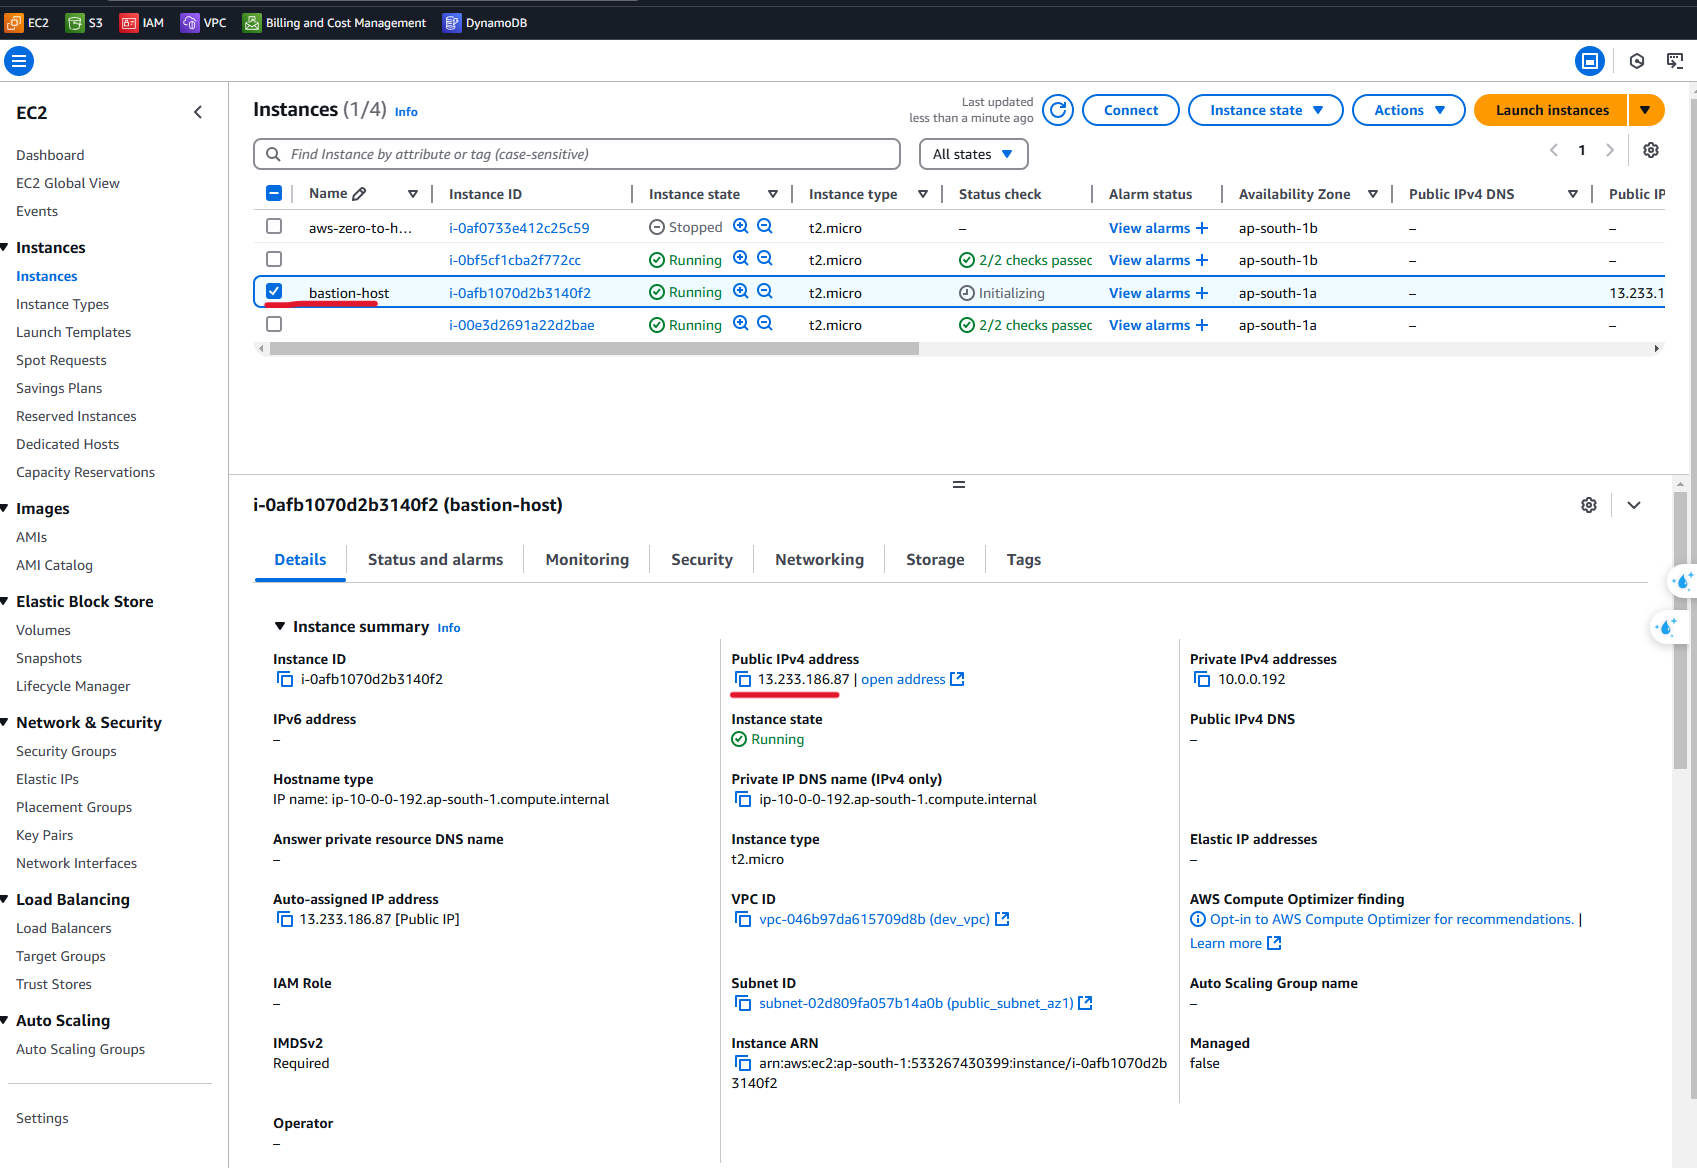
- Created an EC2 instance in the public subnet (Bastion Host):
- Used SSH Agent Forwarding to connect from the Bastion Host to the private instances.
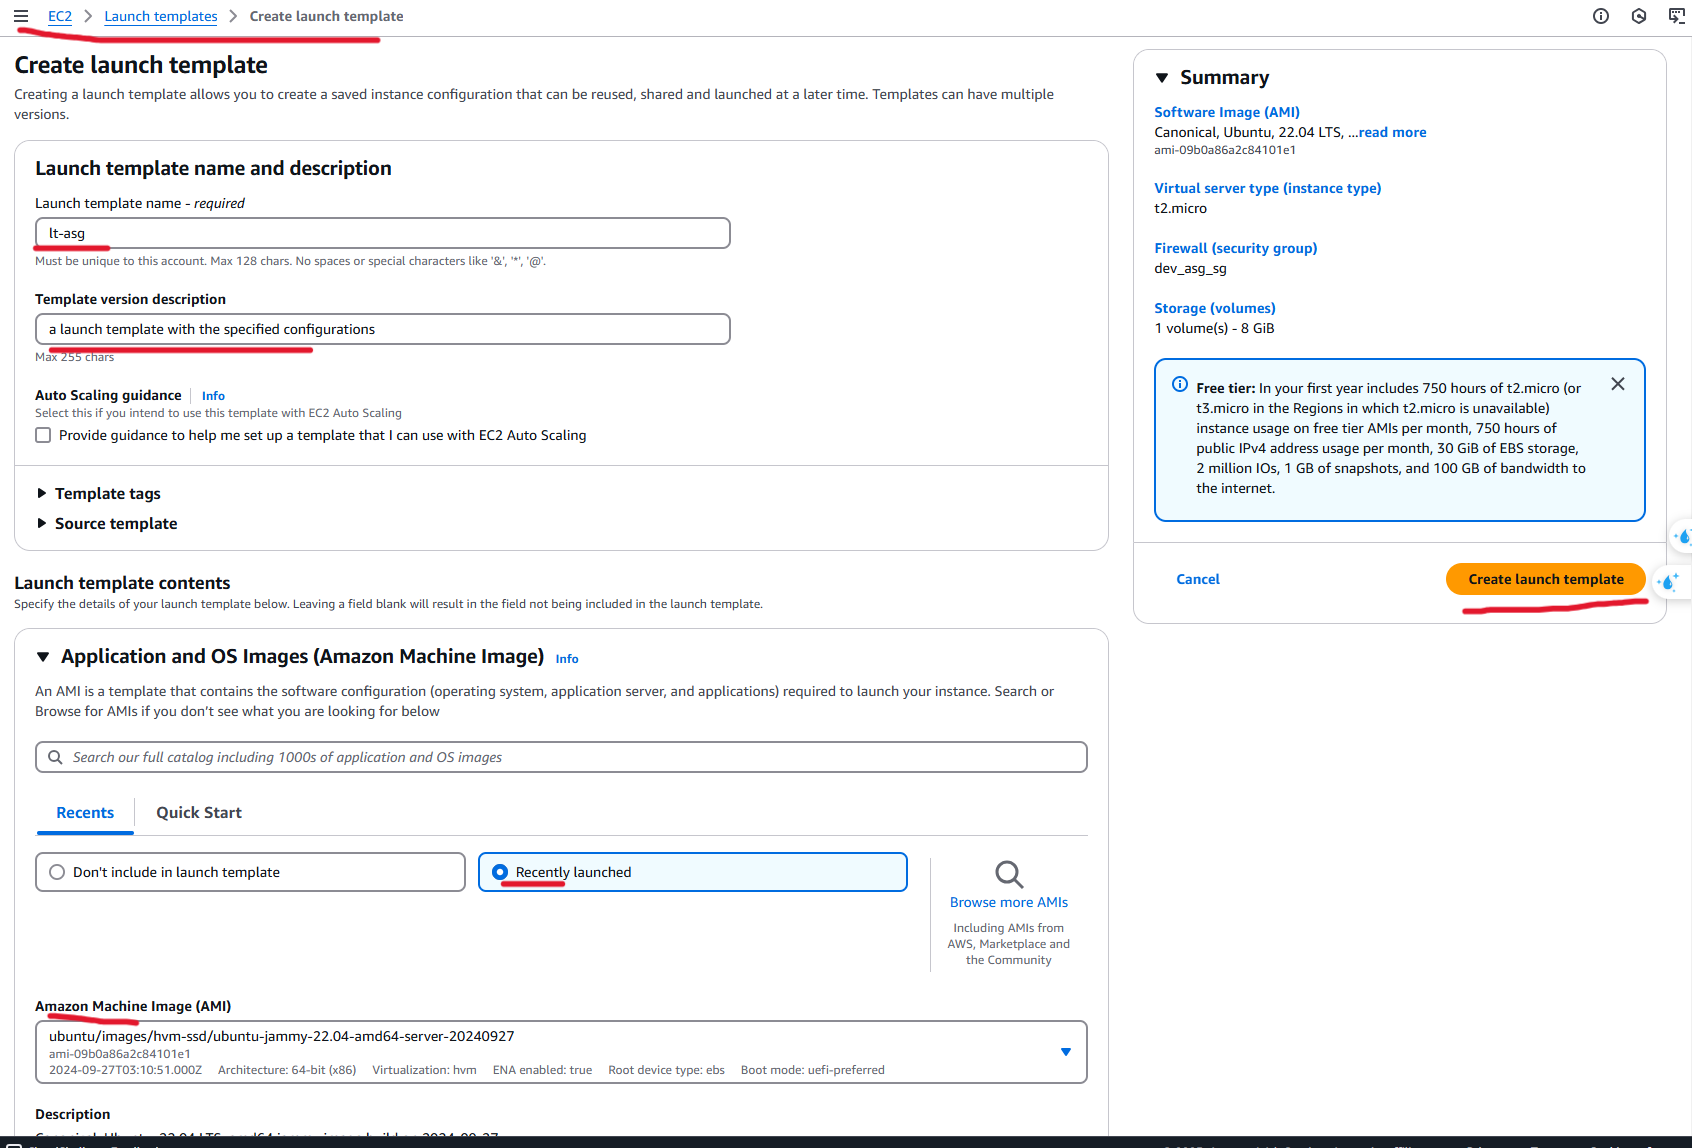
Step 4: Setting Up an Auto Scaling Group with a launch template
- Created a launch template
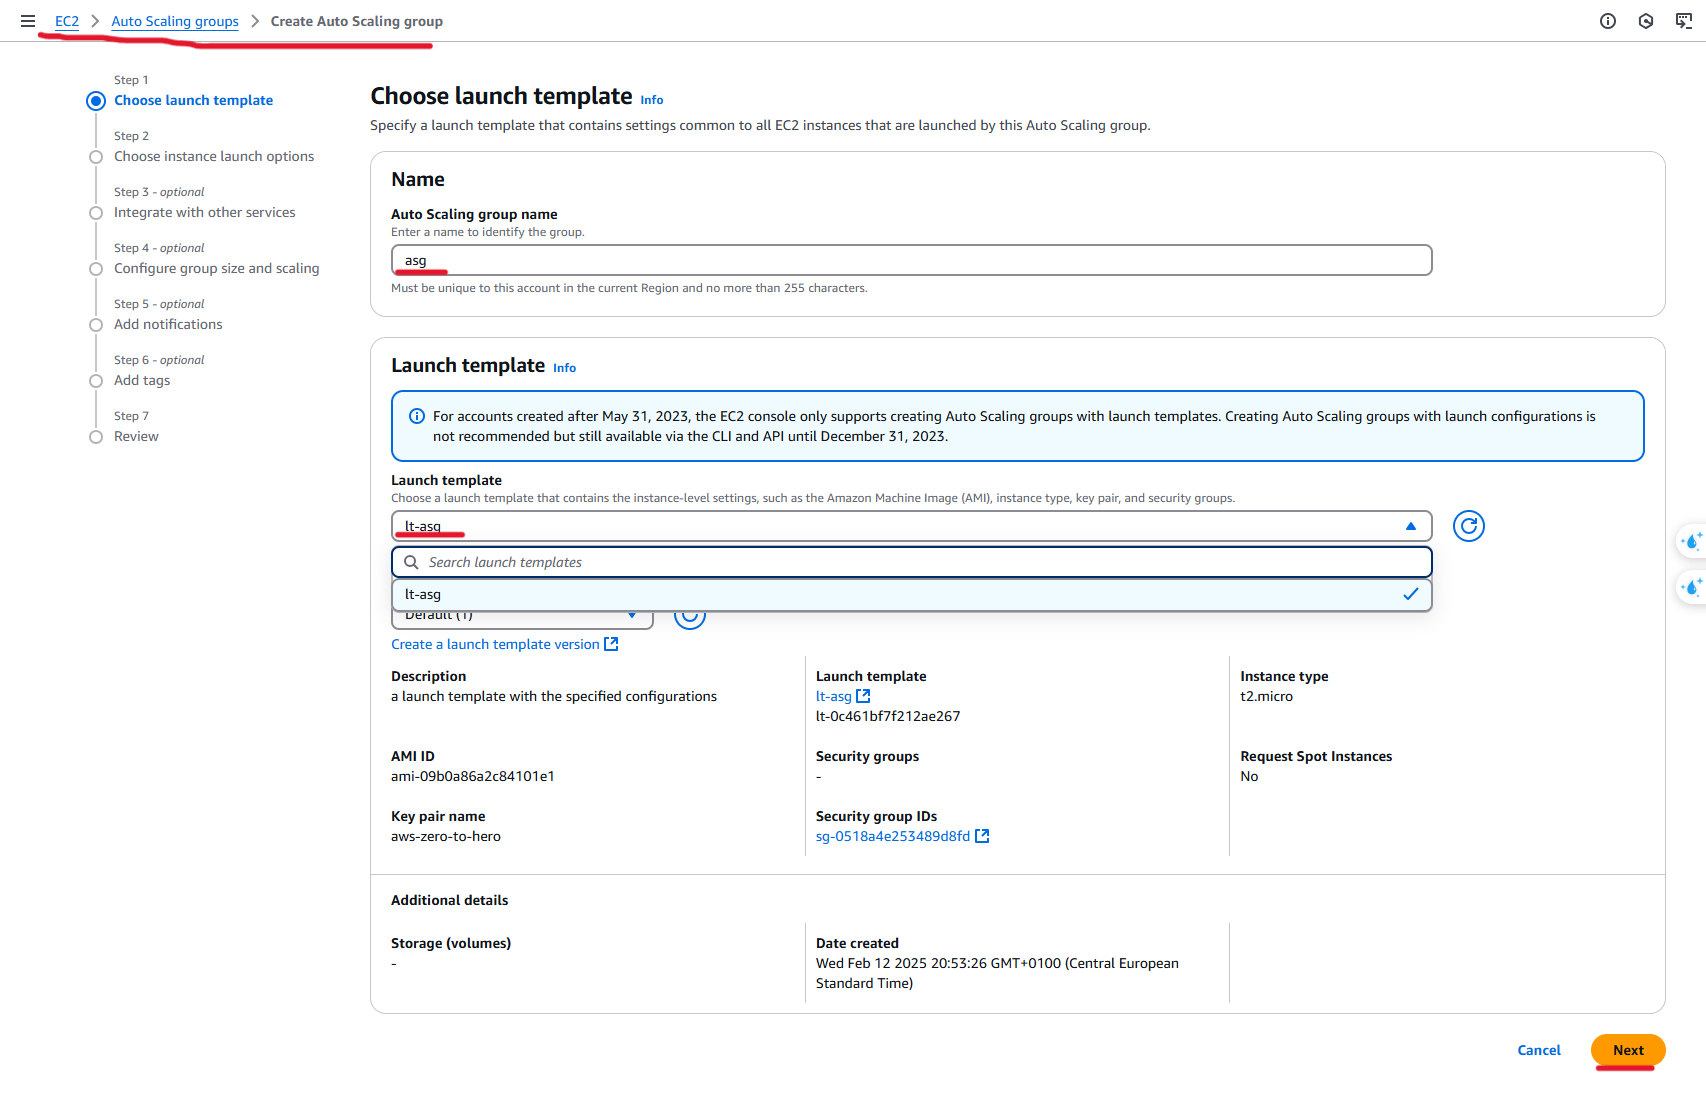
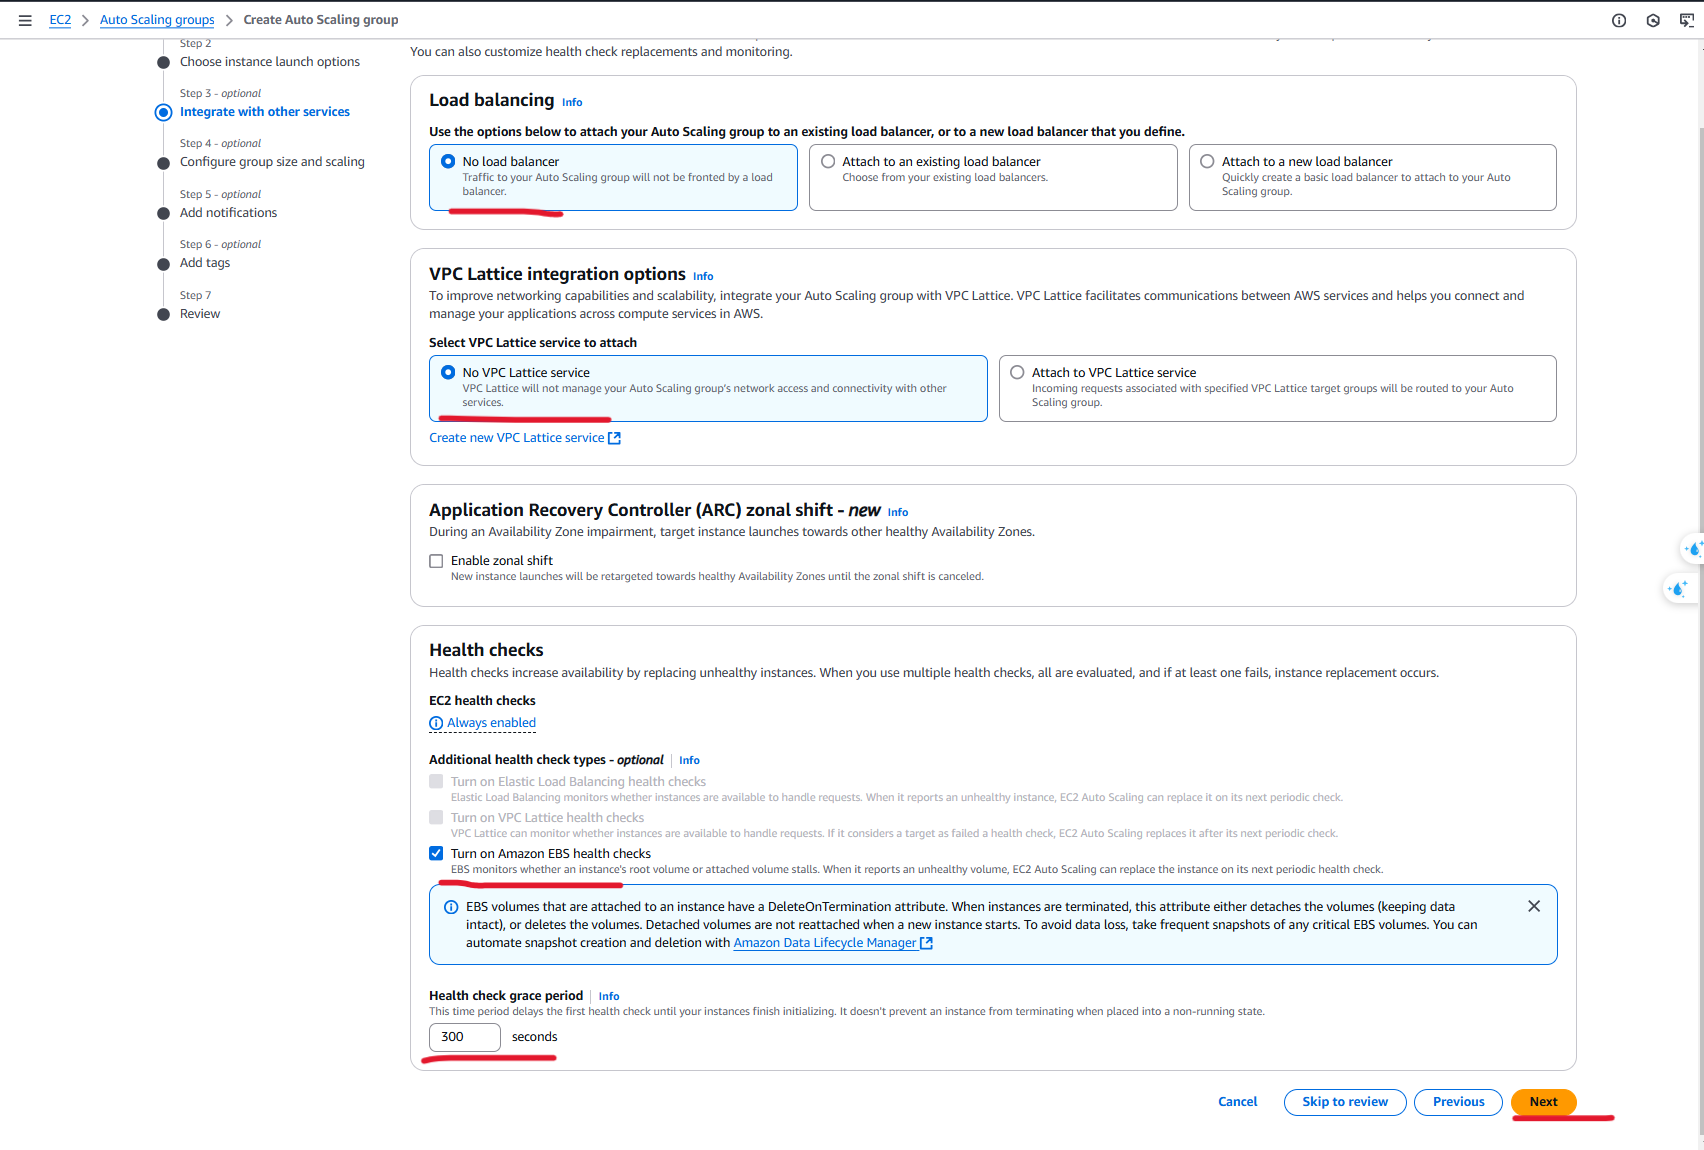
Created an Auto scaling group:
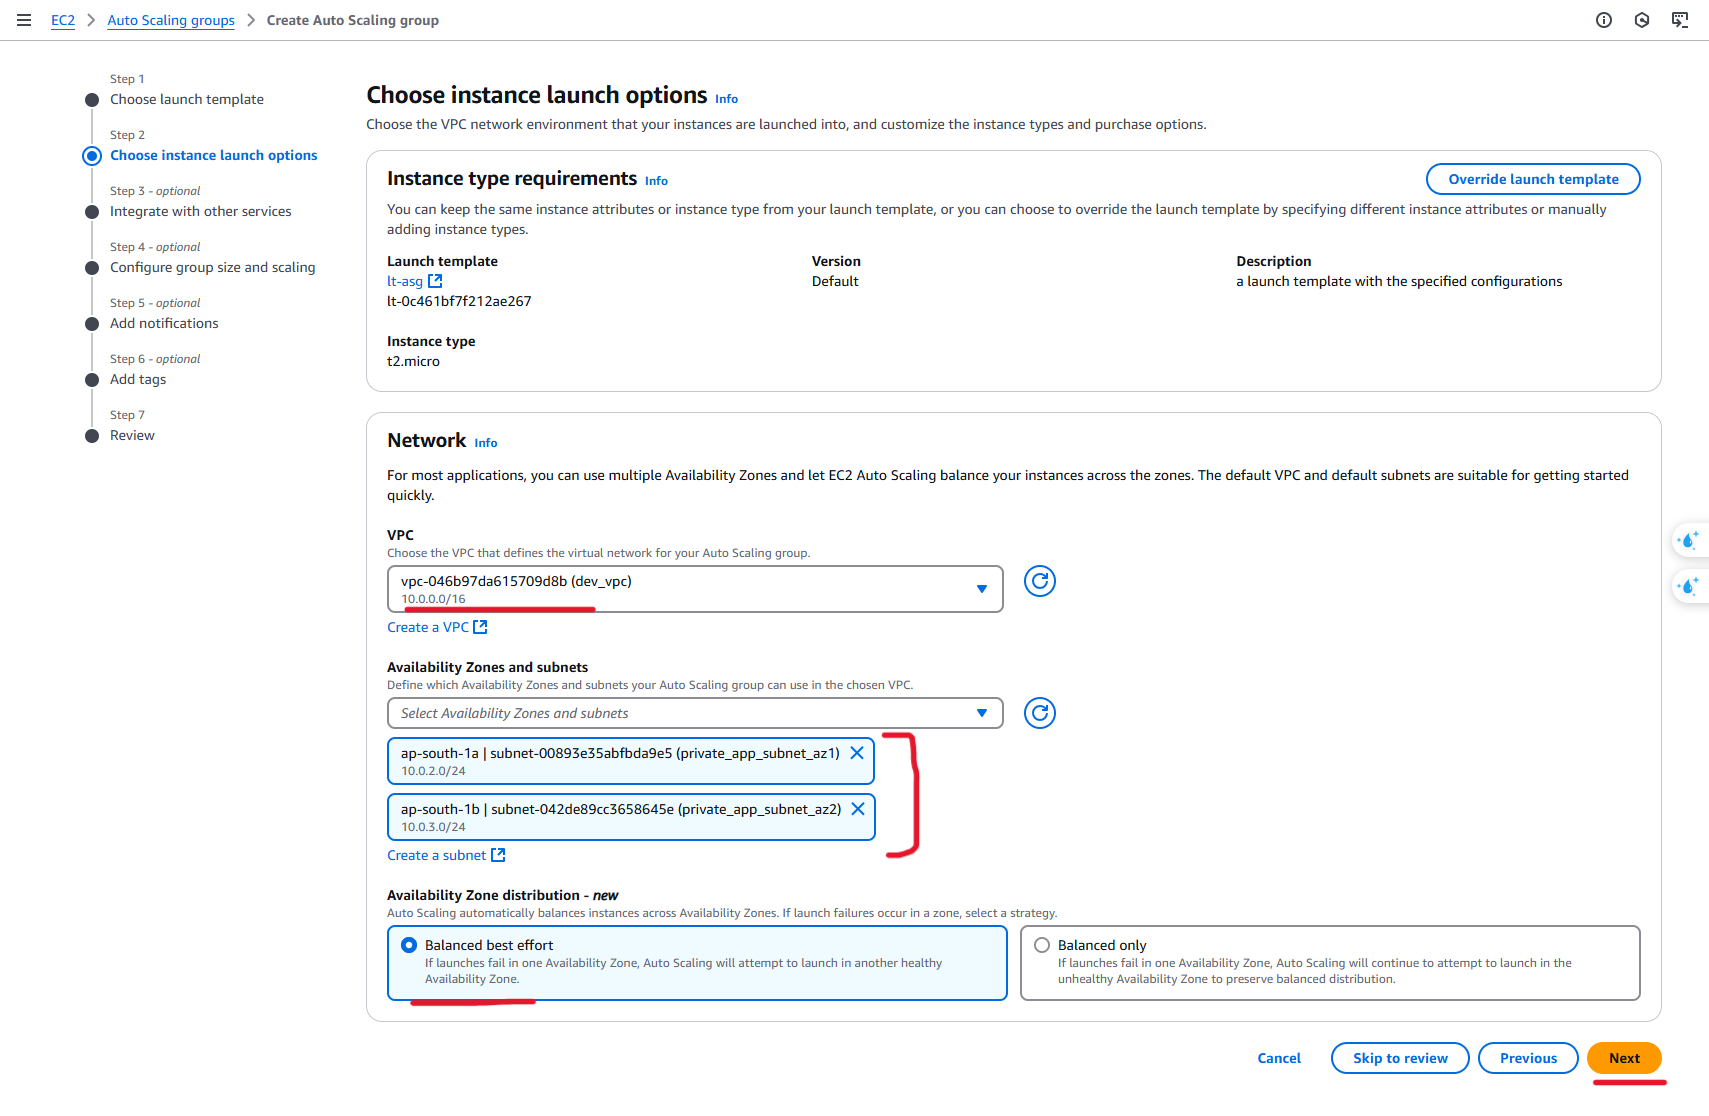
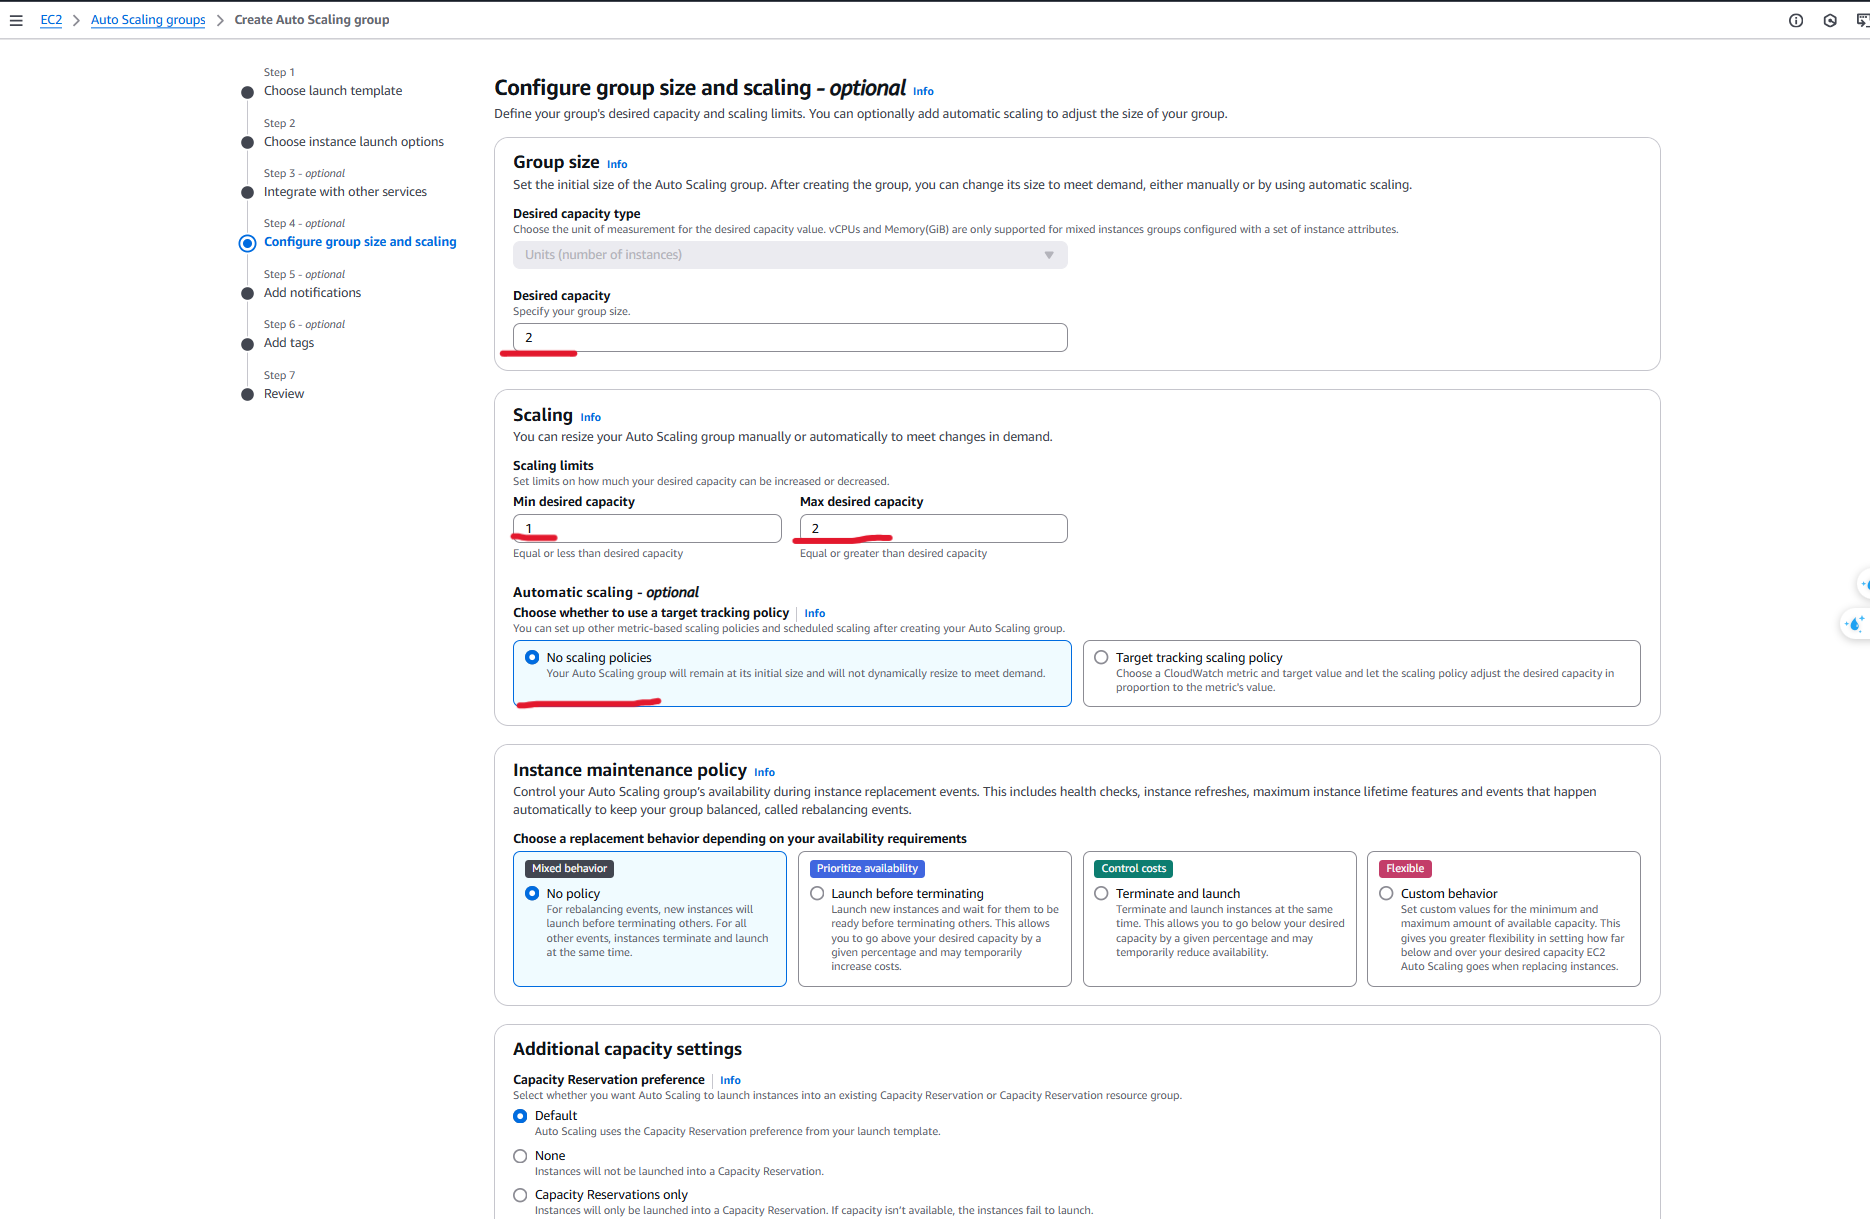
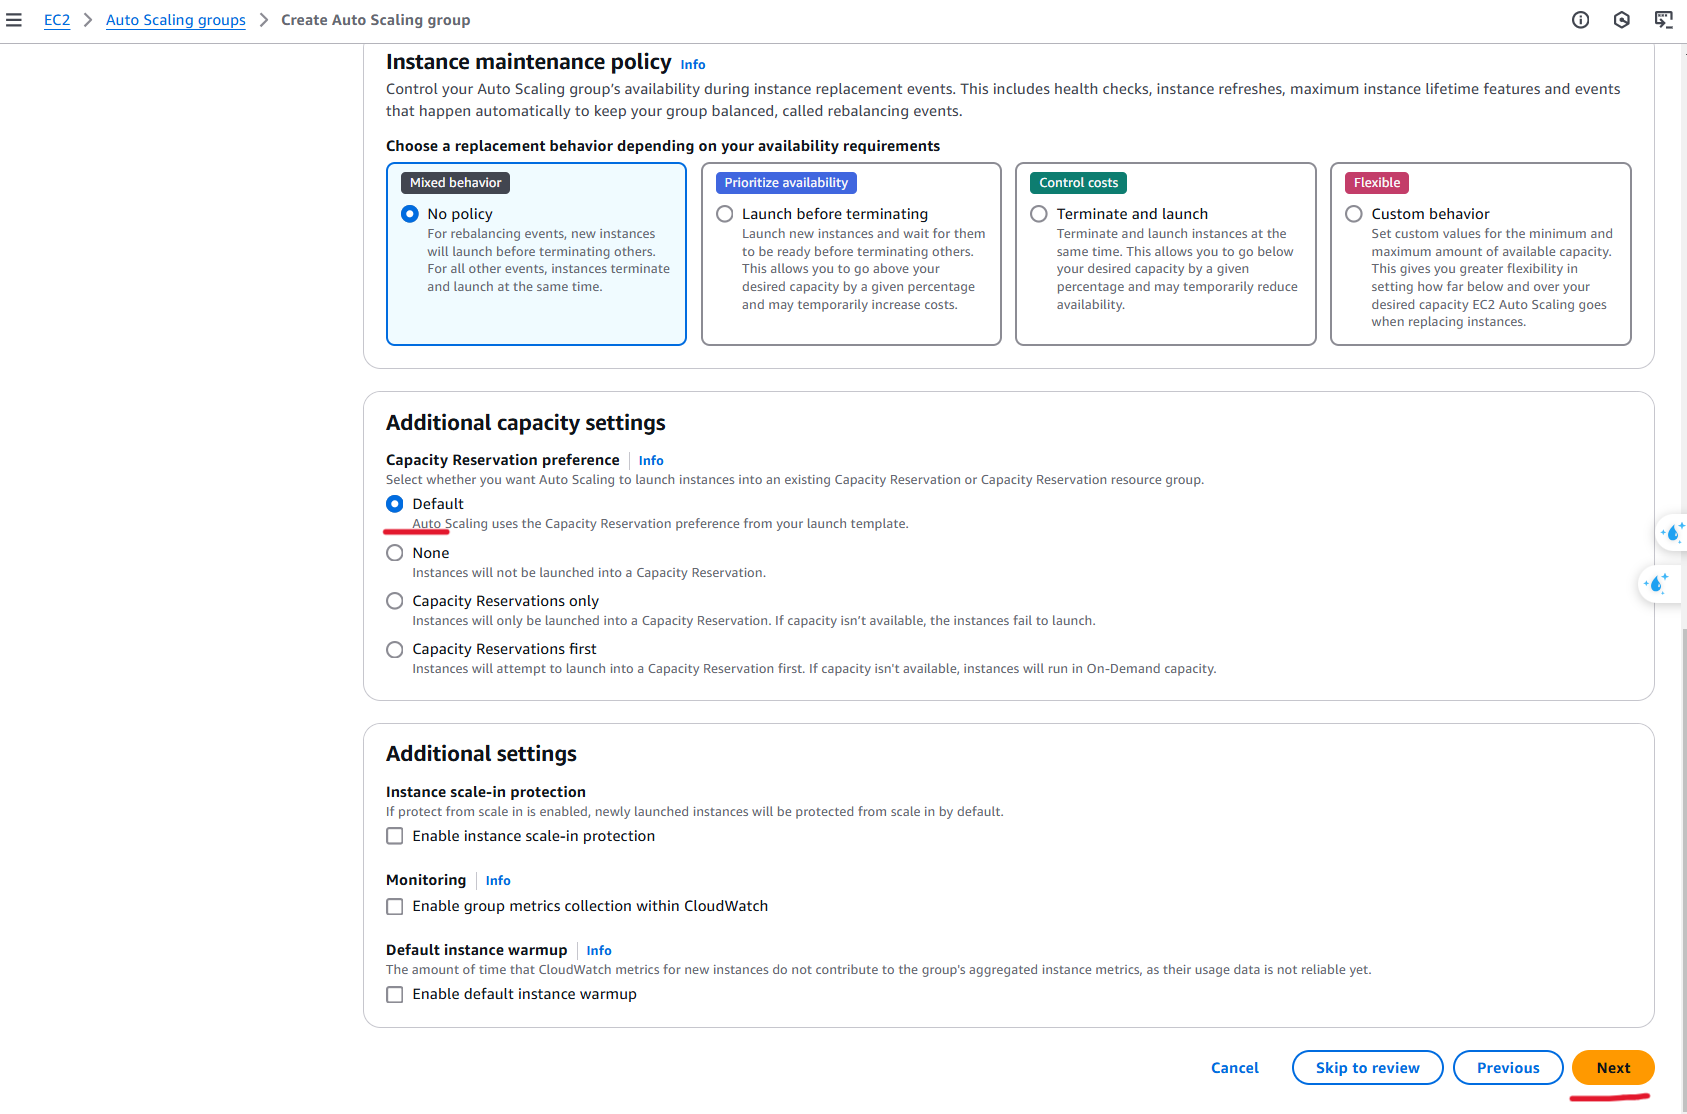
AWS will launch 2 instances automatically.

Step 5: Setting up load balancer:
- Created an Application Load Balancer (ALB) to distribute traffic across multiple instances.
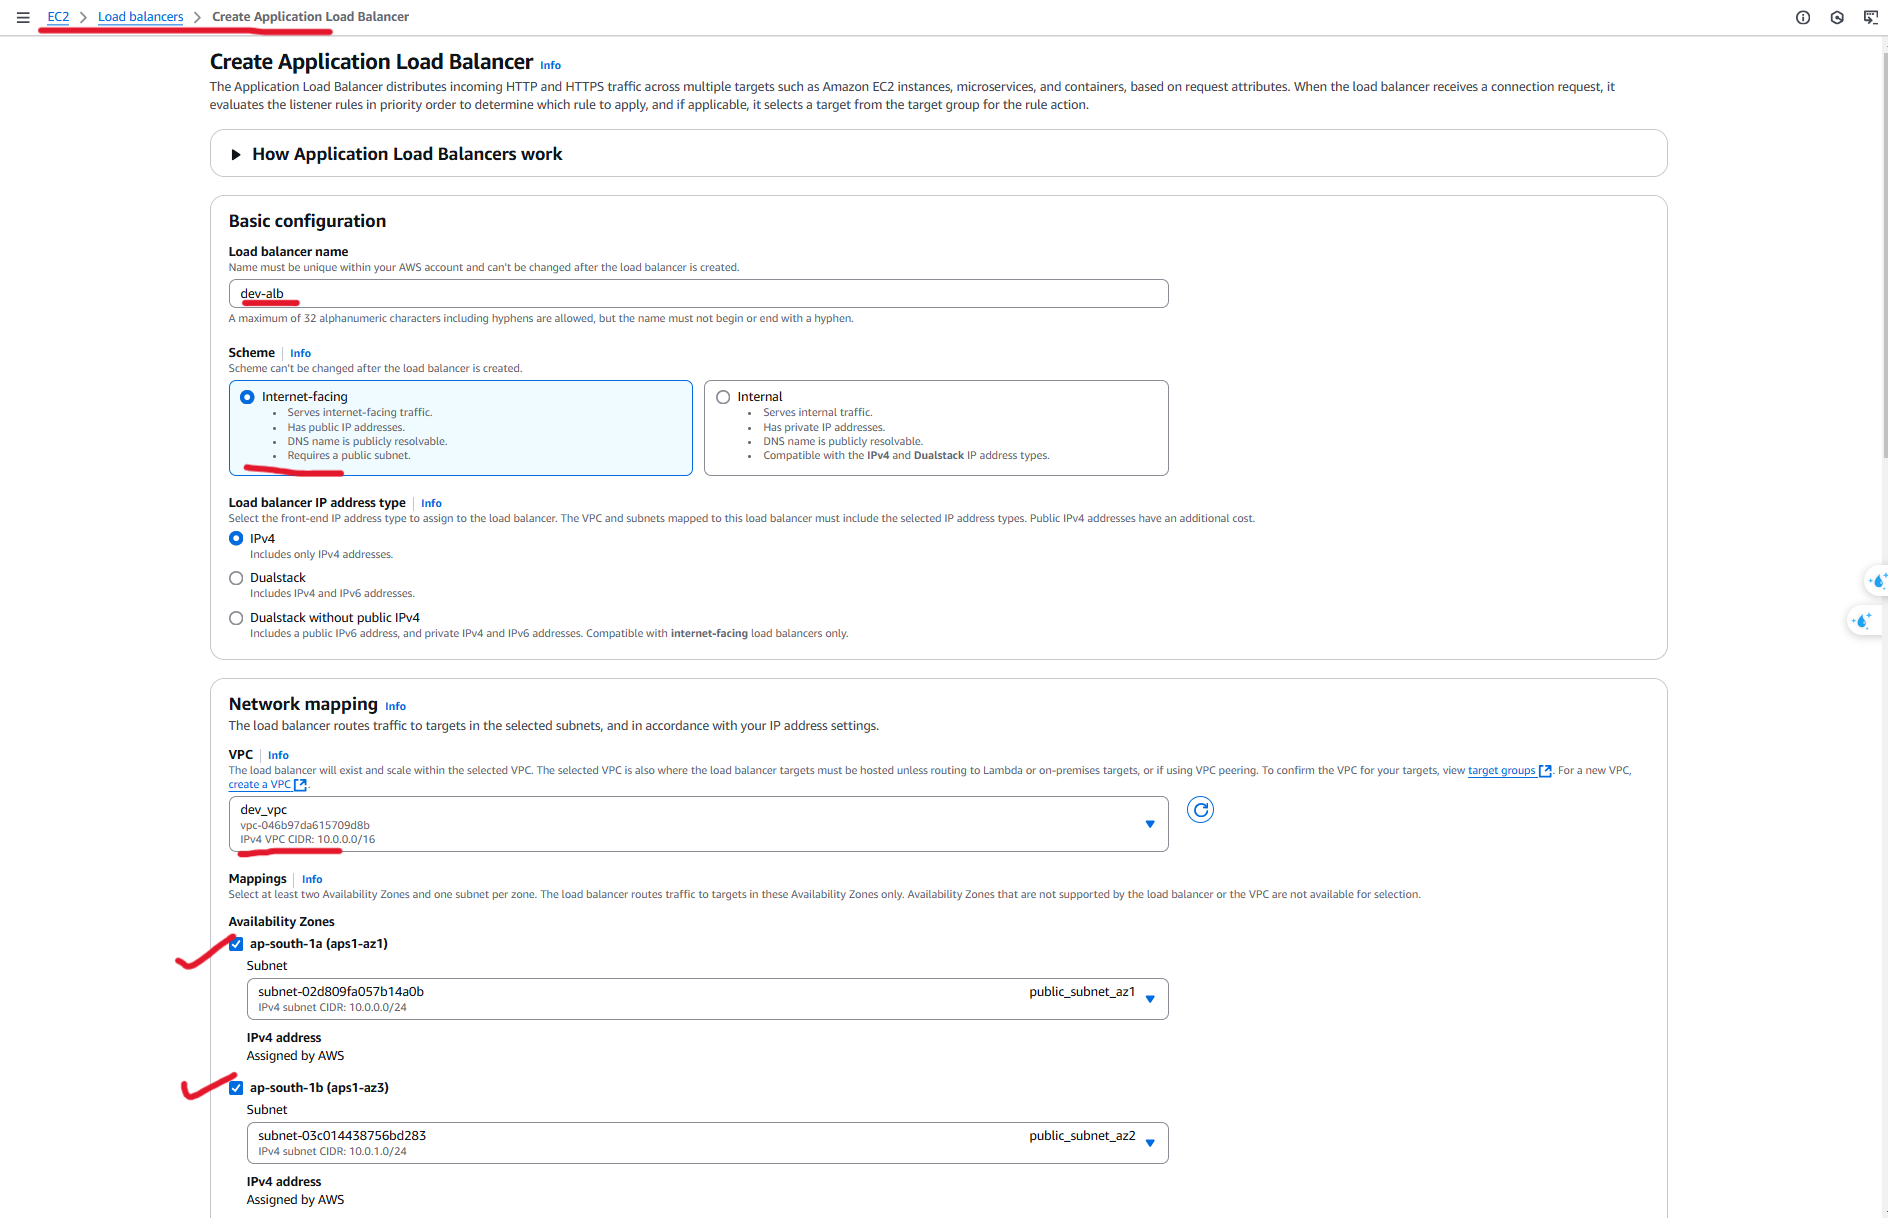
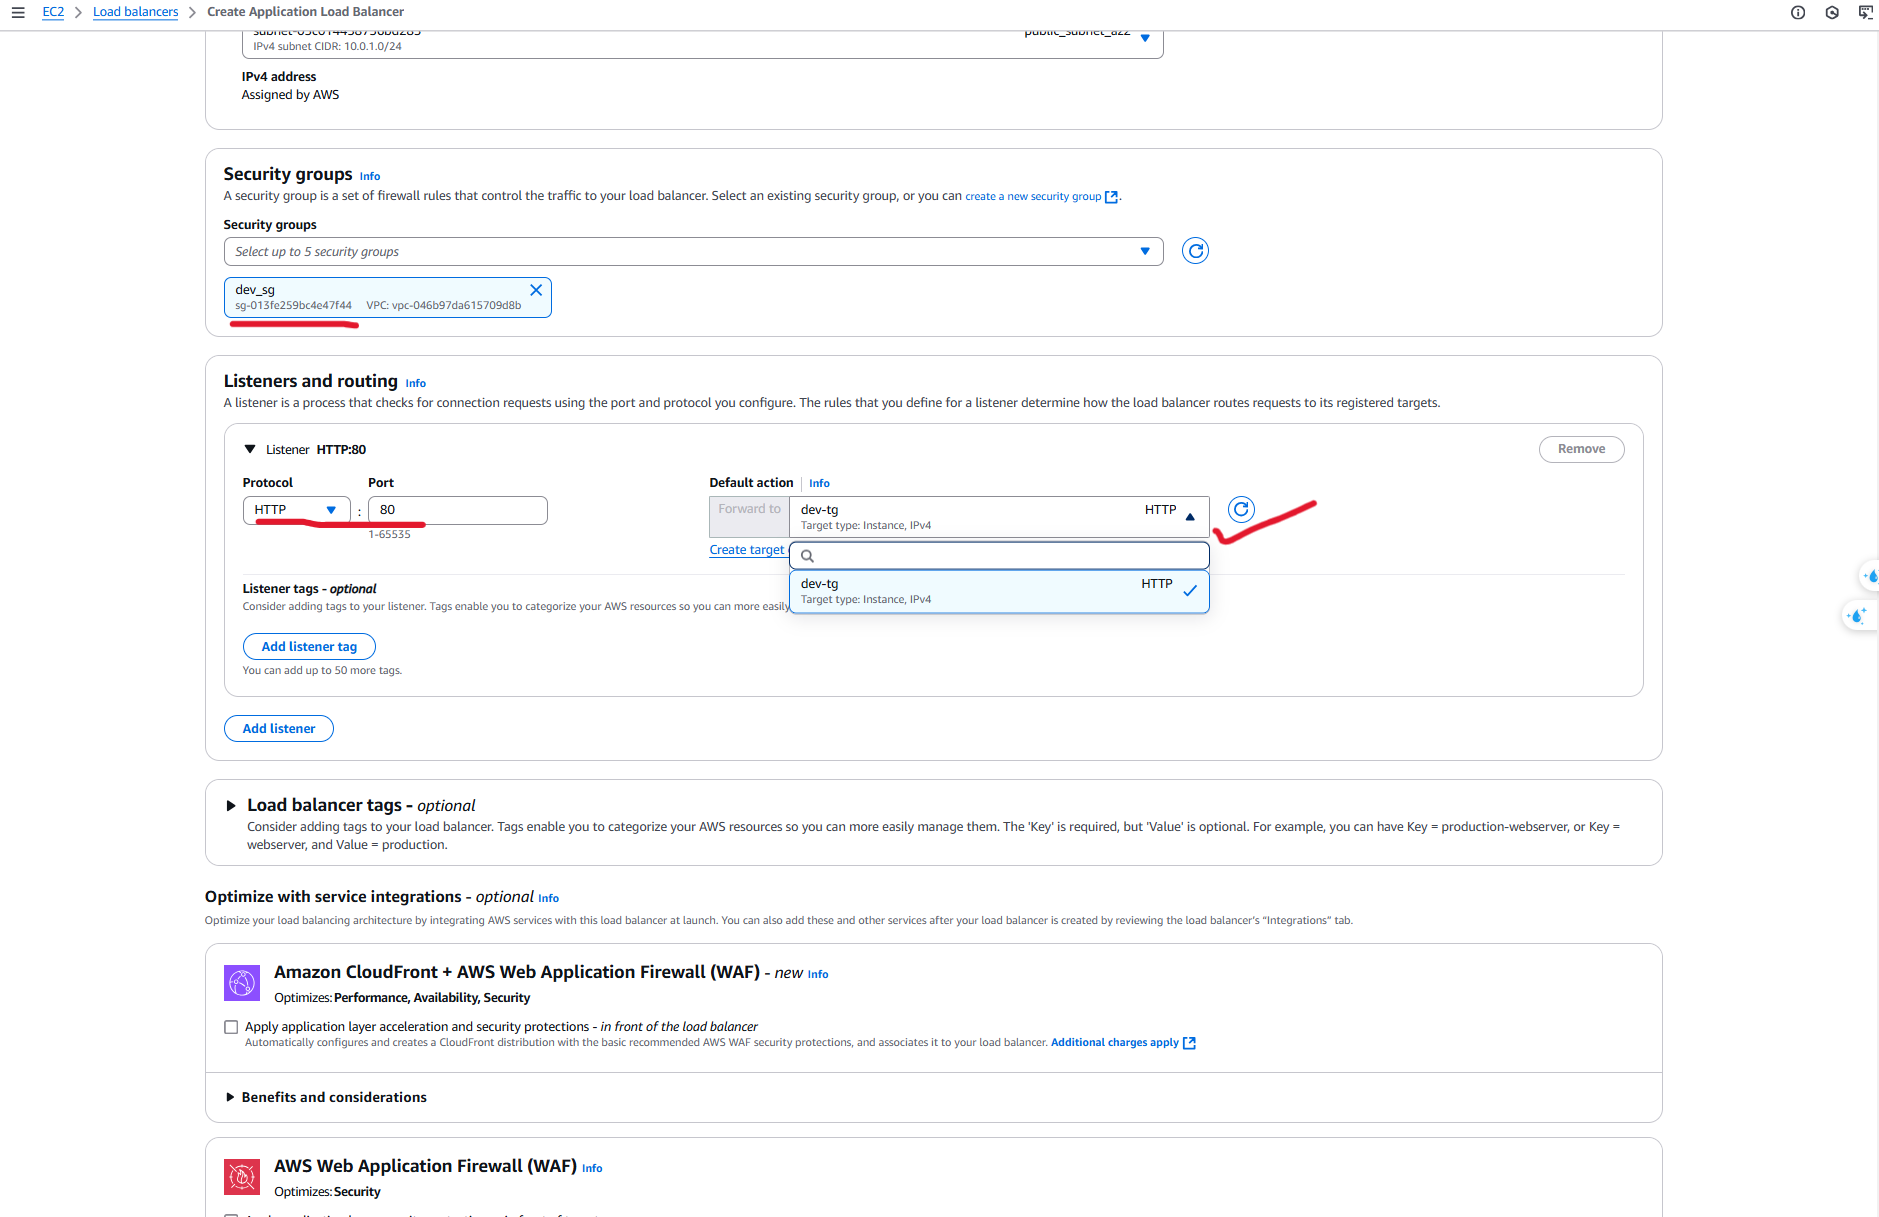
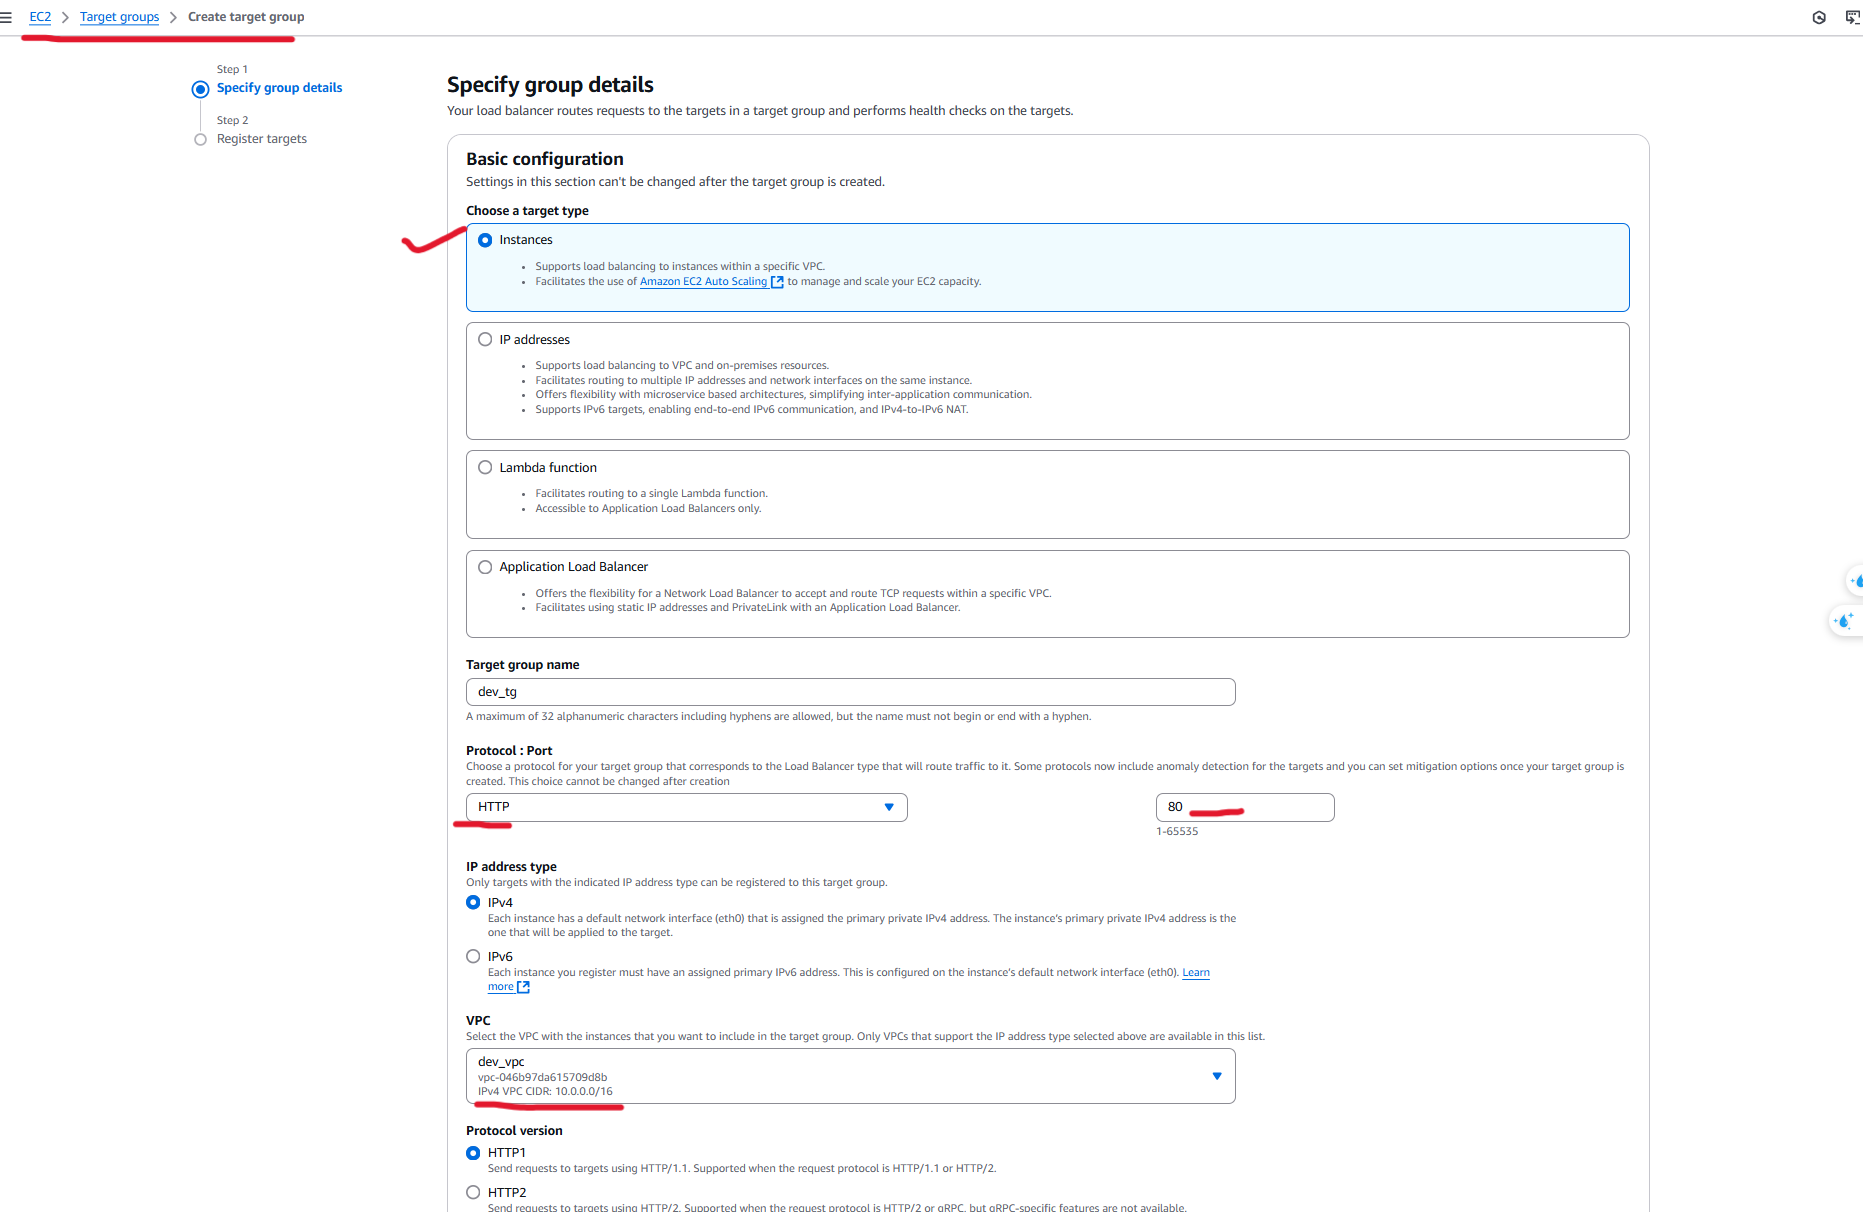
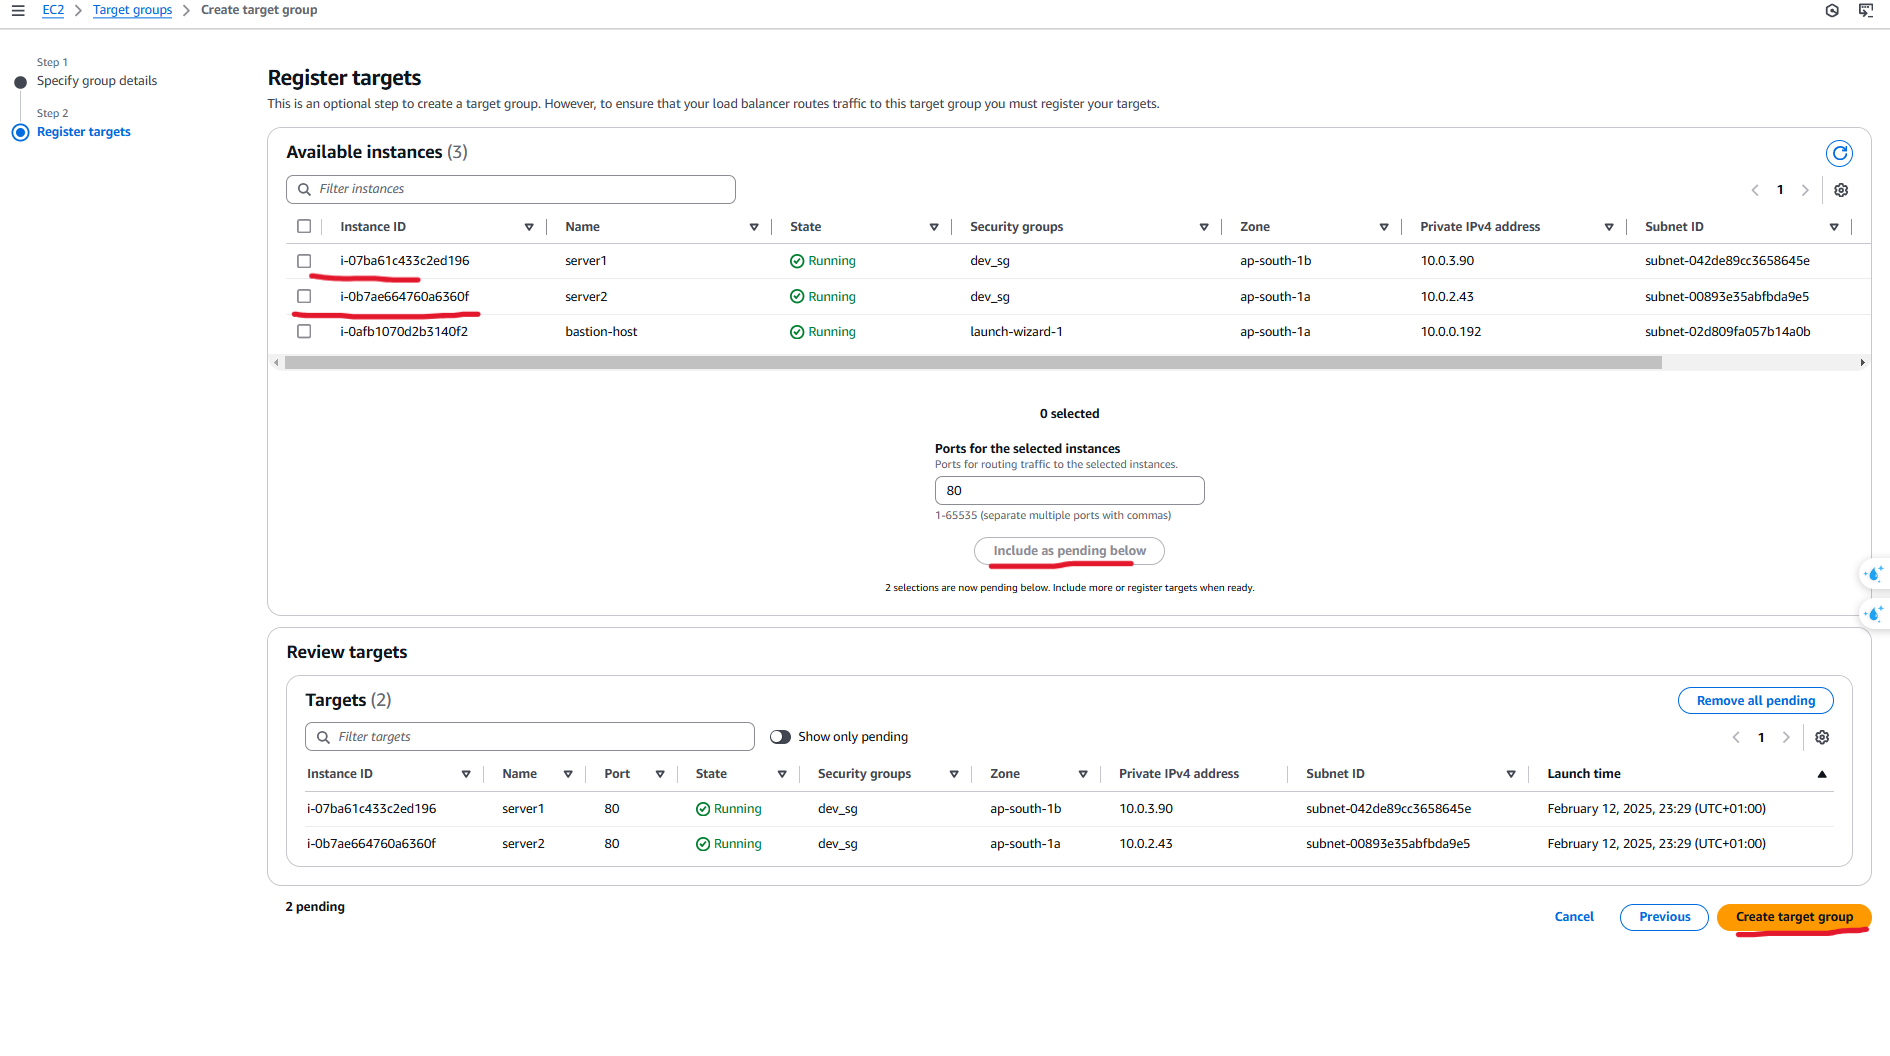
Registered Target Groups with the ALB to send traffic to private instancesif you haven’t previously created.
Step 5: Installing Nginx on Private Instances via Bastion Host
As in step no 3 we learnt how ssh port forwarding works to access private server via public server:
againhere are the commands to login/ssh to your private server via bastion server
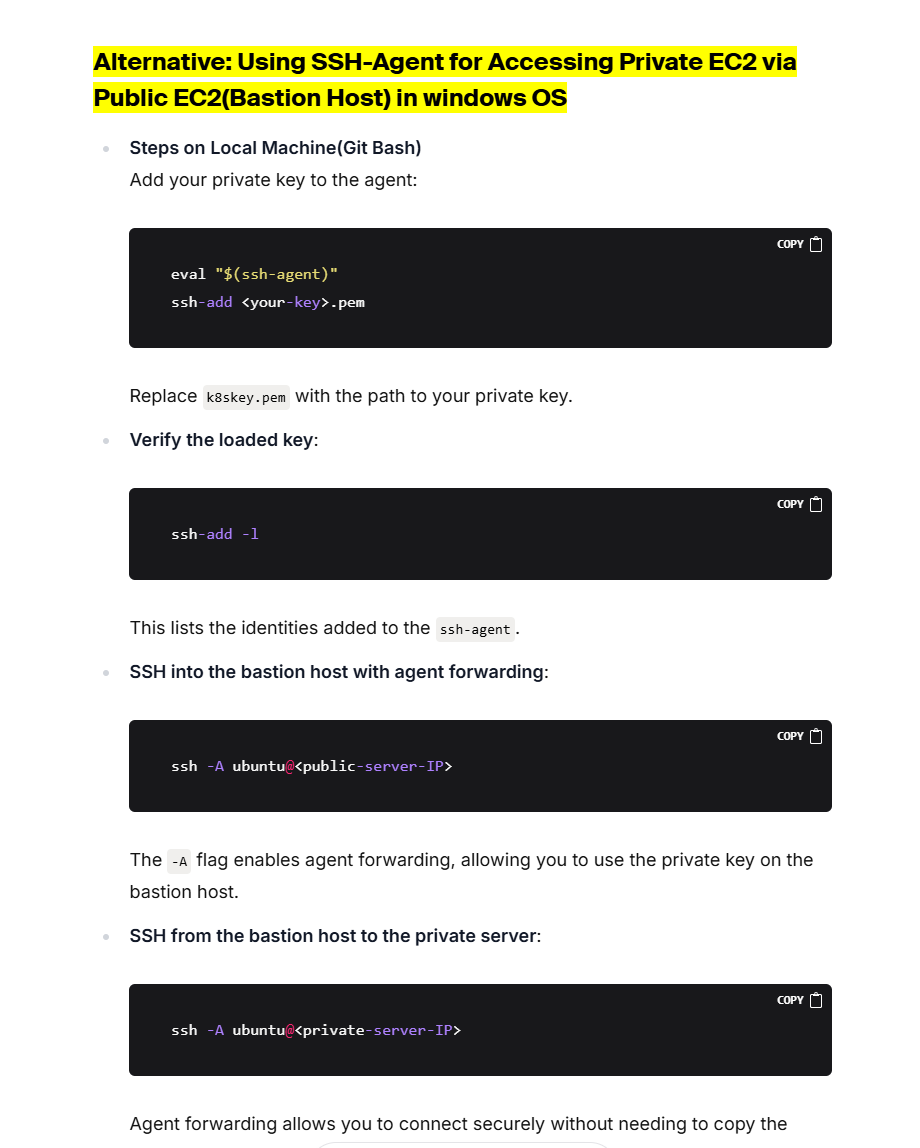
- Open your terminal and run:
        bashCopyEditeval "$(ssh-agent)"
        ssh-add <your-key.pem>  # Replace with the path to your private key
        ssh-add -l
        ssh -A ubuntu@<public-server-IP> # bastion server ip
        ssh -A ubuntu@<private-server-IP> # from bastion to private server
Installed Nginx on the private instances
        sudo apt update -y
        sudo apt install -y nginx
        sudo systemctl start nginx
        sudo systemctl enable nginx
        sudo vi /var/www/html/index.html
Typed index.html page
        <!DOCTYPE html>
        <html lang="en">
        <head>
            <meta charset="UTF-8">
            <meta name="viewport" content="width=device-width, initial-scale=1.0">
            <title>Welcome</title>
        </head>
        <body>
            <h1>Hello, from server 1 !</h1>
        </body>
        </html>
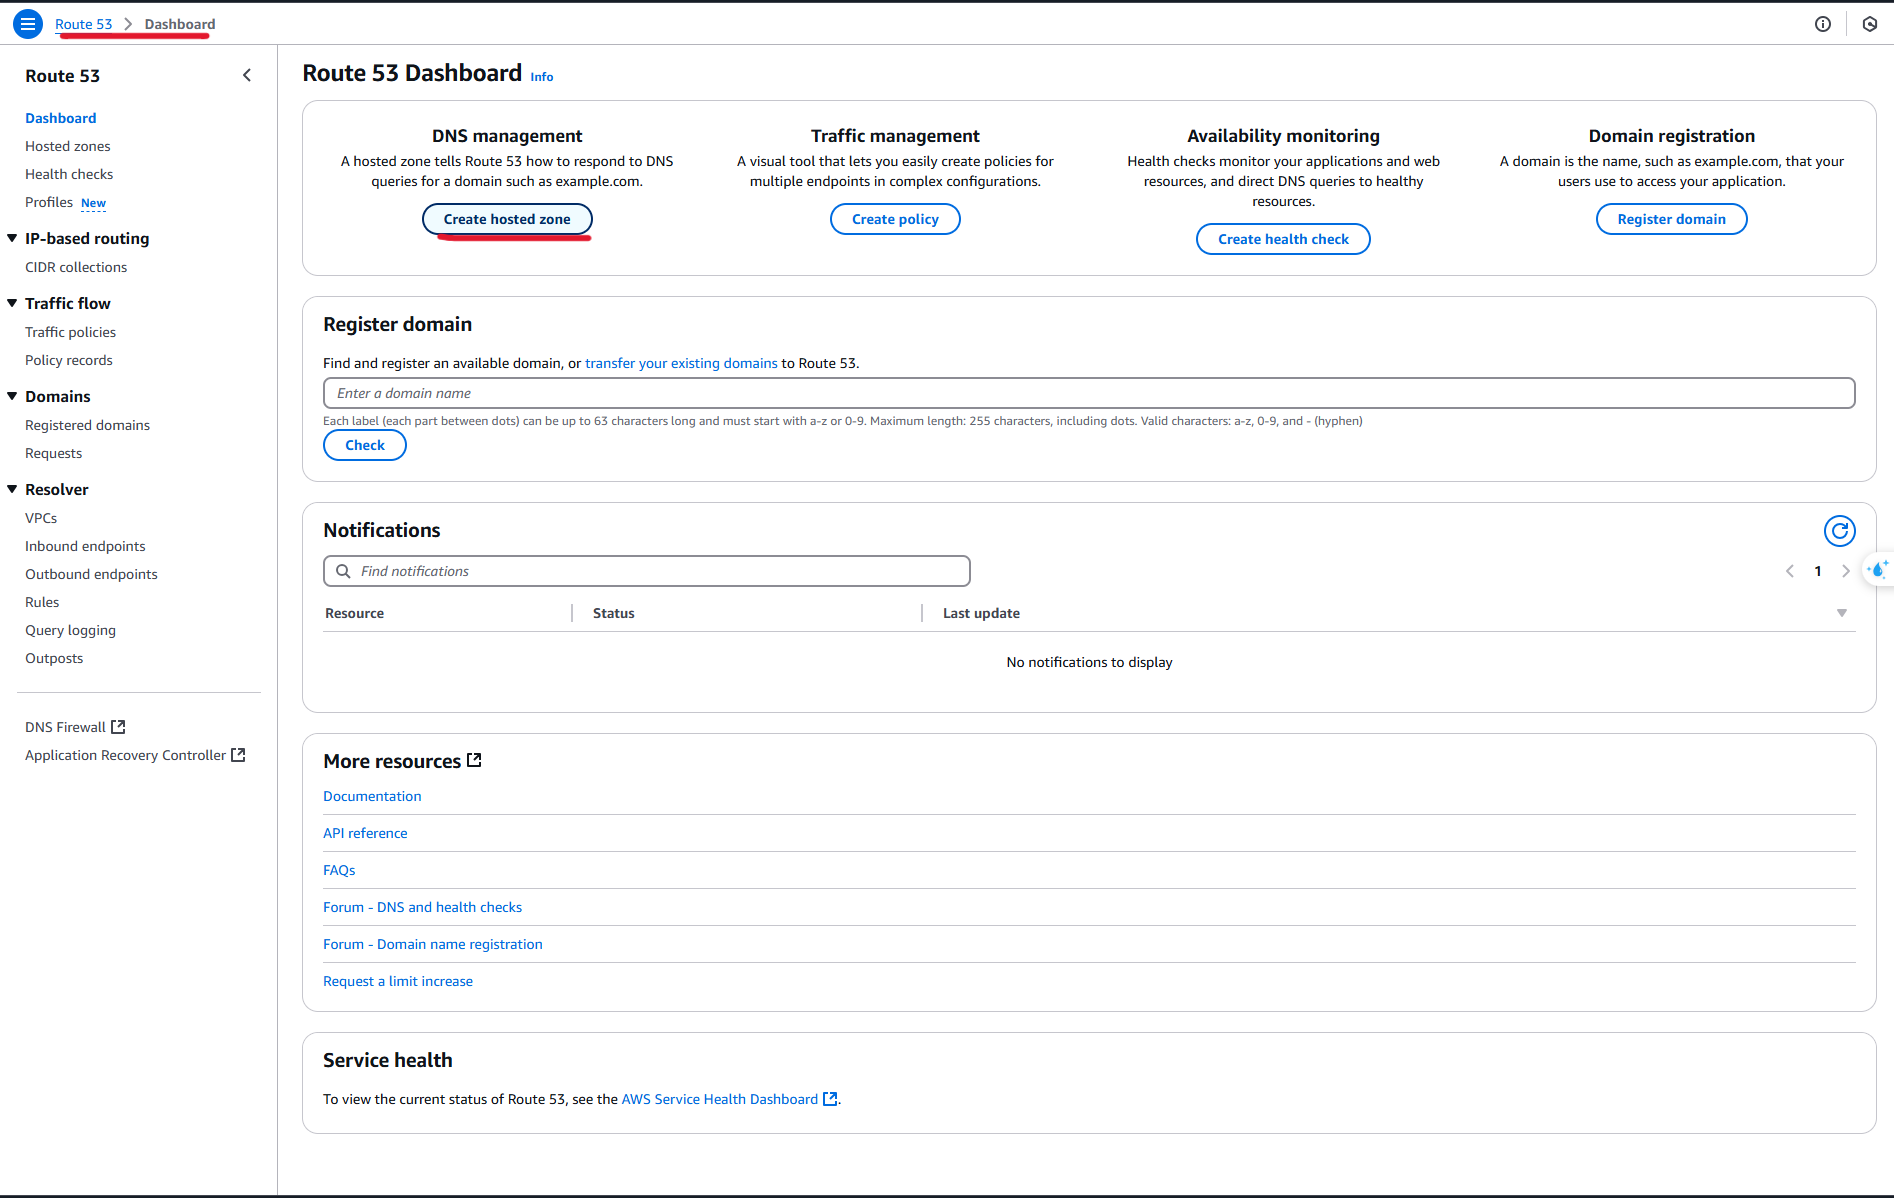
Step 6: Configured Custom Domain to AWS Route 53
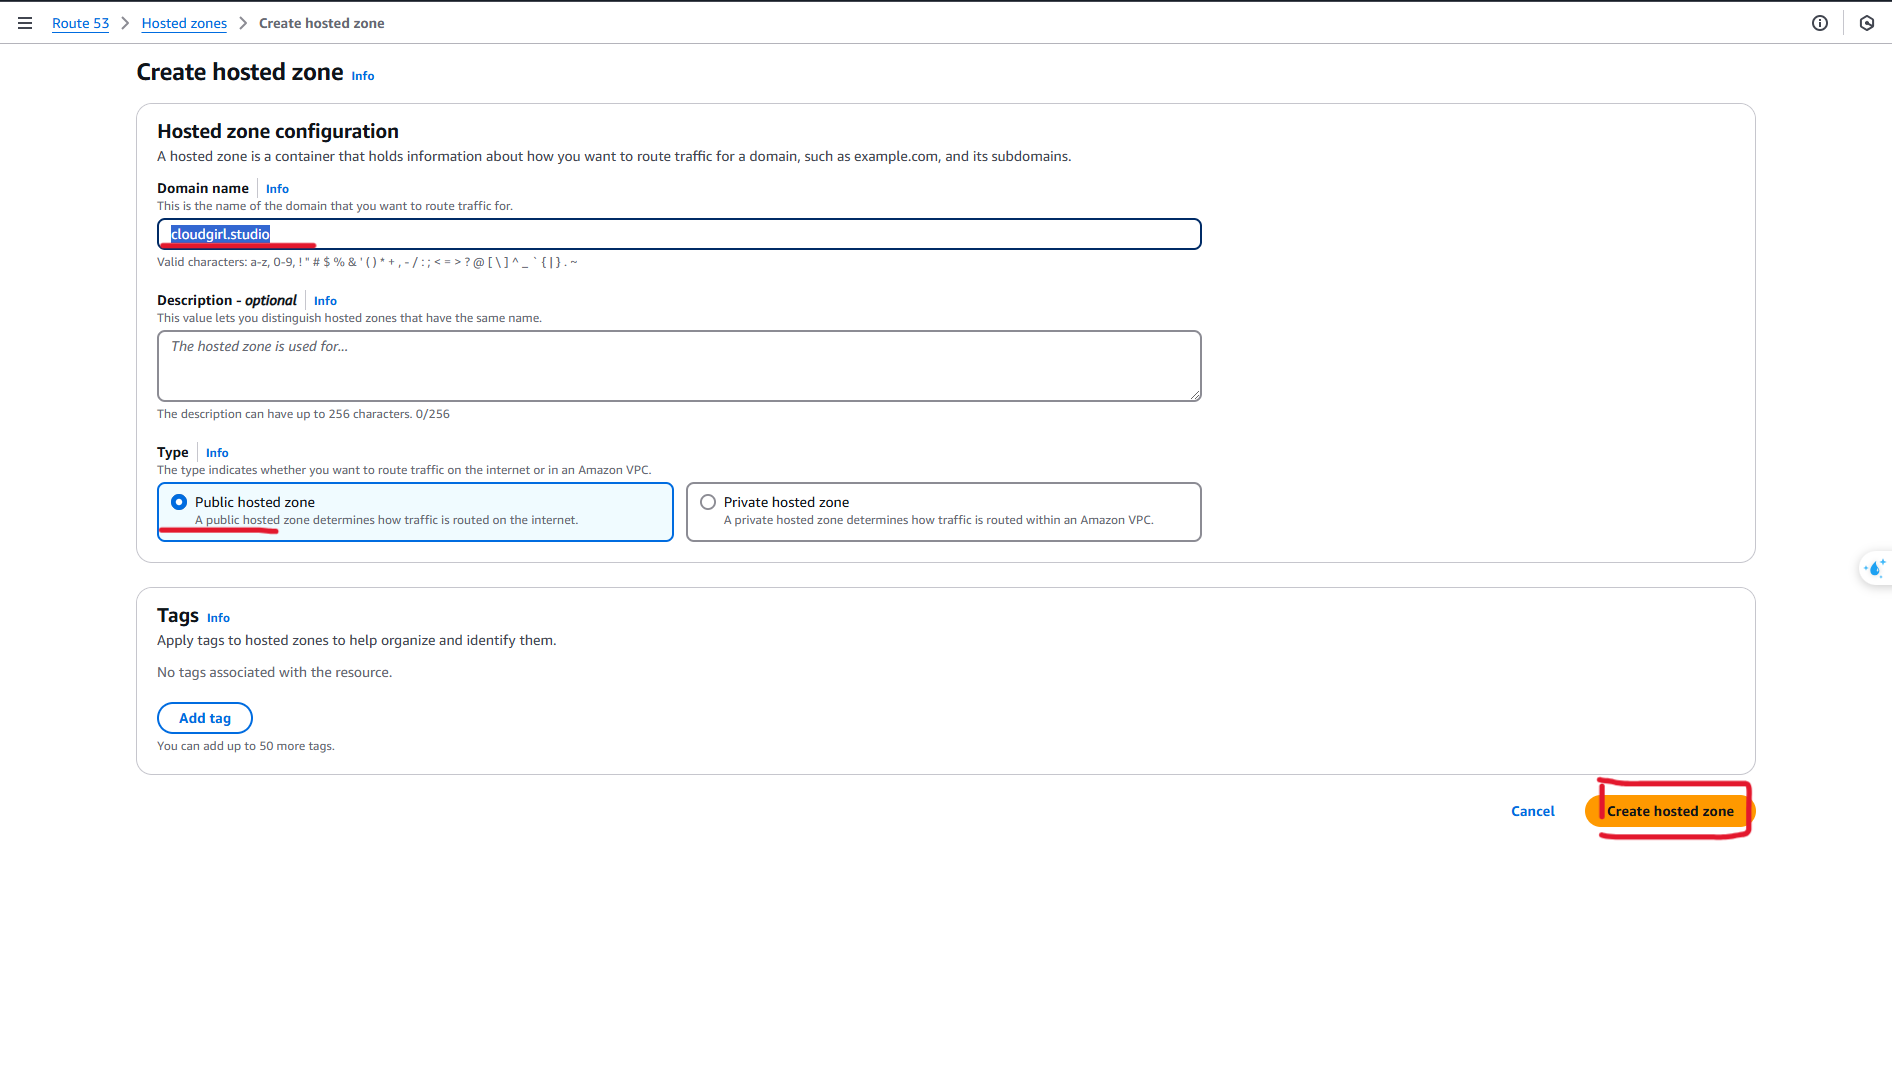
- Created a hosted zone:
- Enter Your Domain Details
- Aws will create name servers for your domain:
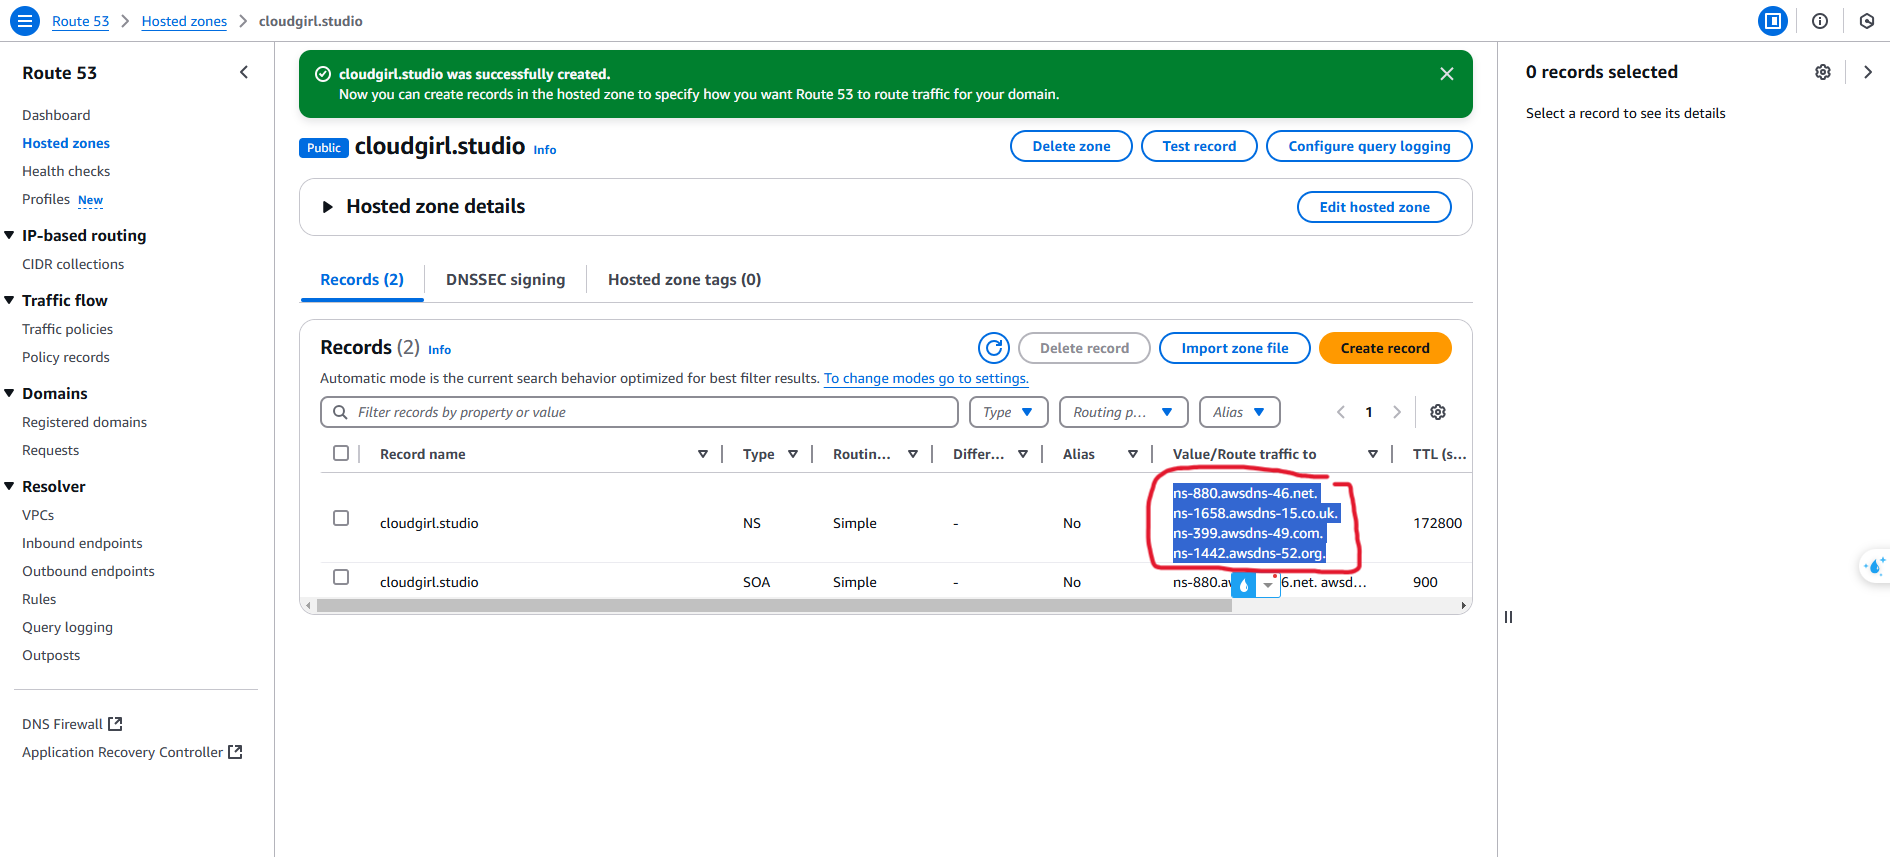
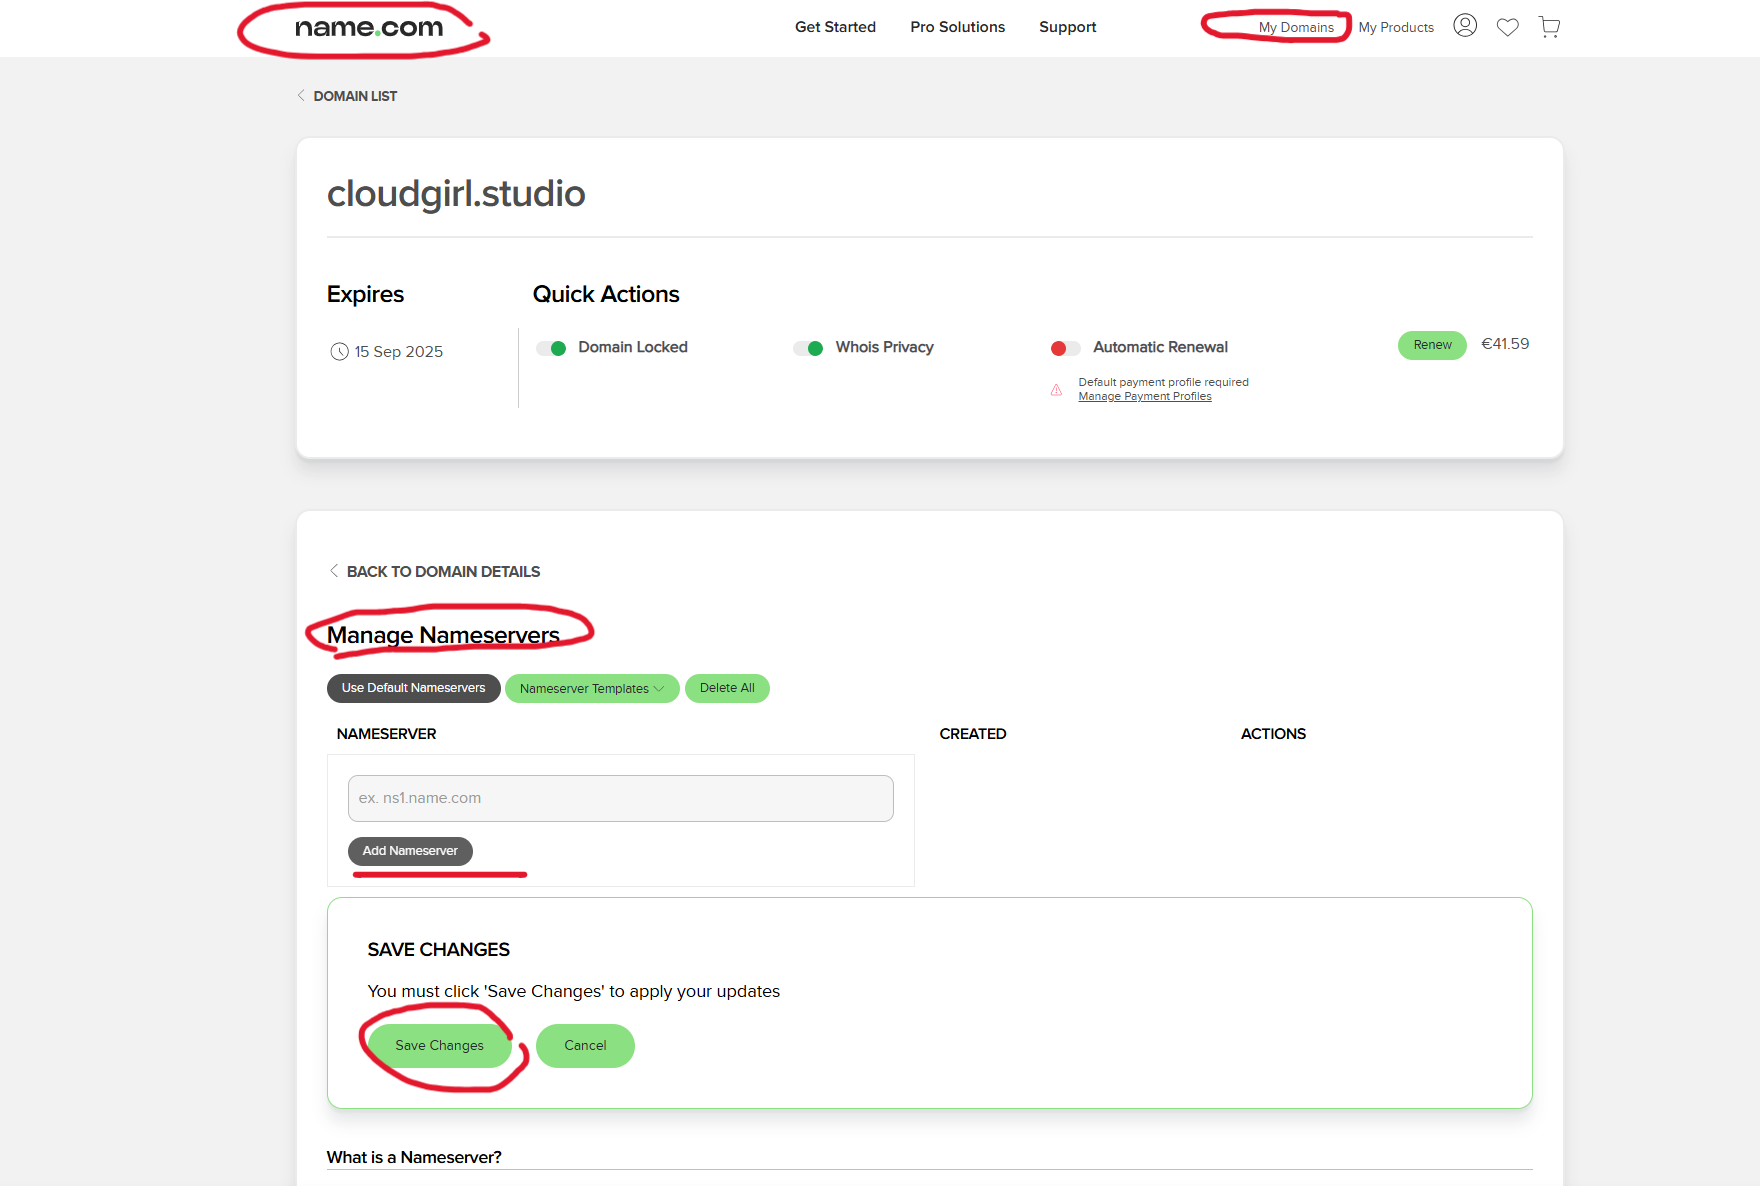
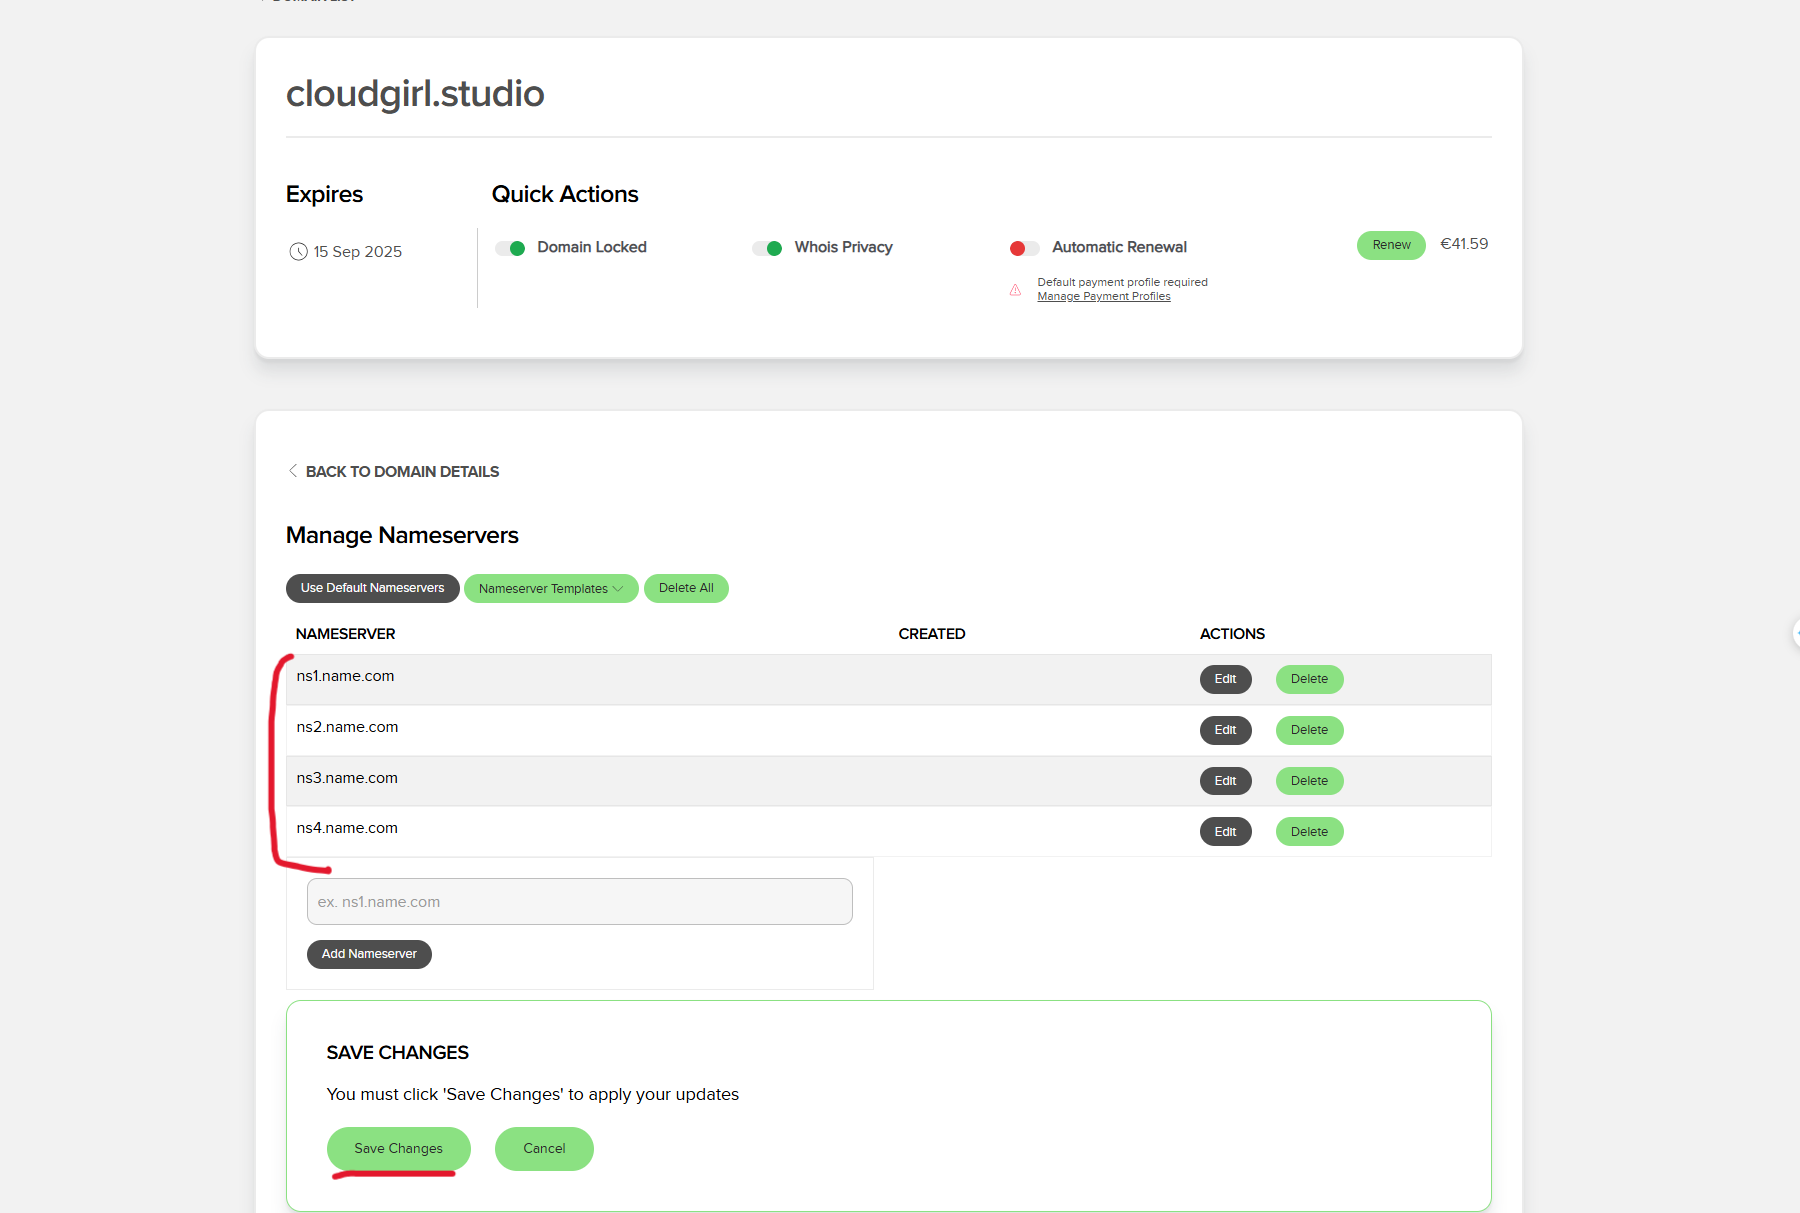
- Update DNS Settings at Your Domain Registrar(in our case it is Name.com)
Verify Domain Connection Using nslookup
Replace
cloudgirl.studio with your actual domain name and run:nslookup cloudgirl.studioCheck the Output
If the output shows the AWS Route 53 nameservers, your domain is correctly linked. Example output:
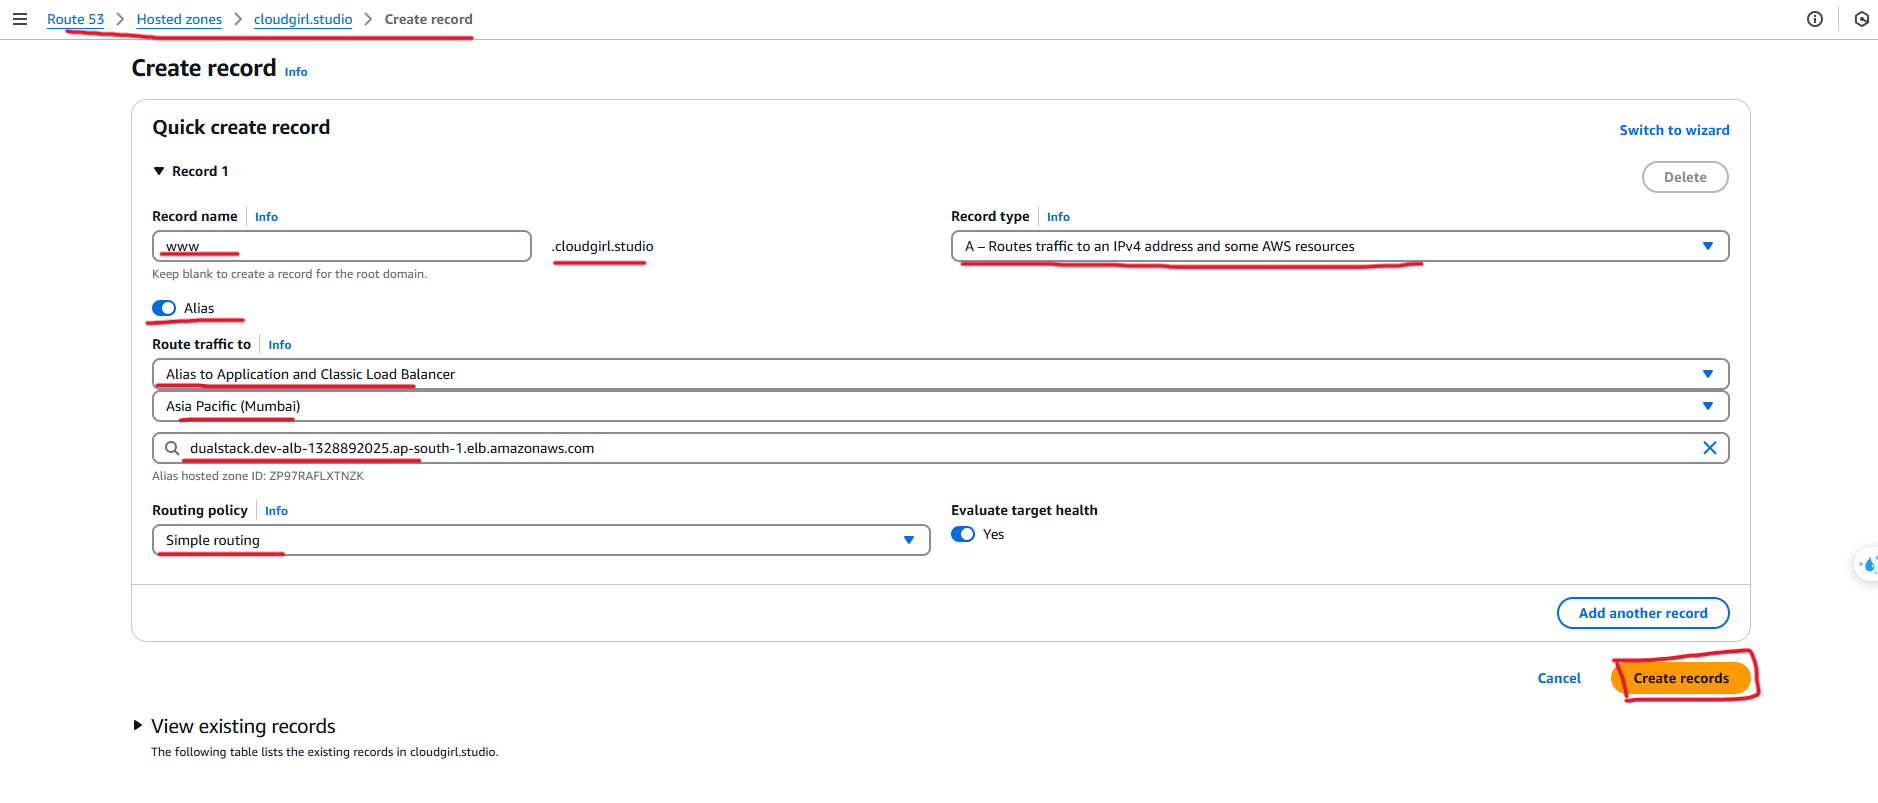
 Server:  UnKnown
 Address:  8.8.8.8

 Non-authoritative answer:
 cloudgirl.studio    nameserver = ns-1234.awsdns-56.net.
 cloudgirl.studio    nameserver = ns-5678.awsdns-78.org.
 cloudgirl.studio    nameserver = ns-9101.awsdns-23.co.uk.
 cloudgirl.studio    nameserver = ns-1123.awsdns-45.com.
Created an A Record to Route Traffic to ALB:
Before attaching an SSL certificate, we first need to route traffic from
www.cloudgirl.studioto the Application Load Balancer (ALB). This step ensures that users can access your website via your domain name, but initially, the connection will not be secure (HTTP only).Test your domain in a browser:
http://<www.cloudgirl.studio>
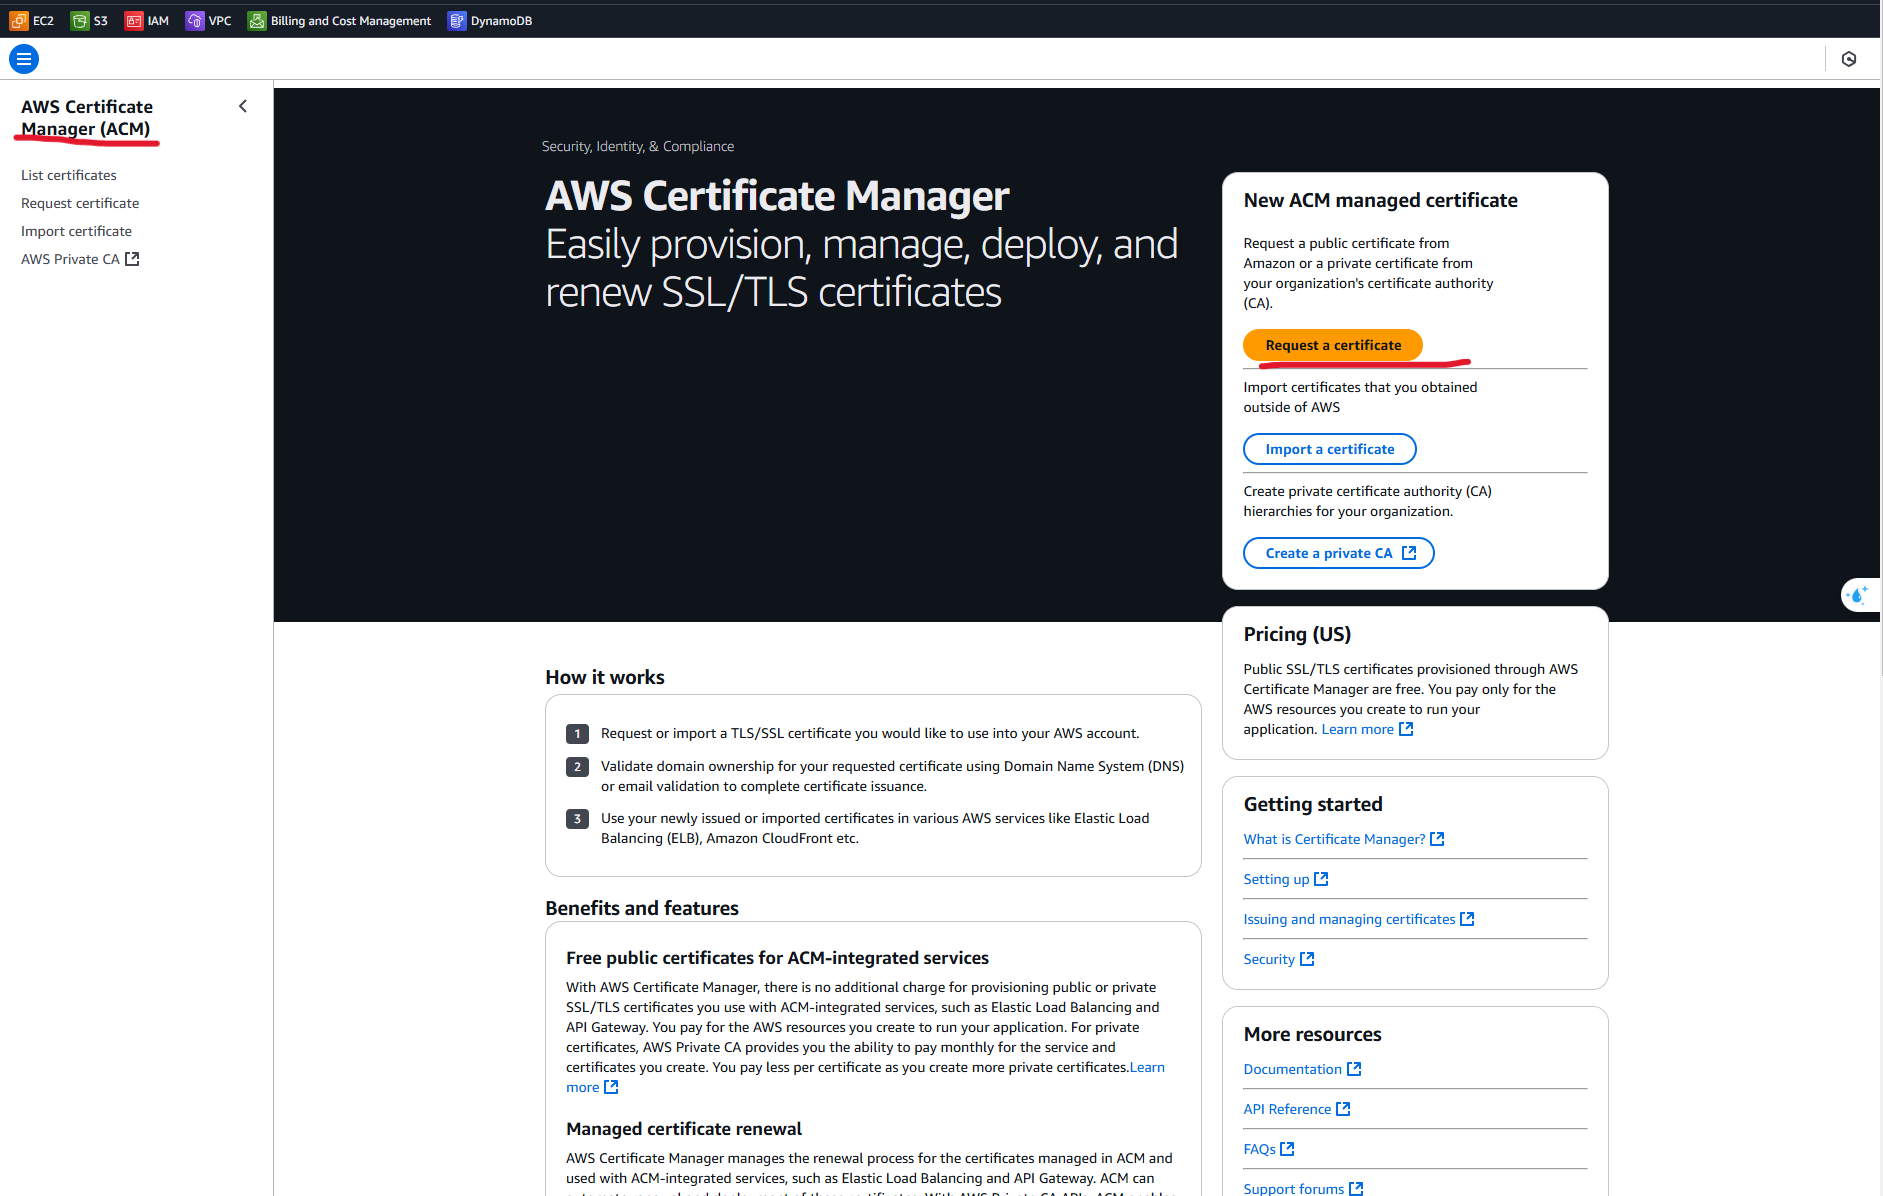
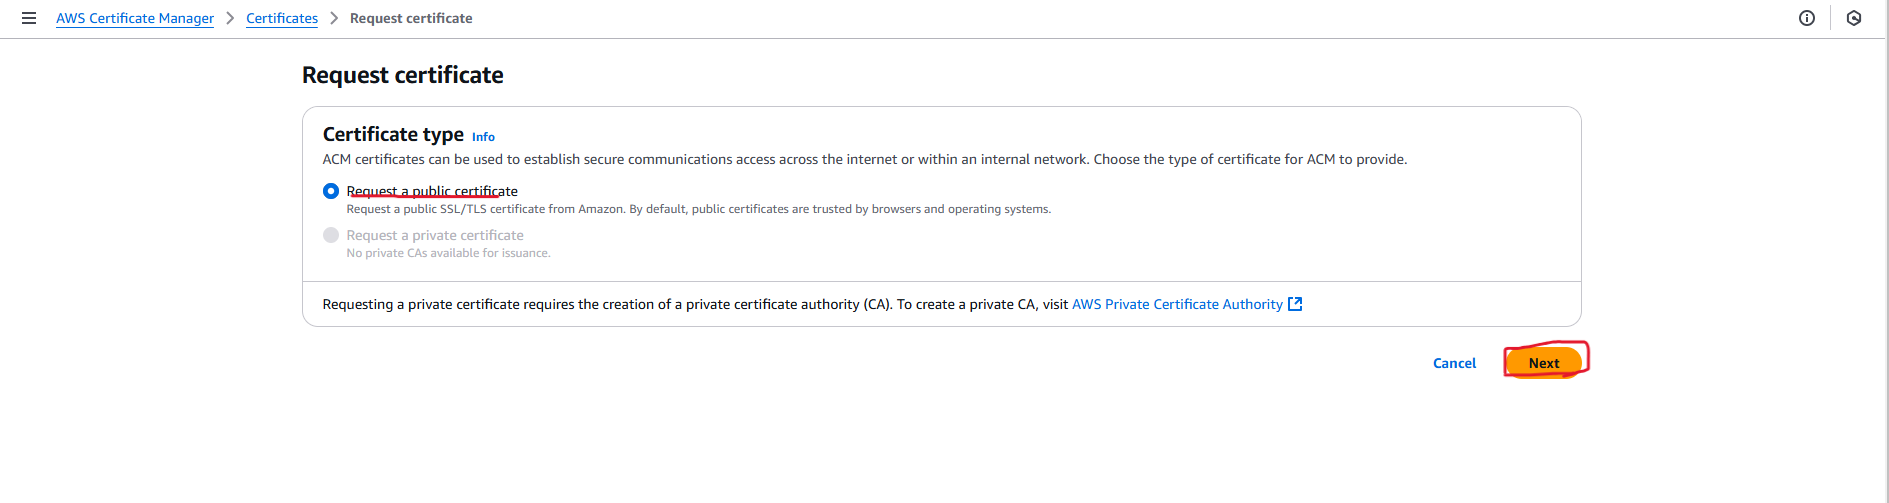
Step 7: Setting Up SSL with AWS Certificate Manager (ACM)
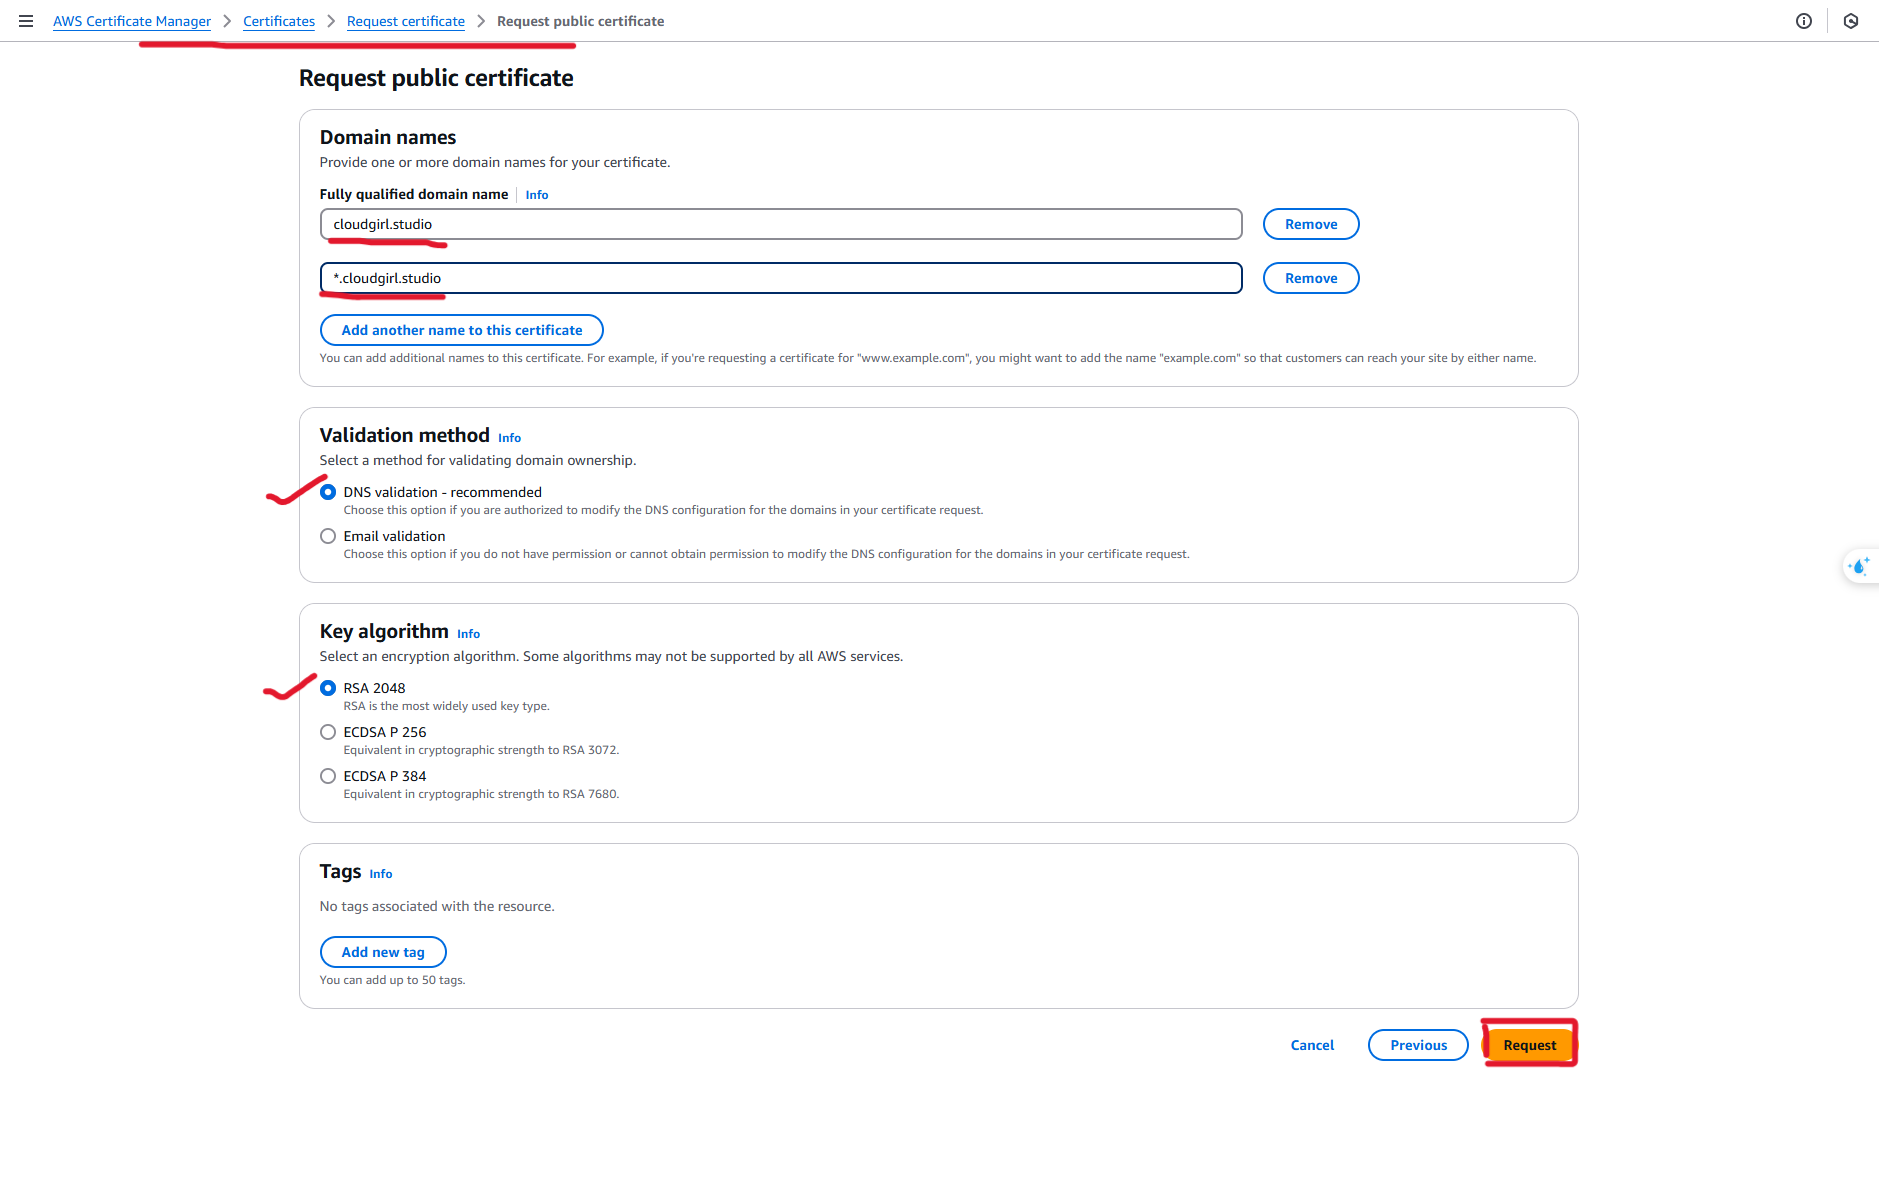
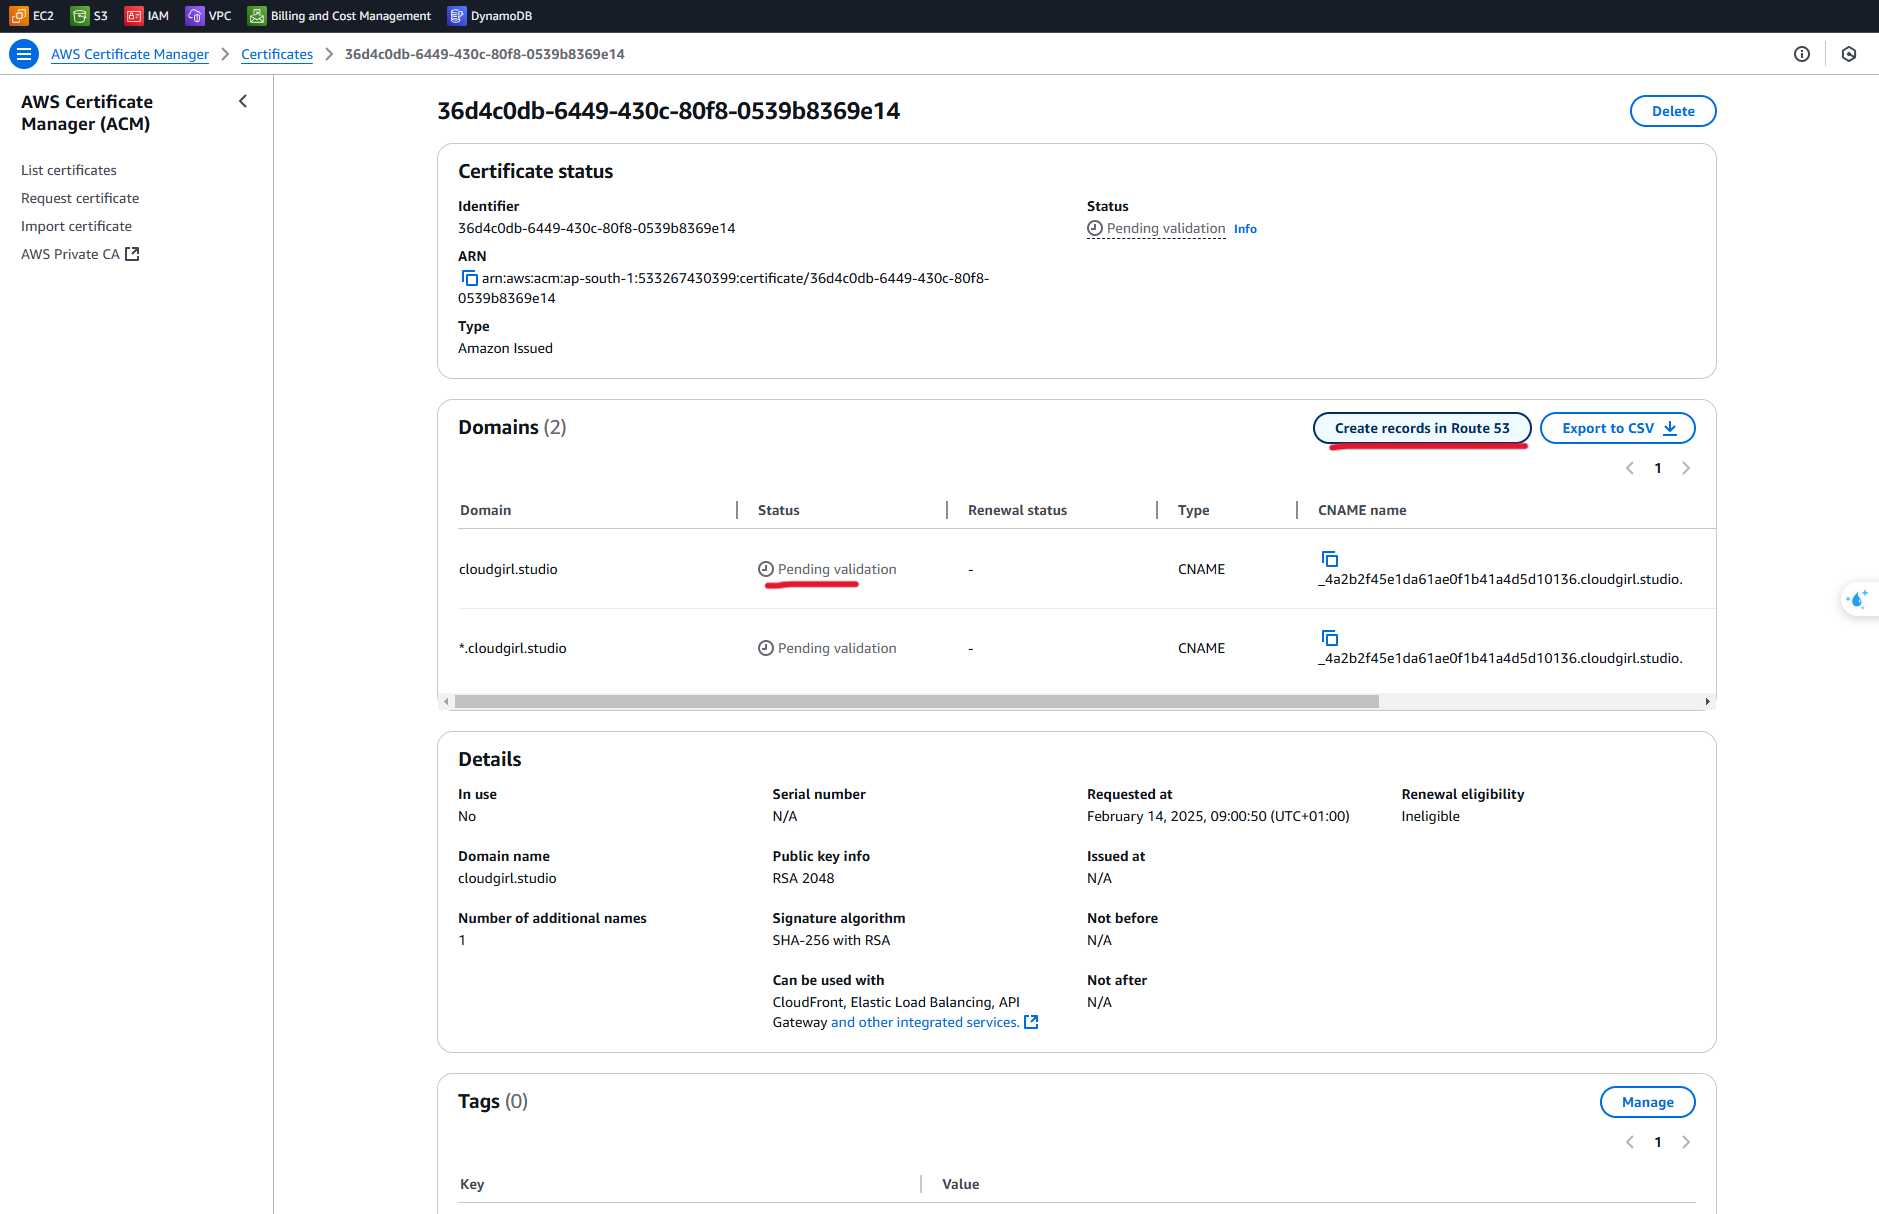
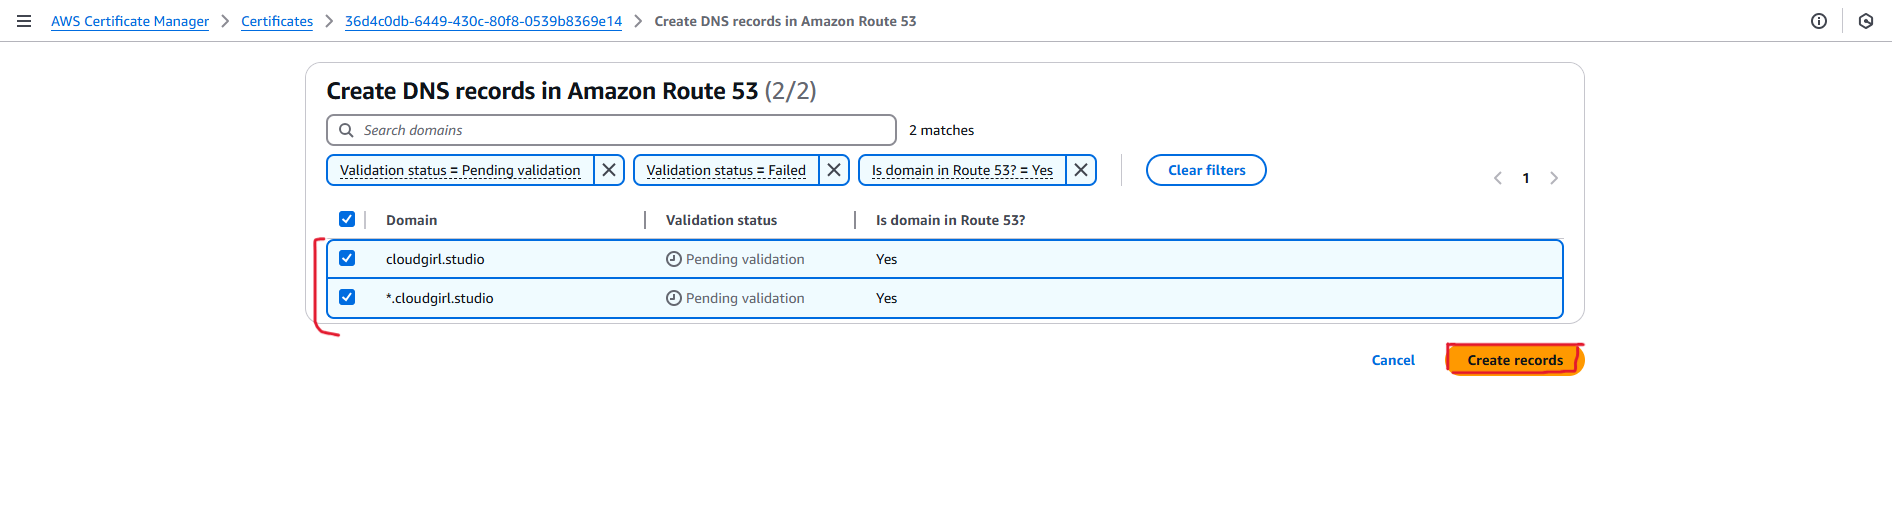
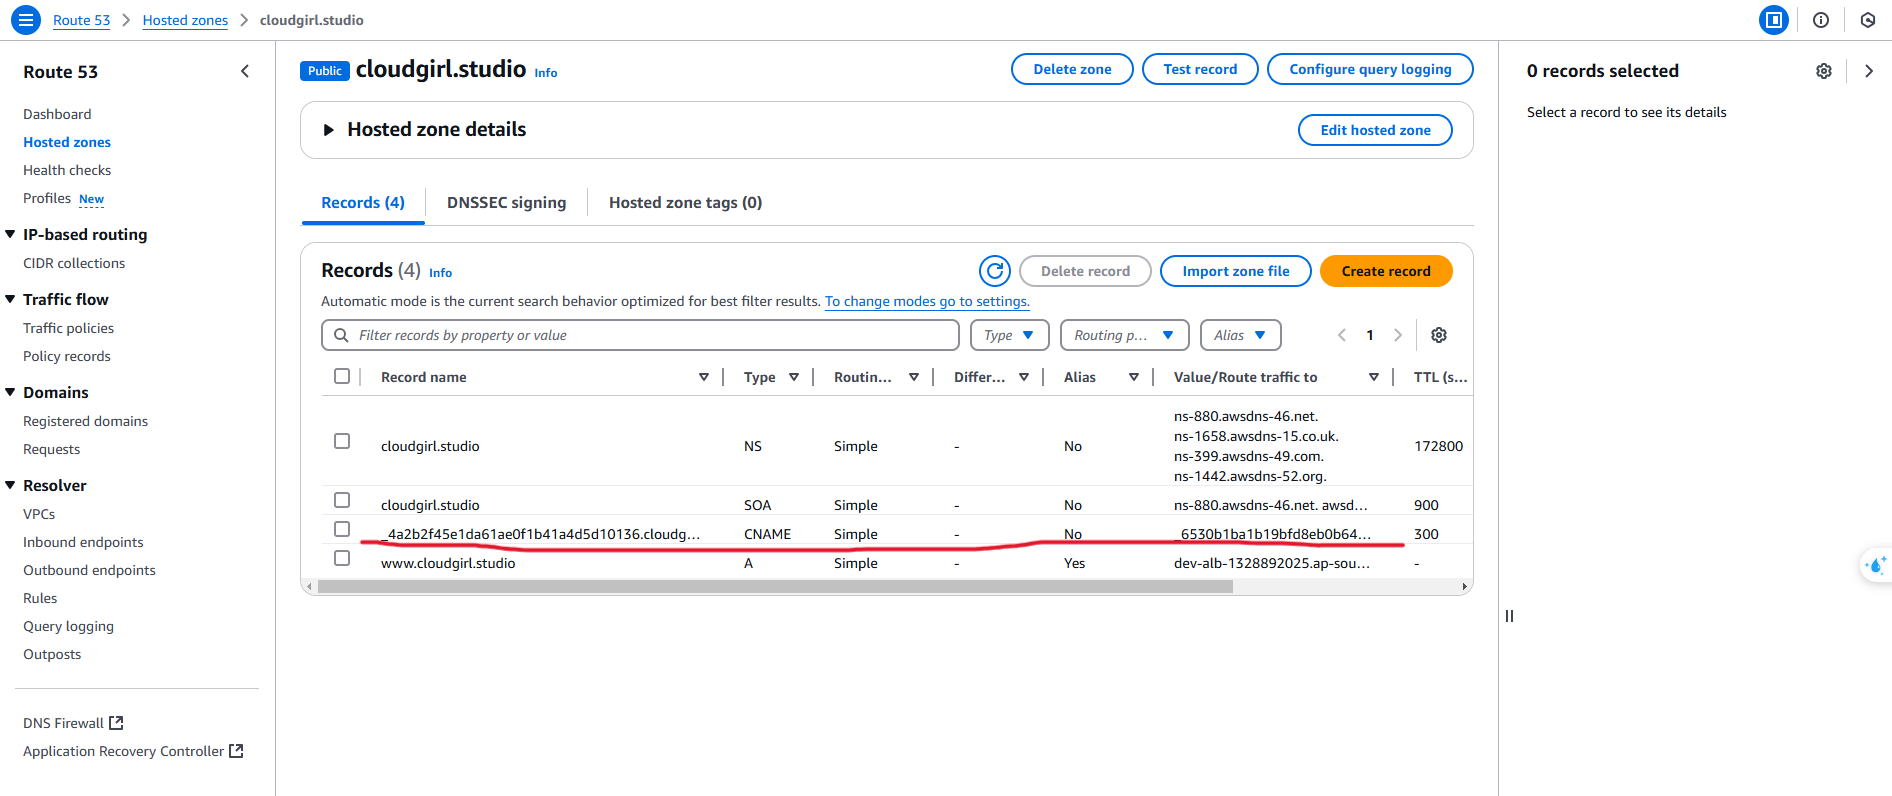
AWS will generate a CNAME record for domain validation
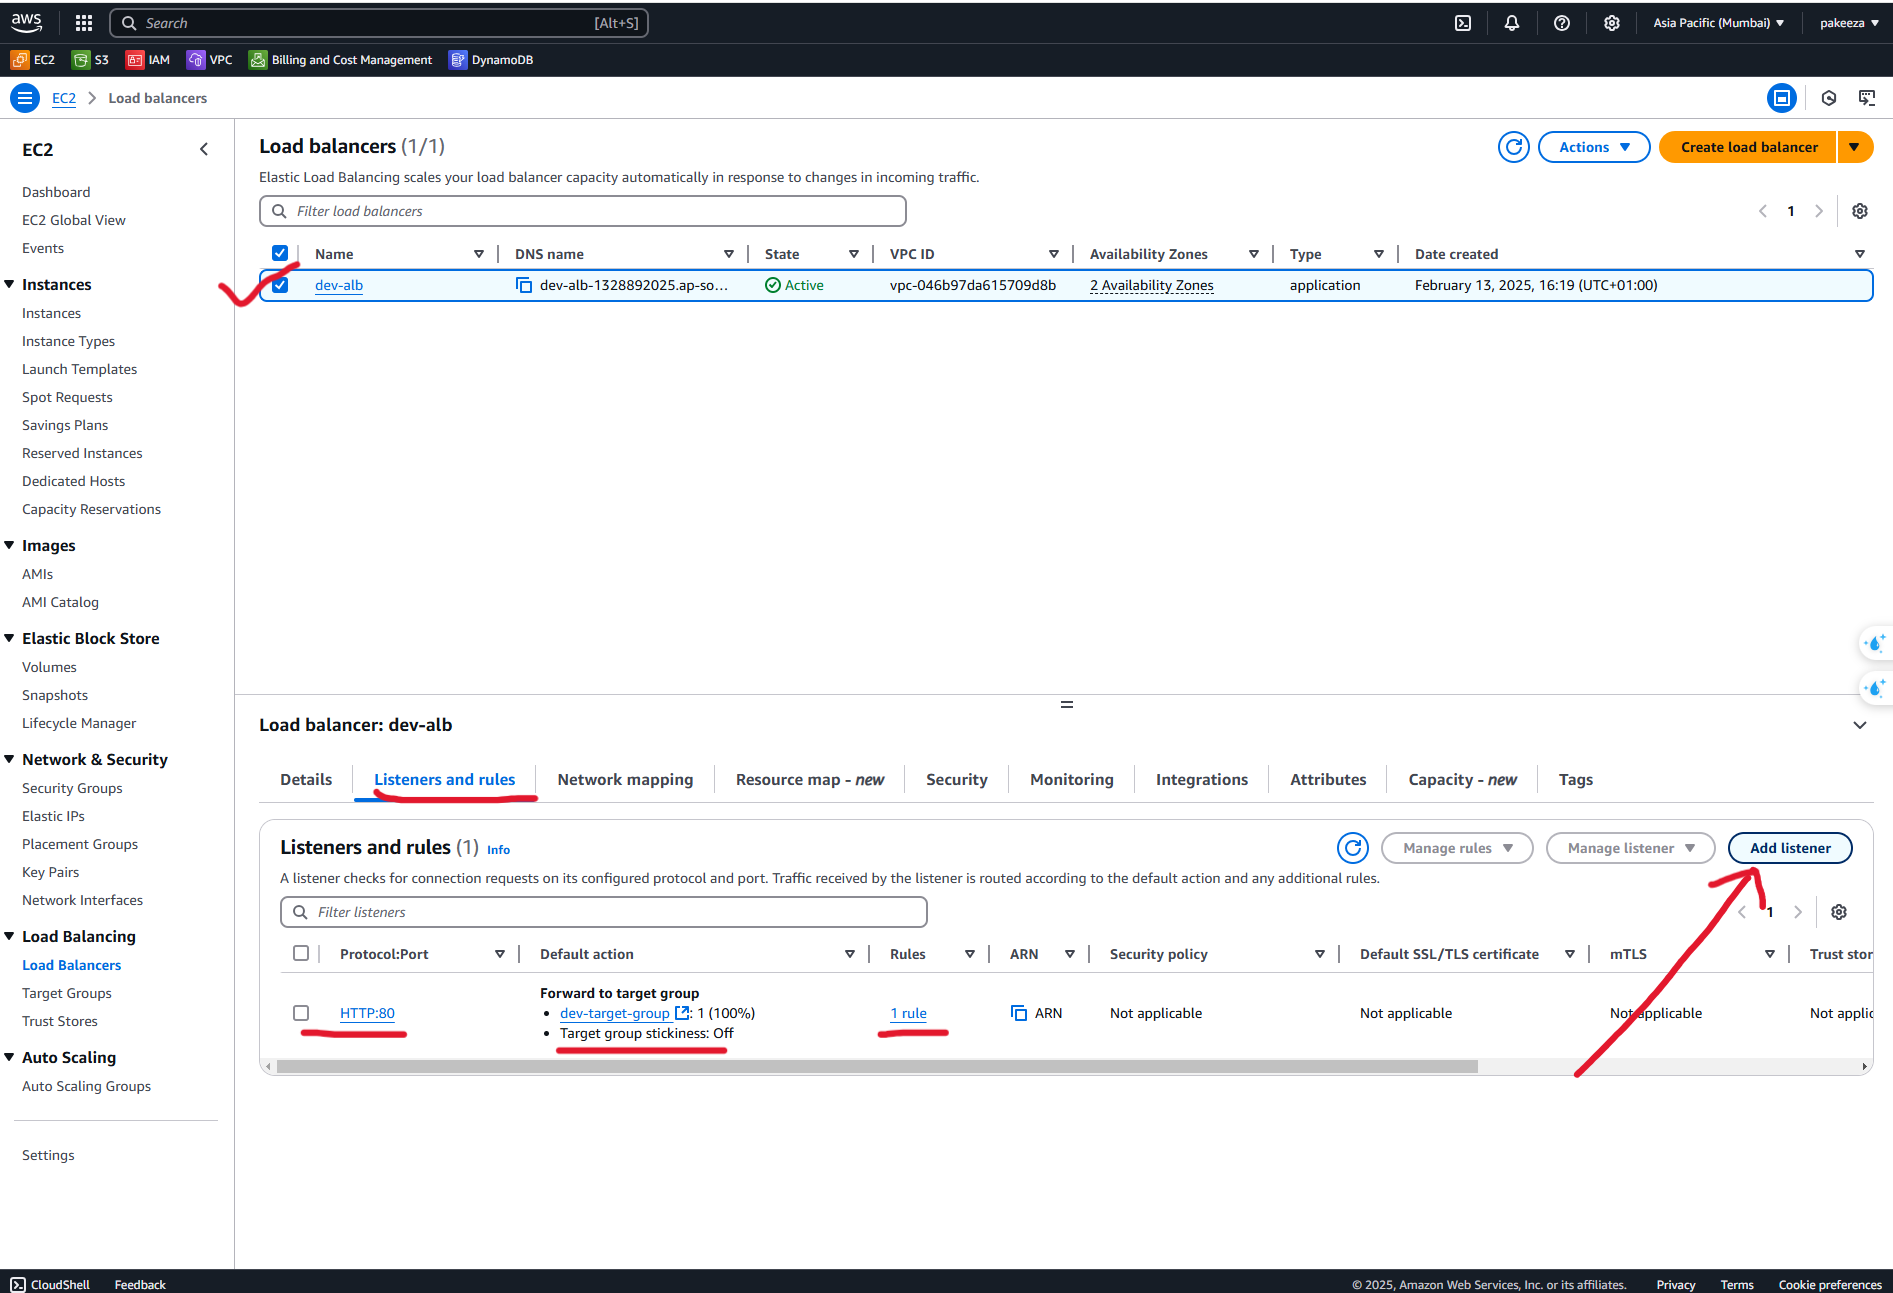
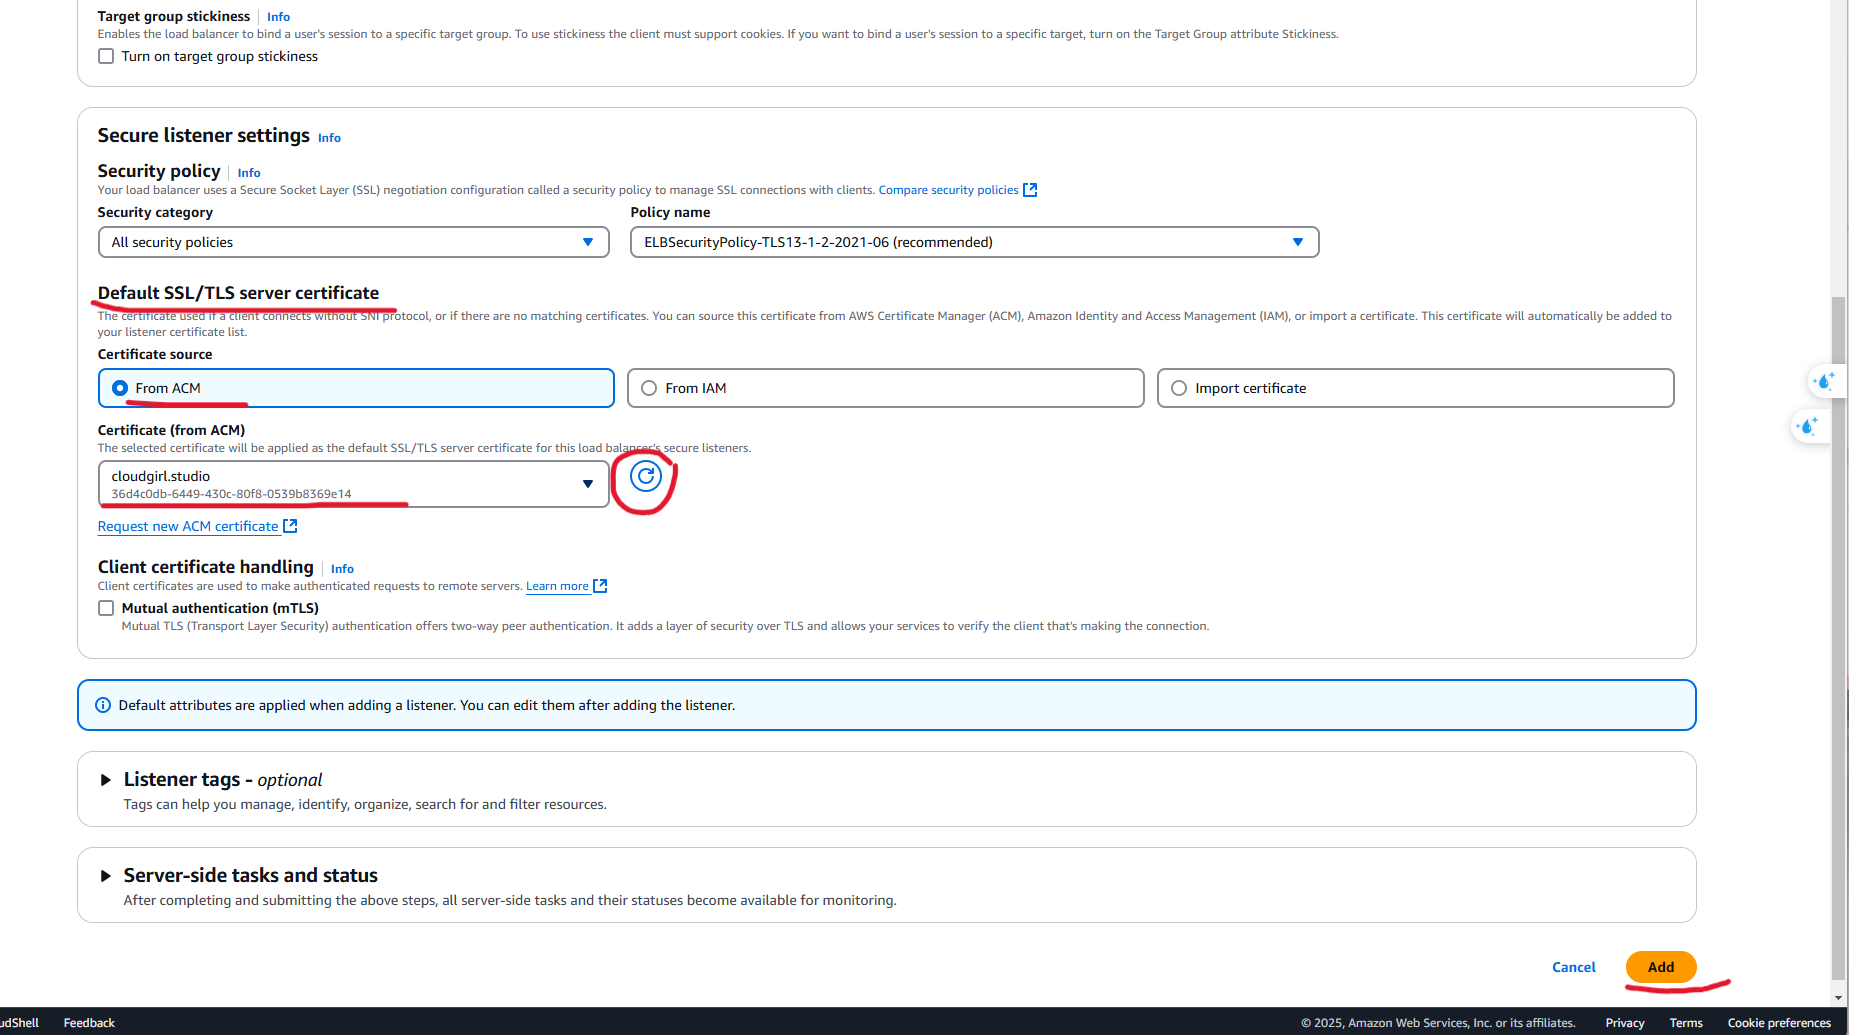
Step 8: Attach the SSL Certificate to the ALB
Select your ALB → Go to the Listeners tab.
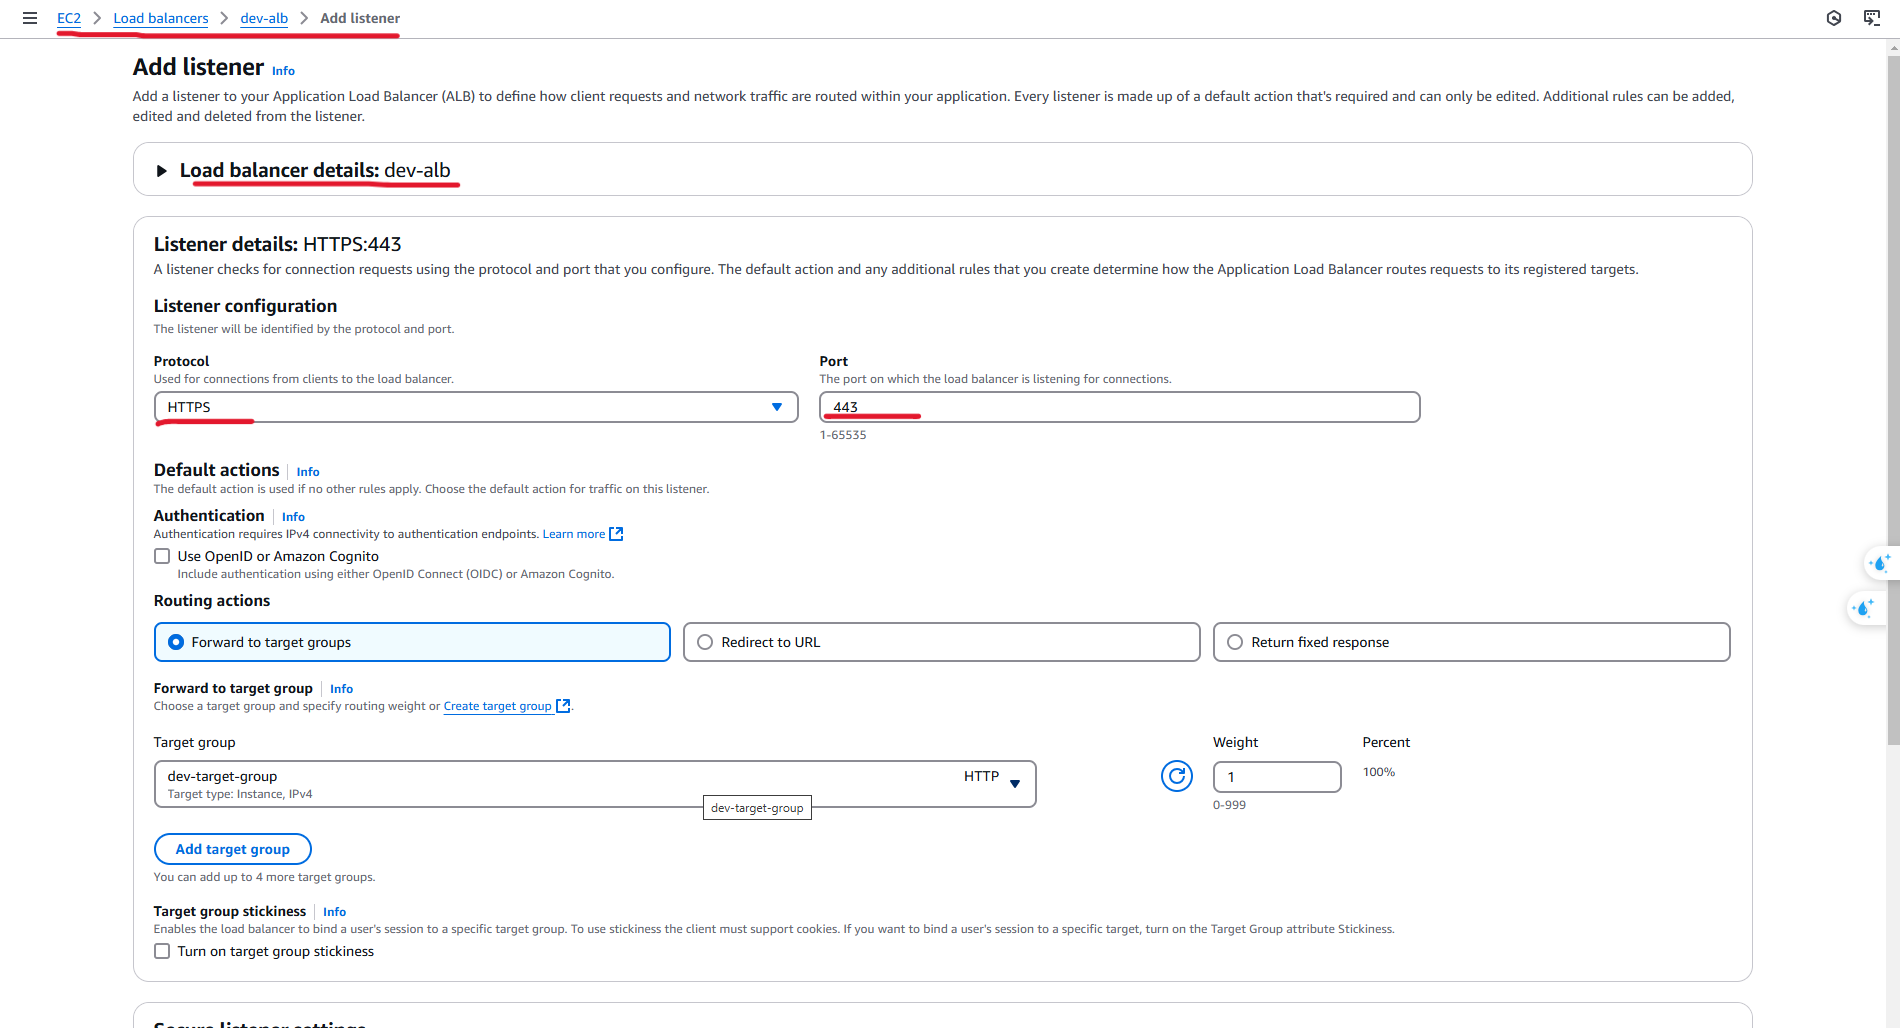
Click Edit Listener → Select HTTPS (443).
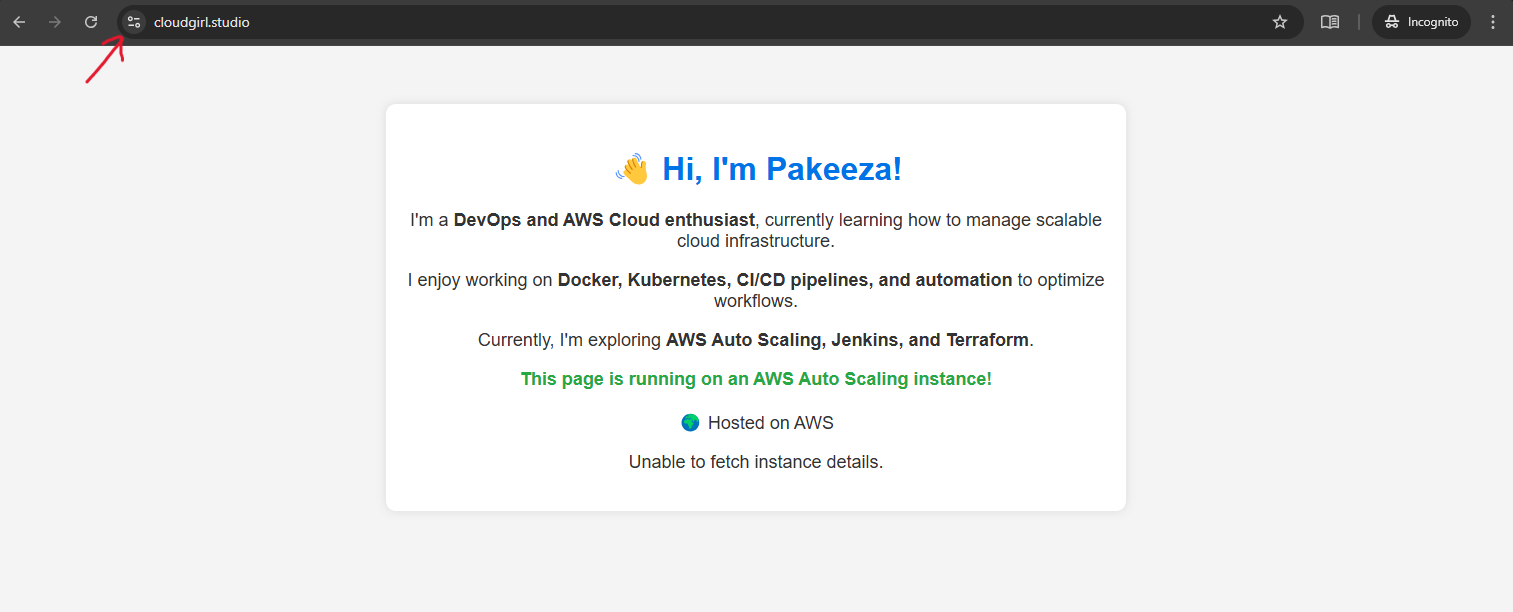
Step 9: Final Verification
Once everything is set up:
Open your browser and visit:
https://www.cloudgirl.studio